The Aging by Account Report
The Aging by Account report allows you to review revenue, current payments owed, and overdue payment by Account or Account Class.
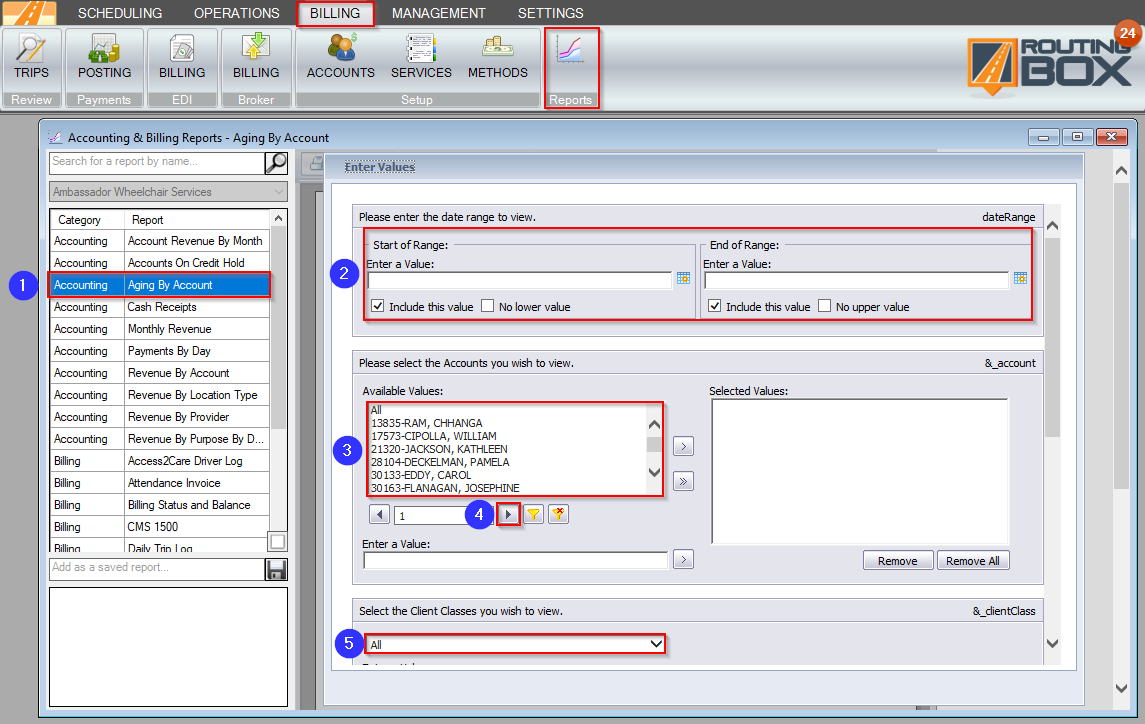
Navigate to the Billing tab, then select the Reports icon.

1. Double Click Aging by Account
2. Click the calendar icons to select the beginning and end date.
3. Double-click the Account(s) you would like to view.
4. If an account is not displayed in the box, click this drop-down to view more accounts.
5. Select the Client Class you would like to view.

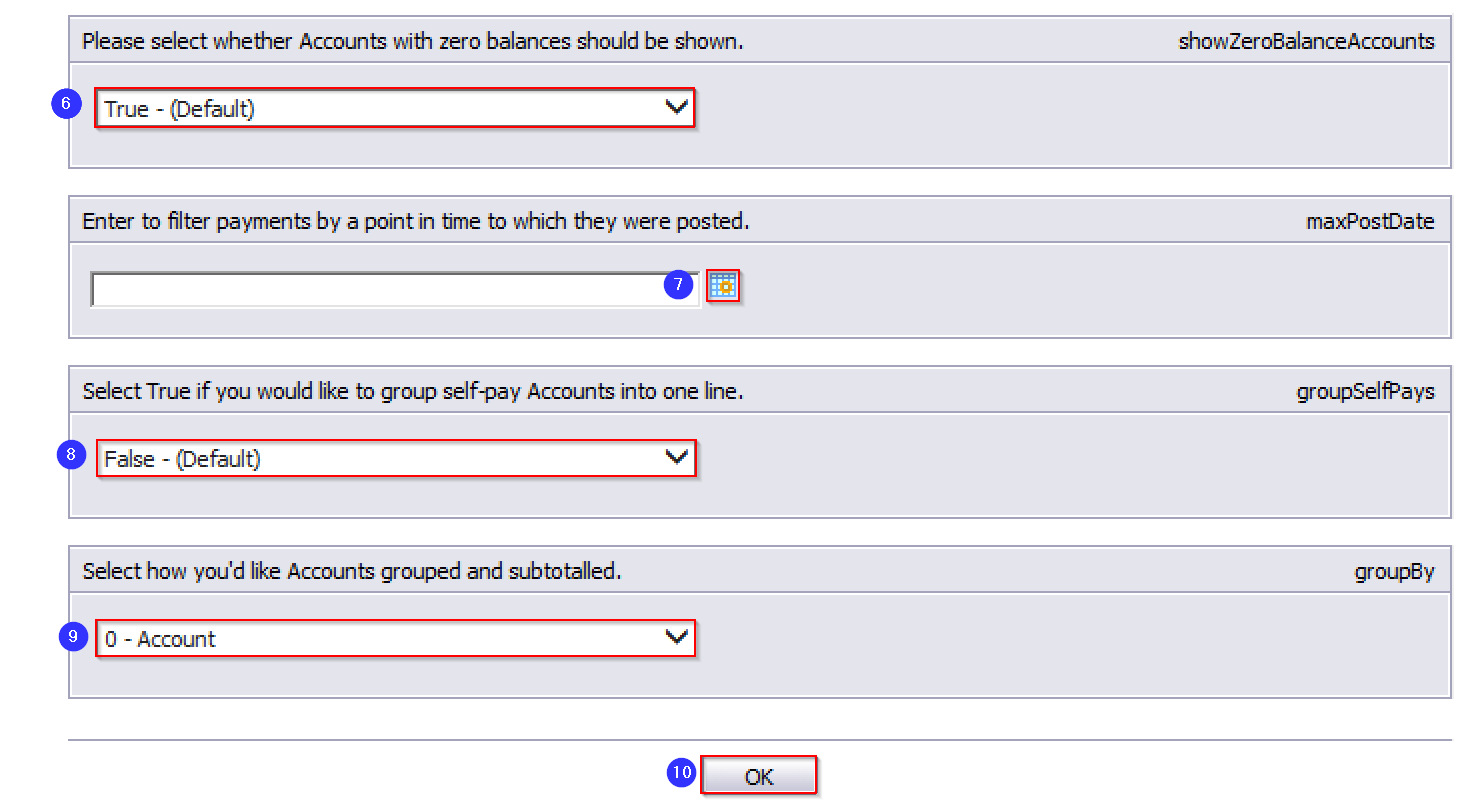
6. Select True if you would like to include accounts with a zero balances
7. This is an optional field that can be left blank, or you can select a date from the calendar if you only want to view payments posted on or after a specific date. This could alter the Paid, Balance, and Current amounts.
8. Select False if you would like each self pay account displayed as a separate line.
9. Choose how you would like the accounts grouped and subtotaled.
10. Click OK to generate the report.

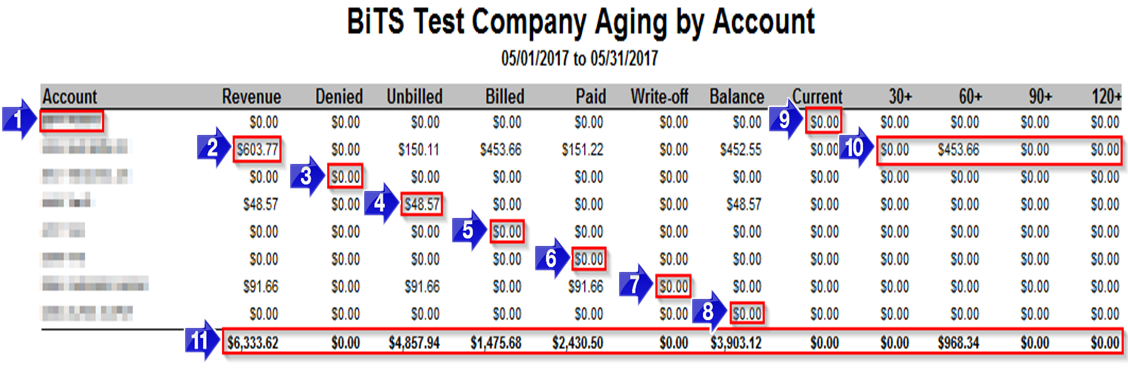
1. The Account ID and name. For an alternate format, please see step 12.
2. Total Revenue is calculated by adding Unbilled and Billed.
3. Any revenue changed to the Denied billing Status.
4. Existing Revenue that is Unbilled.
5. Total Billed Revenue.
6. The total amount Paid
7. Revenue that has been changed to the Write-off billing status.
8. The remaining Balance is calculated by subtracting Paid and Write-Off from Revenue.
9. Revenue that is owed but not overdue, is displayed in the Current column.
10. Past due Revenue 30+, 60+, 90+ and 120+ are the amount of days overdue.
11. A total of each column.

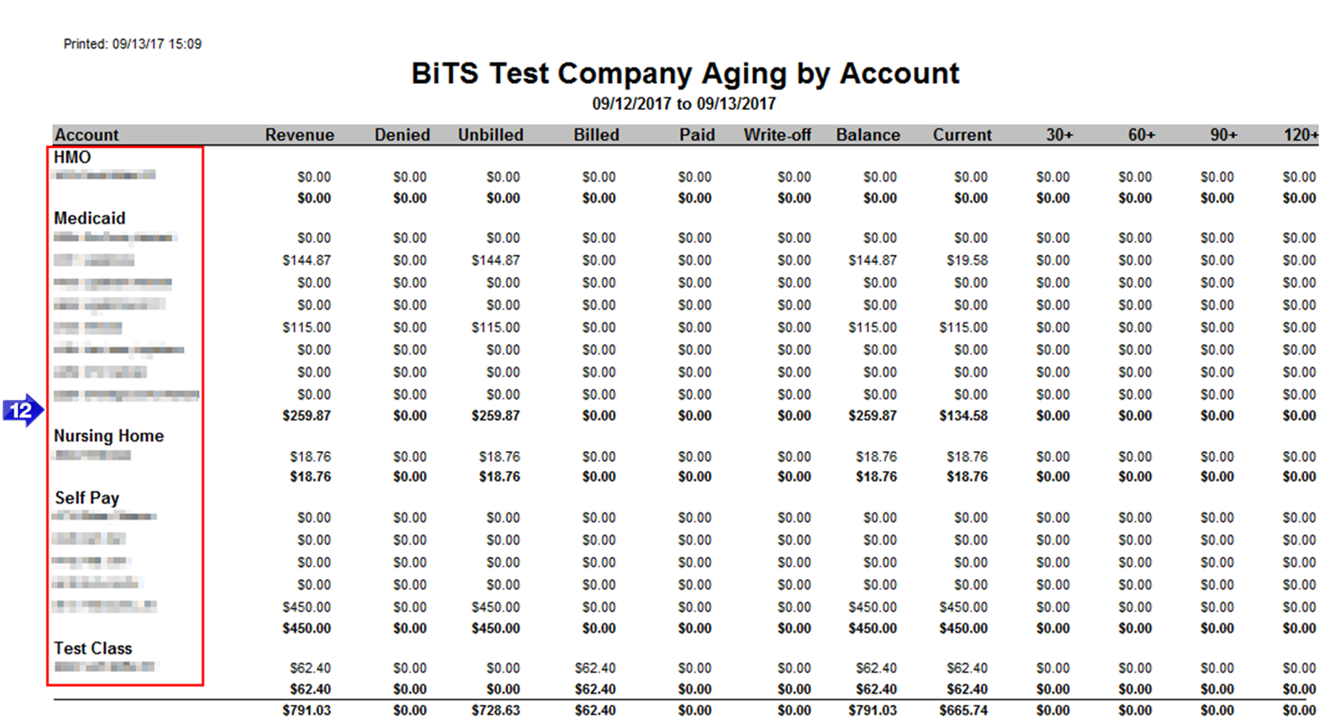
12. This is an alternate format. If you choose to group and subtotal accounts, the report will be separated by account class or provider.
Related Articles:
How to Change the Billing Status of a Trip
How to Load an Electronic Remittance
How to Search for an Invoice Number
Key Terms:
Account, Balance, Billed, Billing, Billing Status, Client Class, Denied, Paid, Report, Revenue, Write-Off, ReportingFormHelp
![New Founders Software-White.png]](https://help.intelligentbits.com/hs-fs/hubfs/New%20Founders%20Software-White.png?height=50&name=New%20Founders%20Software-White.png)