The Attendance Invoice Report
The Attendance Invoice allows you to create an invoice that provides an overview of the clients transported during a date range, the days that they were transported, and the total owed.
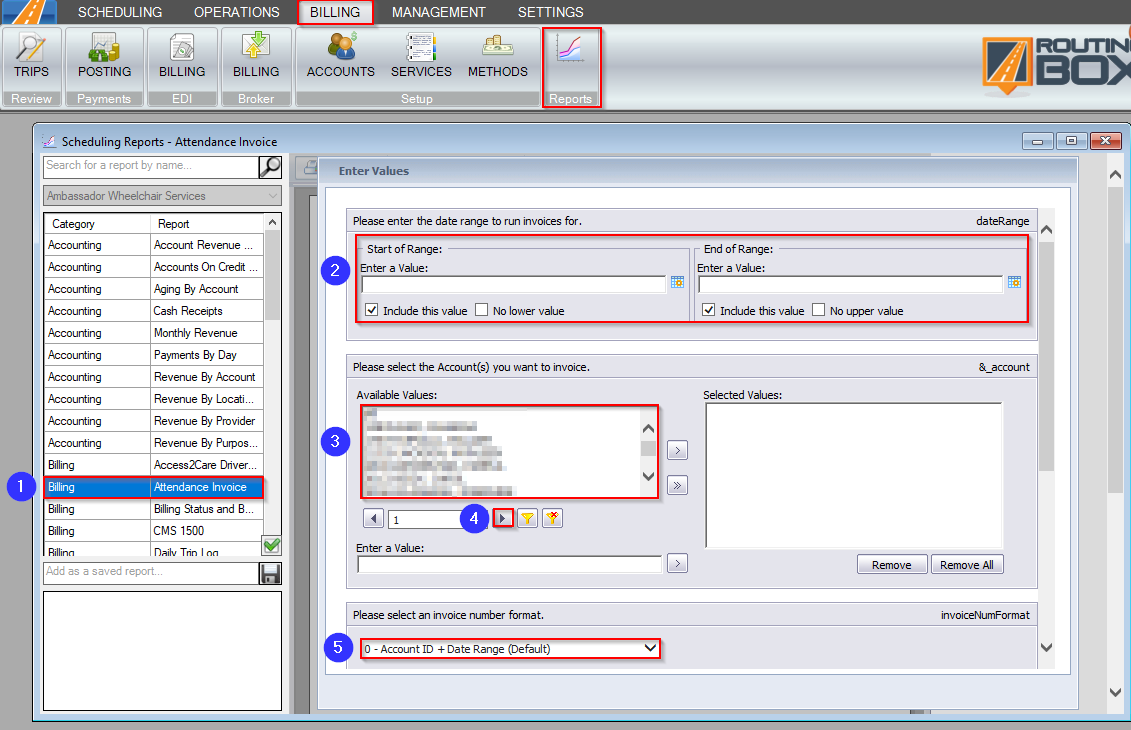
Navigate to the Billing tab, then select the Reports icon.

1. Double-click Attendance Invoice.
2. Select a start and end date for the range you would like to view.
3. Double-click on the Account(s) you would like to view.
4. Click the drop-down to view more options if the account isn’t visible in the grid.
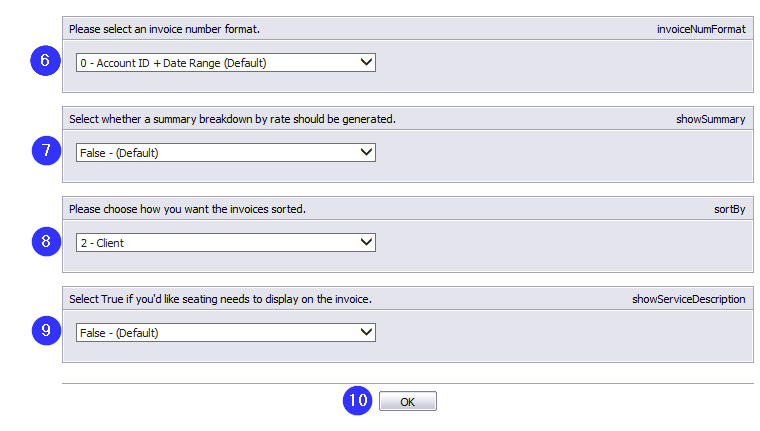
5. Select an invoice number format.

6. Select True if you would like a breakdown at the end of the report of how many times each rate was applied within the date range.
7. Select whether a summary breakdown by rate should be generated.
8. Choose how the invoices will be sorted.
9. Select True if you would like seating needs displayed.
10. Click OK to generate the report.

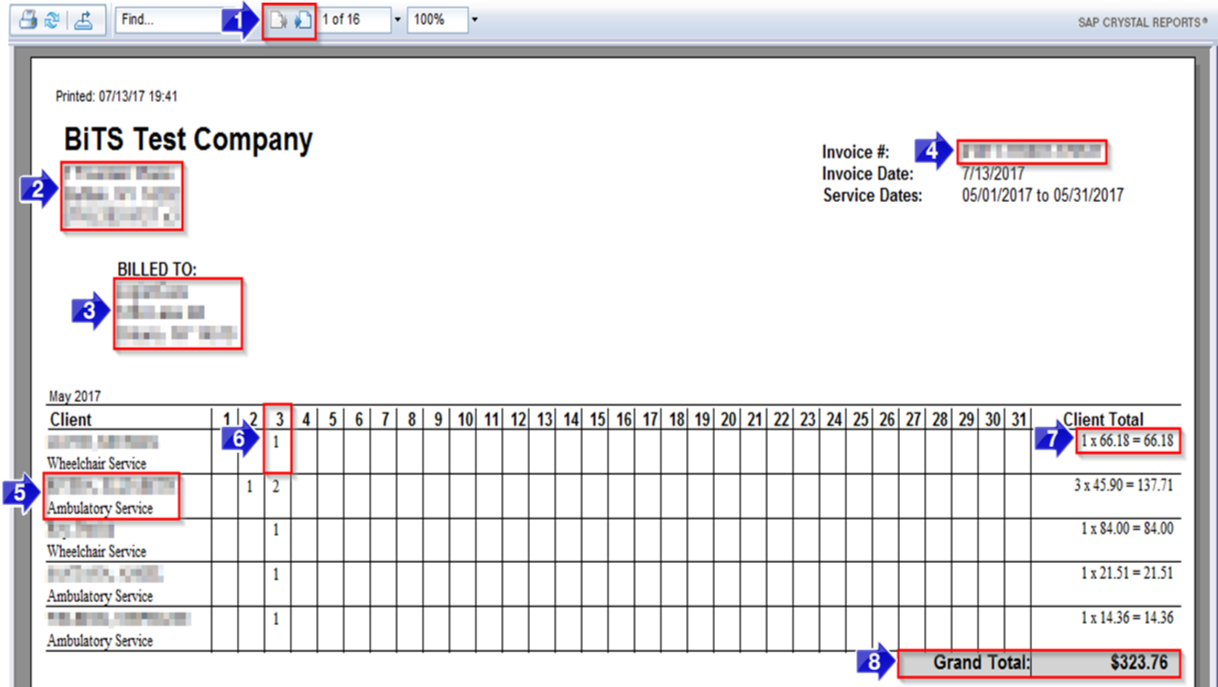
1. Use these buttons to toggle between pages.
2. Your company’s primary address and phone number will be displayed here.
3. The Account name and address that the invoice was created for will be displayed here.
4. The Invoice # is generated based on the invoice number format that was selected. The Invoice # can be used to review the trips on an invoice and to reprint an invoice.
5. Each Client name and their seating need (if selected from filters) will be displayed on its own line.
6. The number of legs that occurred on that date for that client. If the number has a strike-through, the leg(s) on this date were cancelled.
7. The Client Total shows the total price for the selected date range by multiplying the number of completed legs by the total rate per leg.
8. Total charges for this account for the selected date range are displayed as the Grand Total.
Video Link:
Related Articles:
How to Override Trip Codes and Prices
How to Search for a Trip
How to Search for an Invoice Number
How to Use the Trip Viewer Quick Search
Invoices
Key Terms:
Account, Attendance, Billing, Client, DOS, Invoice, Need, Report, Seating Need, ReportingFormHelp
![New Founders Software-White.png]](https://help.intelligentbits.com/hs-fs/hubfs/New%20Founders%20Software-White.png?height=50&name=New%20Founders%20Software-White.png)