![New Founders Software-White.png]](https://help.intelligentbits.com/hs-fs/hubfs/New%20Founders%20Software-White.png?height=50&name=New%20Founders%20Software-White.png)
Navigate to the Scheduling tab, then select the Reports icon.
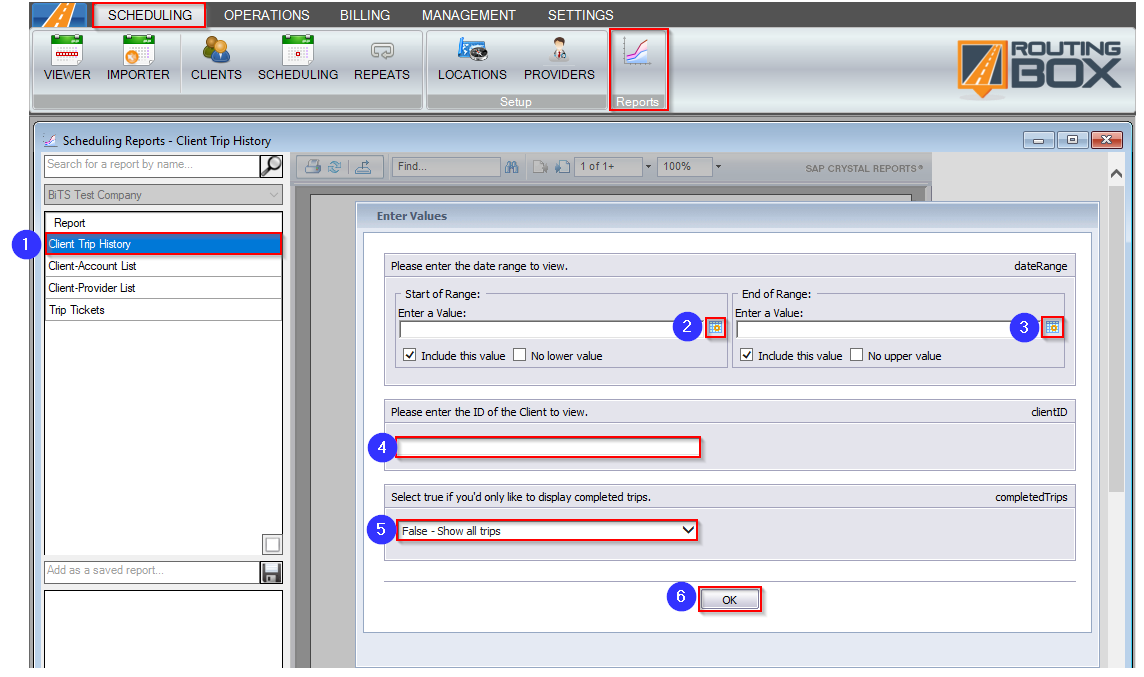
1. Double-click Client Trip History.
2. Click the calendar icon to select the beginning date for the range you would like to view.
3. Click the calendar icon to select the end date for the range you would like to view.
4. Enter the client’s ID #. This information can be retrieved from the Client Profile next to the client's name.
5. Select True if you would only like to view completed trips. Select False if you would like to view all trips for the selected client in that date range.
6. Click OK to generate the report.
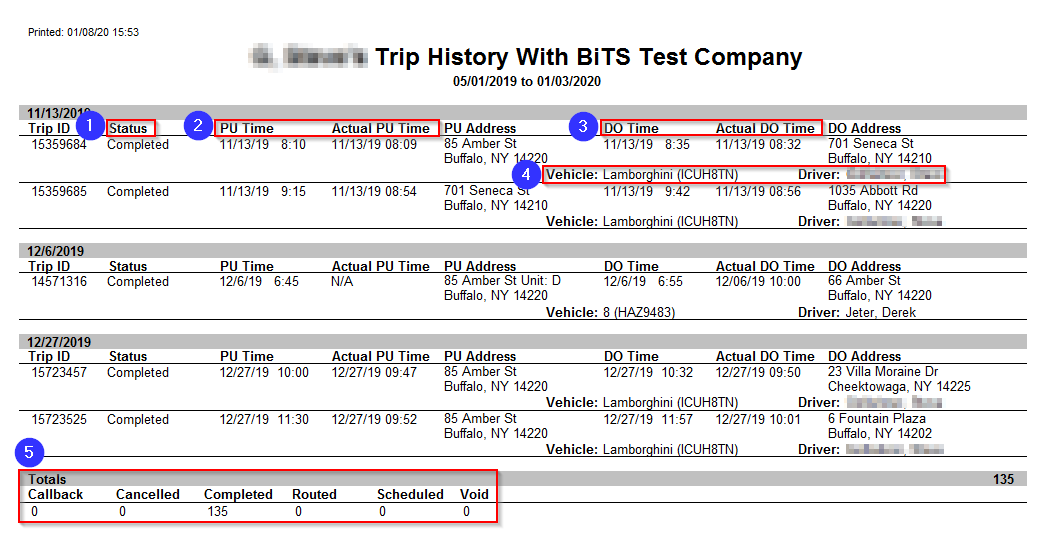
1. This column shows the current trip status.
2. The PU Time column shows the time that the client was scheduled to be picked up. If the PU Time column shows 0:00 as the time, the trip is a Will Call. The Actual PU Time shows the timestamp from a driver using RB Mobile to change their status to Arrived at Pickup. If the Actual PU Time column shows N/A, the driver did not update their status for that trip.
Note: If you're interested in using RB Mobile for status updates, please contact BiTS Support by phone, e-mail or chat.
3. The DO Time column shows the time that the client was scheduled to be dropped off. If the DO Time column shows 0:00 as the time, the trip is a Will Call. The Actual DO Time shows the timestamp from a driver using RB Mobile to update their status to Arrived at Dropoff. If the Actual DO Time column shows N/A, the driver did not update their status to Arrived at Dropoff.
4. The vehicle number and driver name will display on Routed and Completed trips.
5. The Totals grid tallies the number of trips with each status currently on the report.
Related Articles:
How to Dispatch a Trip
How to Search for a Trip
How to Use the Trip Viewer Quick Search
Key Terms:
Client, Driver, Report, Status, Trip, Vehicle, ReportingFormHelp