![New Founders Software-White.png]](https://help.intelligentbits.com/hs-fs/hubfs/New%20Founders%20Software-White.png?height=50&name=New%20Founders%20Software-White.png)
Navigate to the Billing tab, then select the Reports icon.
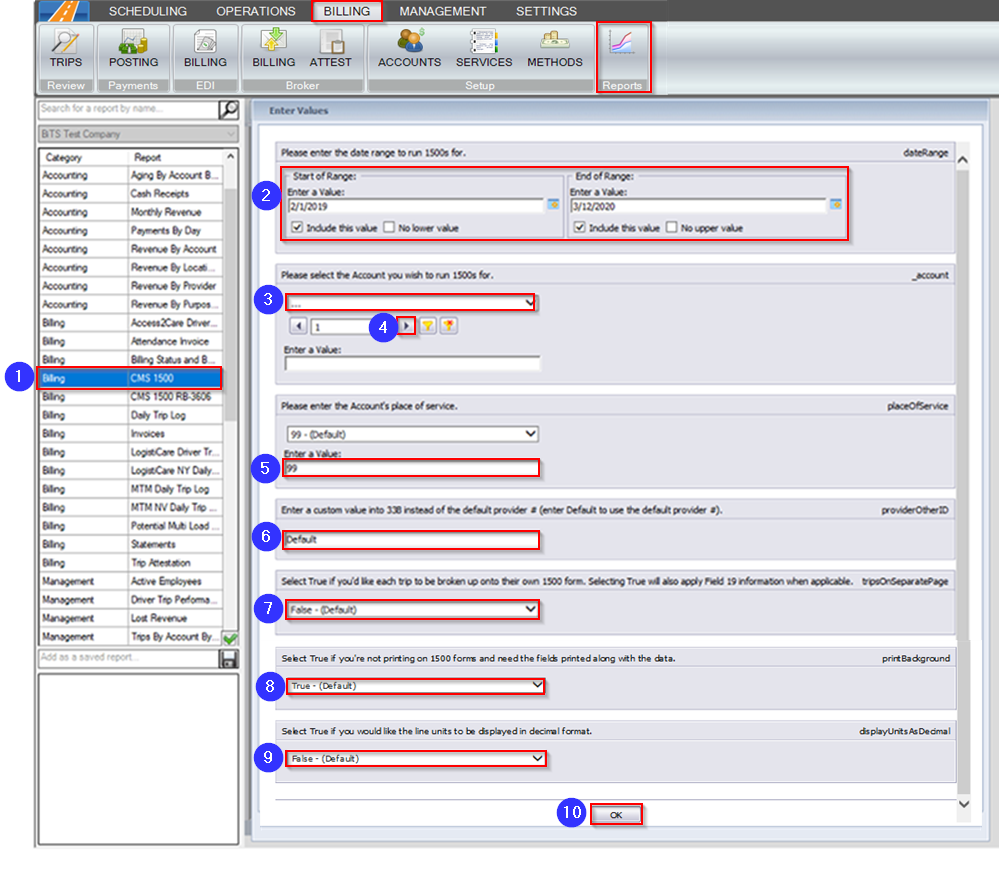
1. Double-click CMS 1500 from the list.
2. Click the calendar icon to select the date range you would like to view.
3. Select the account you would like to create a CMS 1500 for.
4. If your account isn’t visible, use this drop-down to view more options.
5. Select the Place of Service to be entered into section 24B on the CMS 1500. If there is a different Place of Service other than the options from the drop-down, it can be entered into the Enter a Value box.
6. In this field, you may enter a provider #, other than the default. It will populate in section 33B on the report.
7. Select True if you would like each trip to have their own CMS 1500 form. Select False if you would like multiple trips on each CMS 1500 form.
8. Select True if you’re printing your CMS 1500 forms on regular paper. Select False if you’re printing the fields onto CMS 1500 forms.
9. Select True if you would like the line units to be displayed in decimal format.
10. Click OK to generate the report.
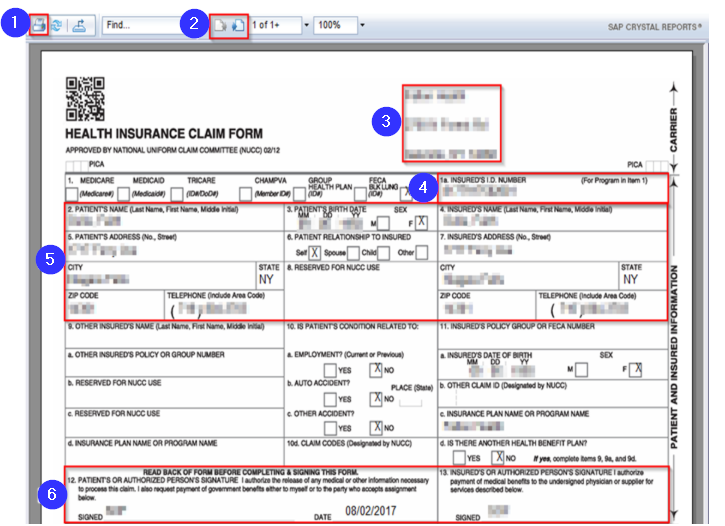 1. Click this button to print the CMS 1500.
2. Use these buttons to toggle between report pages.
3. The account name and primary address are displayed at the top of the CMS 1500."You got
4. The member # populates in section 1A.
5. Information from the Client Profile populates in this section. This includes patient name, insured’s name (if applicable), date of birth, address and telephone number.
6. This section of the CMS 1500 populates with SOF to indicate that the client’s signature is on file.
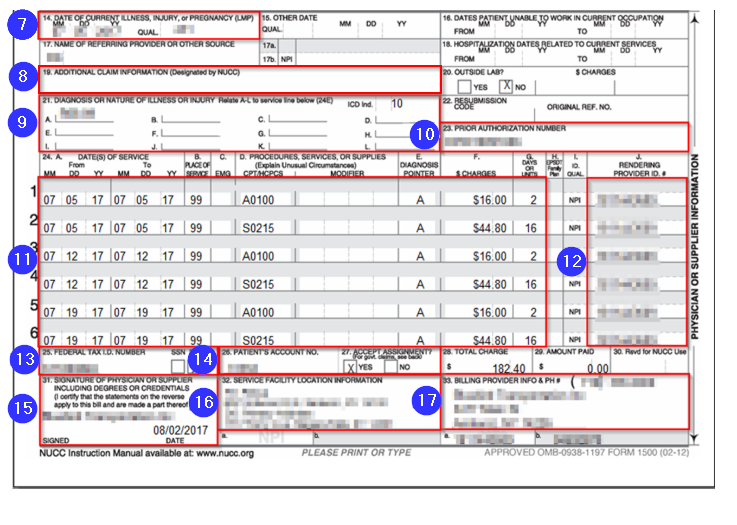
7. The date of service populates in section 14.
8. Box 19 can be populated by creating a custom field and updating the CMS_1500_ADDITIONAL_INFORMATION_FIELD system setting.
9. The diagnosis codes listed in the Client Profile populate in section 21. If there are multiple diagnosis codes saved on the profile, they will all be displayed.
10. The Approval # on the trip populates in section 23 as the Prior Authorization Number.
11. Information pertaining to service codes populate in section 24 of the CMS 1500. This includes date of service, service codes, rates and quantities.
12. The NPI from the Company Profile populates in section 24J.
13. The FEIN from the Company Profile populates in section 25.
14. The client ID from RoutingBox populates in section 26 as the Patient’s Account No.
15. Your company name populates in section 31 as an electronic signature with the date you created the CMS 1500.
16. The PU and DO location populates in section 32.
17. Your company name, the primary address from your Company Profile and your company telephone number populates in section 33.
Video Link: