![New Founders Software-White.png]](https://help.intelligentbits.com/hs-fs/hubfs/New%20Founders%20Software-White.png?height=50&name=New%20Founders%20Software-White.png)
Navigate to the Operations tab, then select the Reports icon.
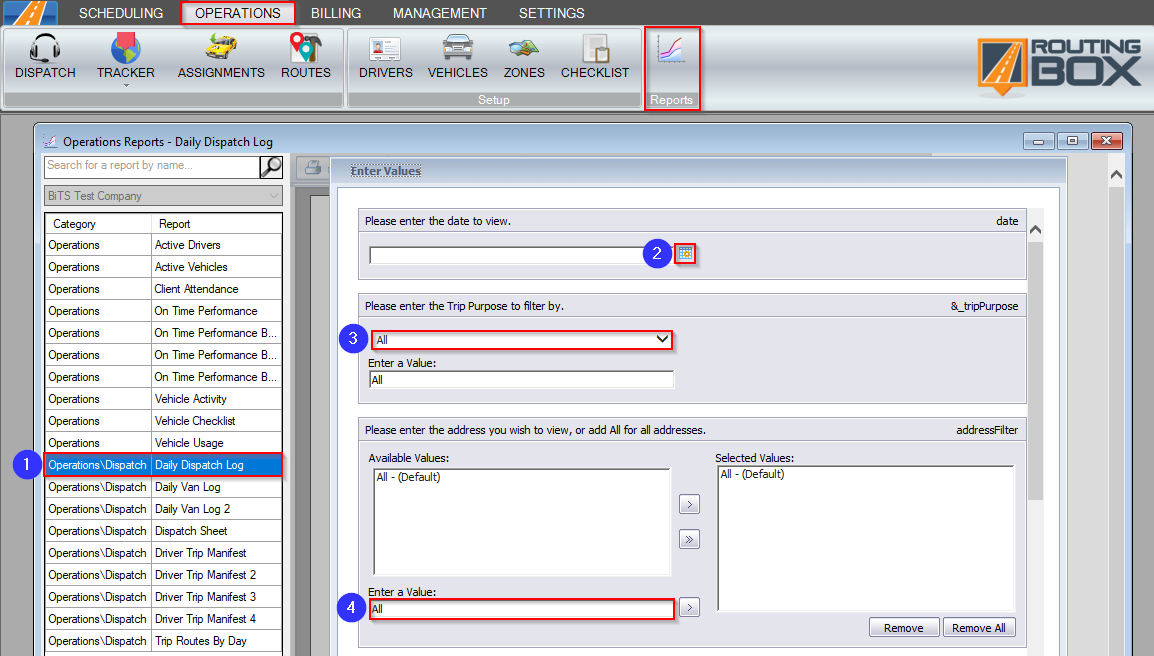
1. Double-click Daily Dispatch Log.
2. Click the calendar icon to select the date you would like to view.
3. If you would like to view a specific purpose, select it from the drop-down menu.
4. If you would like to view a specific address, remove the all option from the selected values, type the address in the Enter a Value bar, and click the arrow to add it to Selected Values.
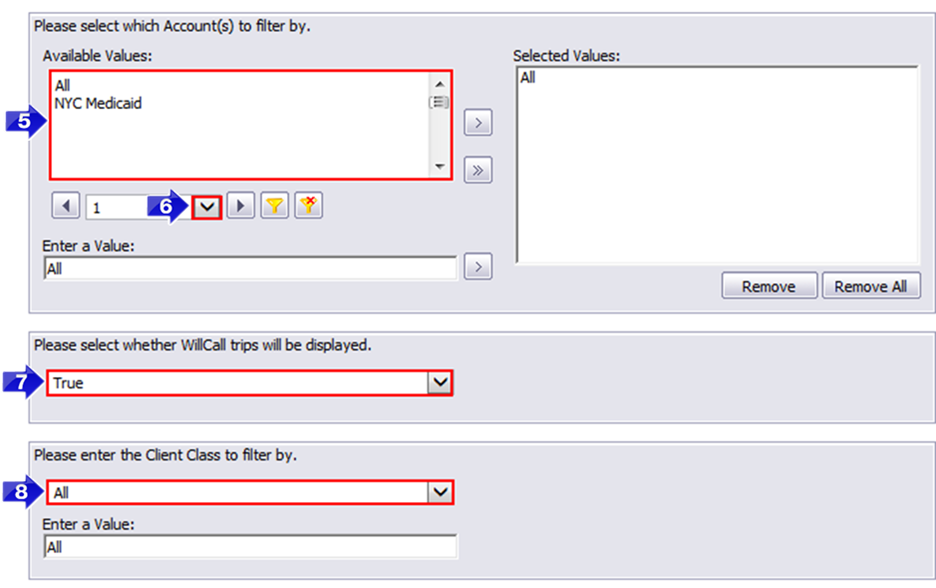
5. Double click the Account(s) you would like to view.
6. If the account is not visible in the grid, click this arrow to view more options.
7. Select True if you would like WillCall trips to be displayed.
8. Select the Client Class you would like to view.
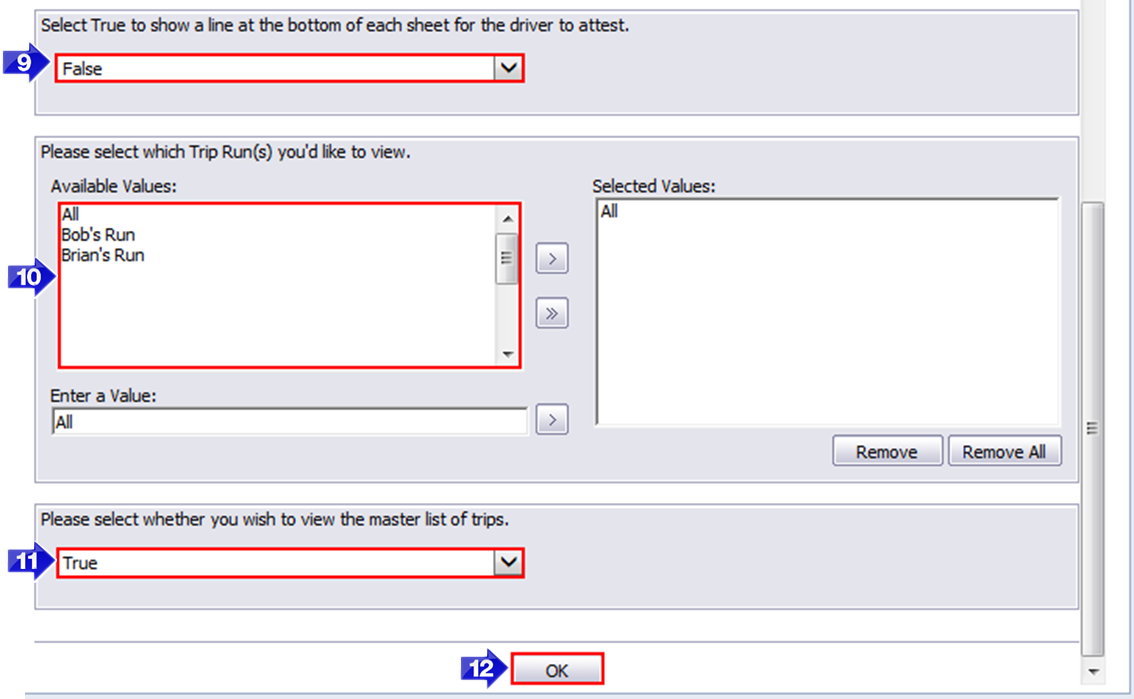
9. Select True if you would like to include a space for the driver to attest.
10. Double-click the trip route(s) you would like to view.
11. Select True to view all trips sorted by PU time. Select False to view trips sorted by assignment. Unassigned trips will display first.
12. Click OK to generate the report.
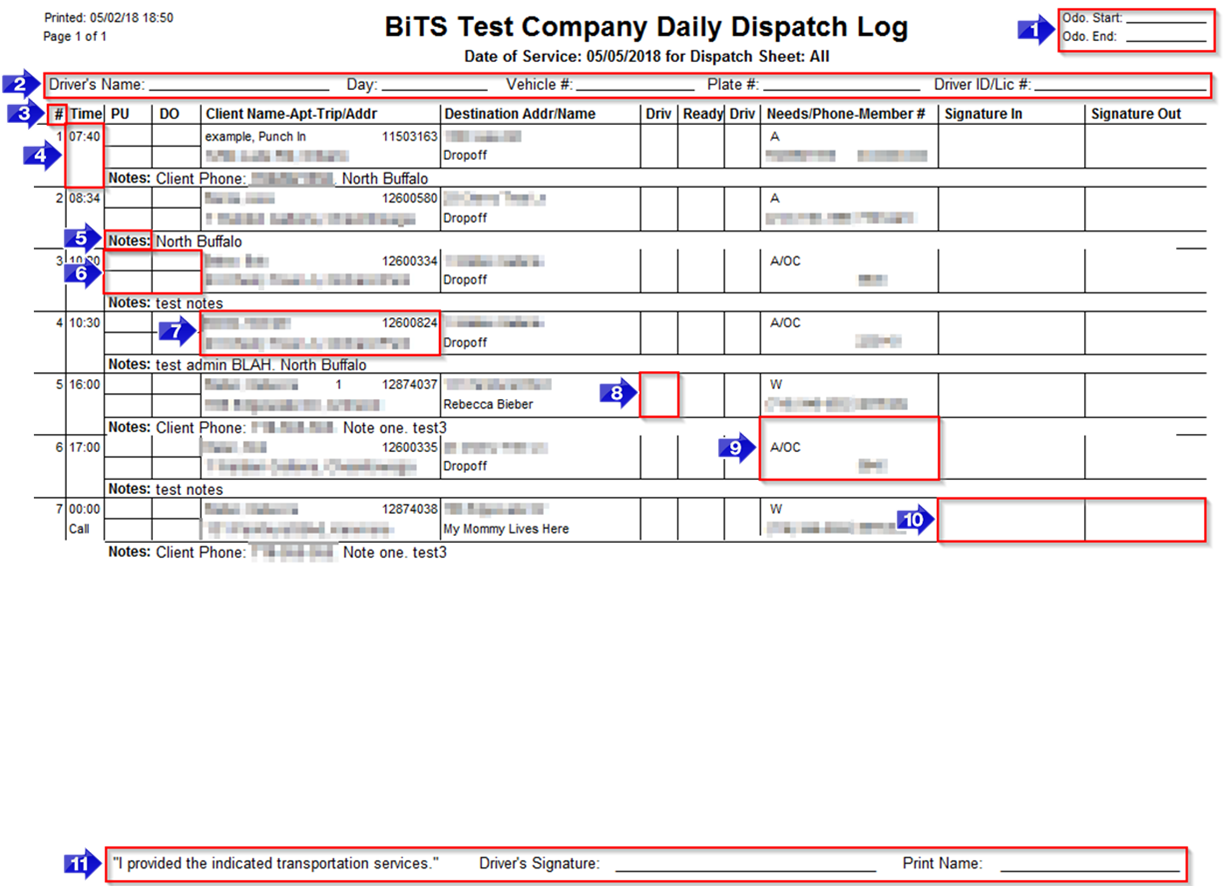
1. The Start and End Odometer fields can be written in by the driver at the beginning and end of their shift.
2. If the report is sorted by assignment and a driver is selected, this information will populate. If there are no assignments for the day or the master list is selected, these fields will be blank.
3. The # column shows the number of trips sorted by scheduled pickup time.
4. The Time column shows the scheduled pickup time for a trip. If a trip is a WillCall, this column will say Call.
5. The Notes fields displays notes from the Client Profile and Trip Scheduling screen that have been made visible to drivers or dispatchers.
6. The PU and DO fields can be written in by the driver with their actual PU and DO time information.
7. The client Name-Apt-Trip/Addr column displays the client name, pickup address and trip ID for the first leg of the trip.
8. The Driv column shows the RoutingBox ID of the driver assigned to that trip.
9. The Needs/Phone/Member # field contains client information for the driver to view.
10. The Signature fields are available for clients to sign at the start and end of their trip.
11. The driver can sign the report here to attest to their trips.
Related Articles:
How to Assign Drivers to Routes
Key Terms:
Account, Address, Attestation, Client Class, Dispatch, Driver, Purpose, Report, Route, WillCall, ReportingFormHelp