![New Founders Software-White.png]](https://help.intelligentbits.com/hs-fs/hubfs/New%20Founders%20Software-White.png?height=50&name=New%20Founders%20Software-White.png)
Navigate to the Operations tab, then select the Reports icon.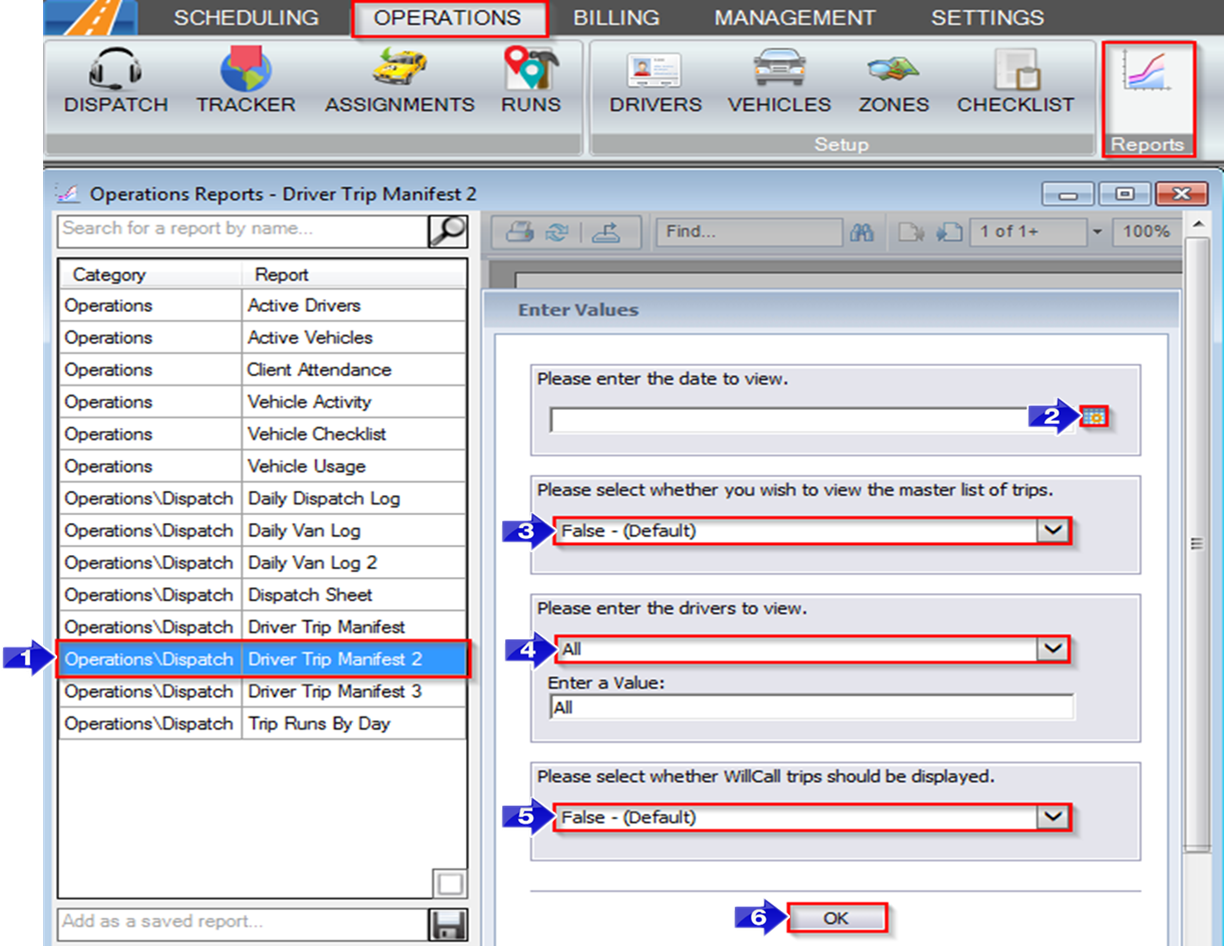
- Double-click Driver Trip Manifest 2.
- Click the calendar and select the date you would like to view.
- Select if you would like to view a master list of trips or view trips separated by assigned driver and vehicle.
- Choose the driver you would like to view from the drop-down menu. By default, All drivers are selected.
- Select if you would like WillCall trips to be displayed. By default, False is selected and WillCall trips are not displayed.
- Click OK to generate the report.
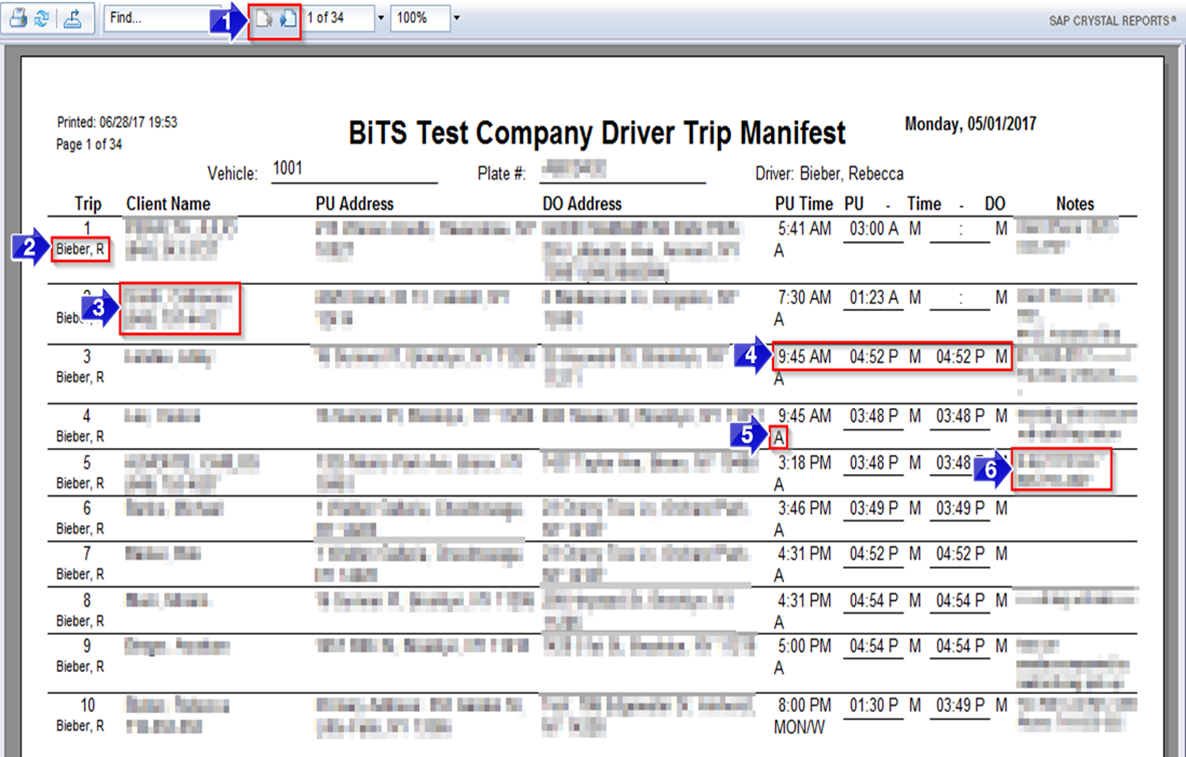
- Use these buttons to toggle between report pages.
- The driver assigned to the Trip is displayed under the trip number.
- Client Name and telephone number are displayed in this column.
- The scheduled PU Time, actual PU Time and actual DO time are displayed in these columns (Actual PU and DO Times are applied by drivers updating their status via RoutingBox Mobile.)
- The need codes are displayed here.
- Notes visible to the driver in the Client Profile and Trip Scheduling screen will be displayed in this column.
Related Articles:
How to Copy Assignments to Another Date
Key Terms:
Client, DO Address, DO Time, Driver, Need, Plate #, Plate Number, PU Address, PU Time, Report, Vehicle, Manifest, WillCall, ReportingFormHelp