![New Founders Software-White.png]](https://help.intelligentbits.com/hs-fs/hubfs/New%20Founders%20Software-White.png?height=50&name=New%20Founders%20Software-White.png)
Method 1 (Route Builder):
Navigate to the Operations tab, then select the Routes icon.
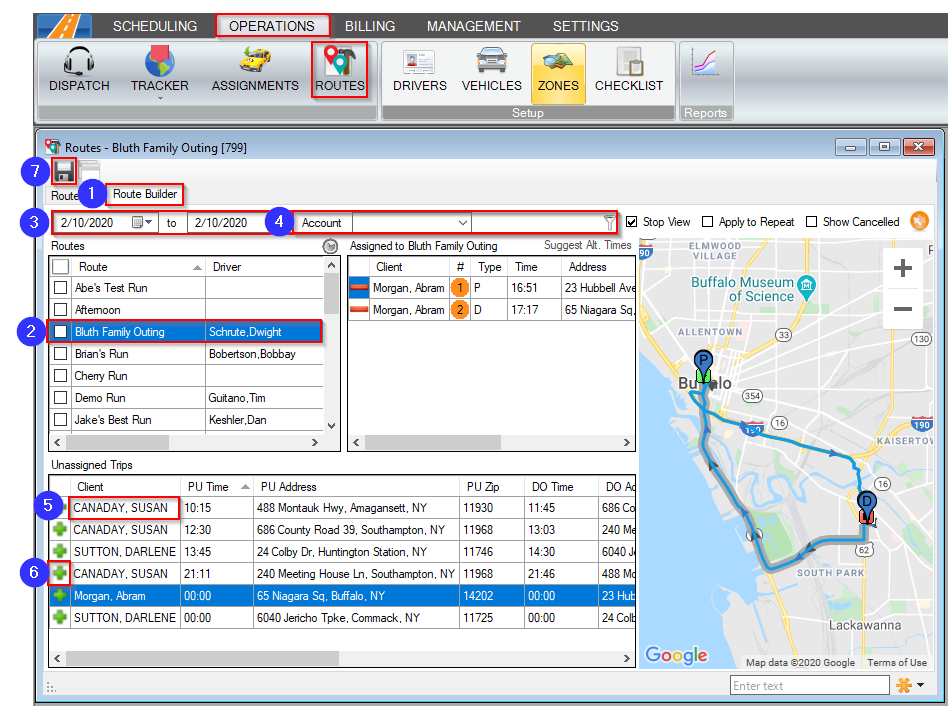
1. Go to the Route Builder tab.
2. Select the Route you’d like to add trips to.
3. Select the date range you would like to view.
4. Enter the Account You can also filter by Class, Mode, Purpose and Zone by selecting the Other Filters icon.
5. To see how a trip would impact the current route, click on a Client name, and view the altered route in blue on the map. The pickup and drop-off addresses are marked on the map with a P and D.
6. Click the green plus sign to add a trip to the selected route.
7. Use the floppy disc icon to save your changes.
Method 2 (Trip Scheduling):
Navigate to the Scheduling tab, then select the Scheduling icon.
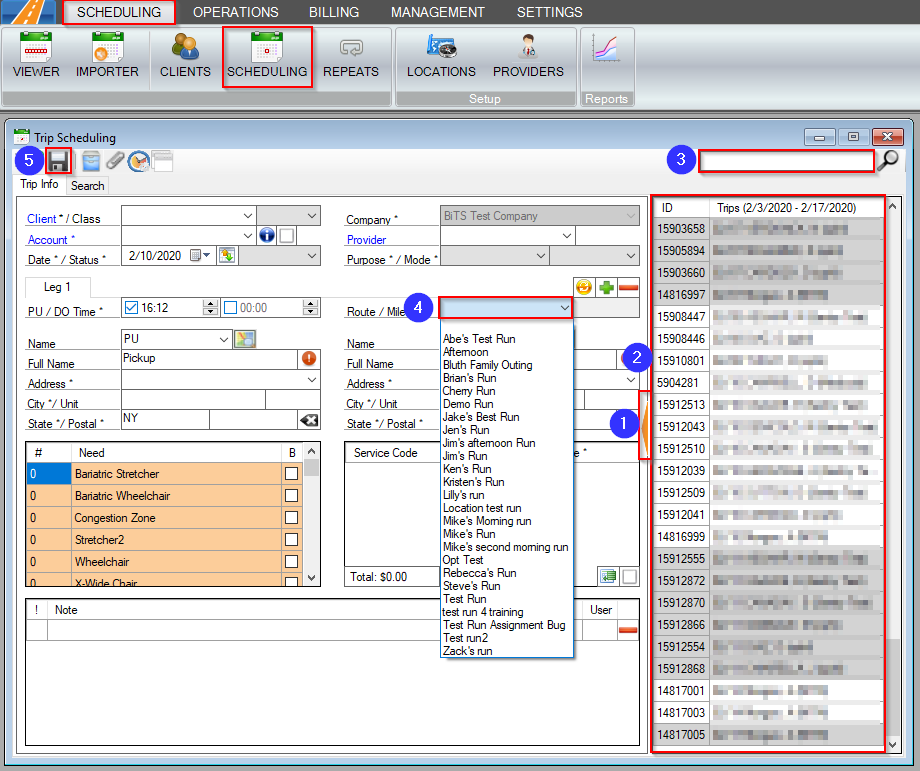
1. Click the orange arrow to expand the Trip Scheduling window.
2. Scroll through the list of trips and select the one you would like added to a Route.
3. You can also narrow down the trips displayed in step 2 by searching for the trip you would like added to a Route.
4. Click the Route drop-down. Select the Route you are applying to this trip.
5. Click the floppy disc icon to save your changes.
Method 3 (Dispatch):
Navigate to the Operations tab, then select the Dispatch icon.
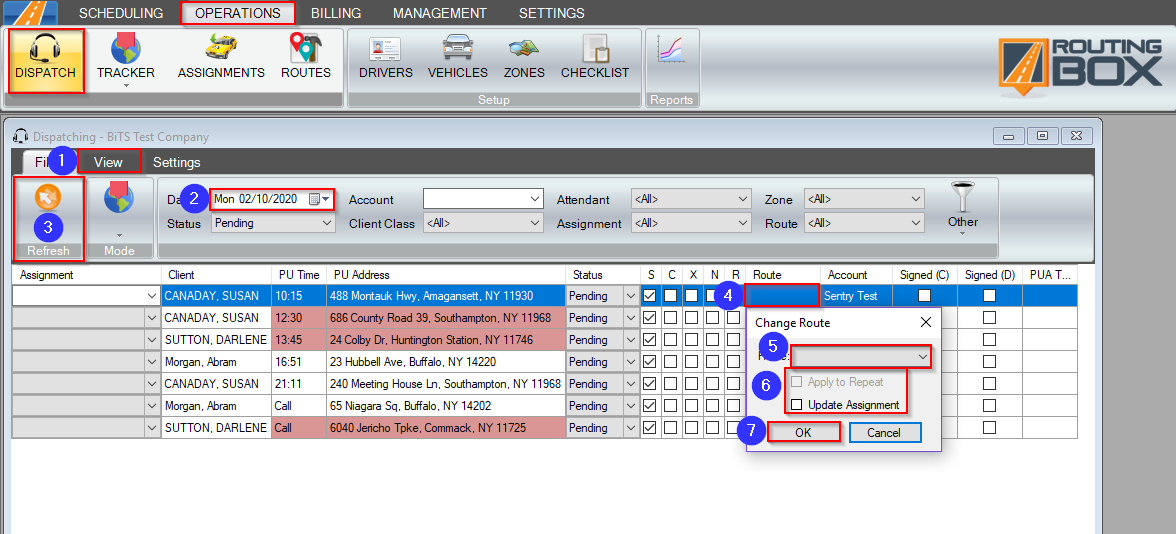
1. Select the View tab and make sure that the Route column is available in your current view.
2. Select the date you would like the trip to start being assigned to the Route.
3. Click Refresh.
4. Double-click the empty Route column next to the trip you would like added to the Route.
5. The Change Route window will open. In the Change Route window, you can assign the trip to any Route that currently exists in your RoutingBox.
6. If this trip is a Repeat Trip, you can click the check box to apply this route to the remainder of the Repeat. To update the assignment on the trip, check the Update Assignment box.
7. Click OK to save your changes.