![New Founders Software-White.png]](https://help.intelligentbits.com/hs-fs/hubfs/New%20Founders%20Software-White.png?height=50&name=New%20Founders%20Software-White.png)
Method 1 (Trip Scheduling):
Navigate to the Scheduling tab, then select the Scheduling icon.
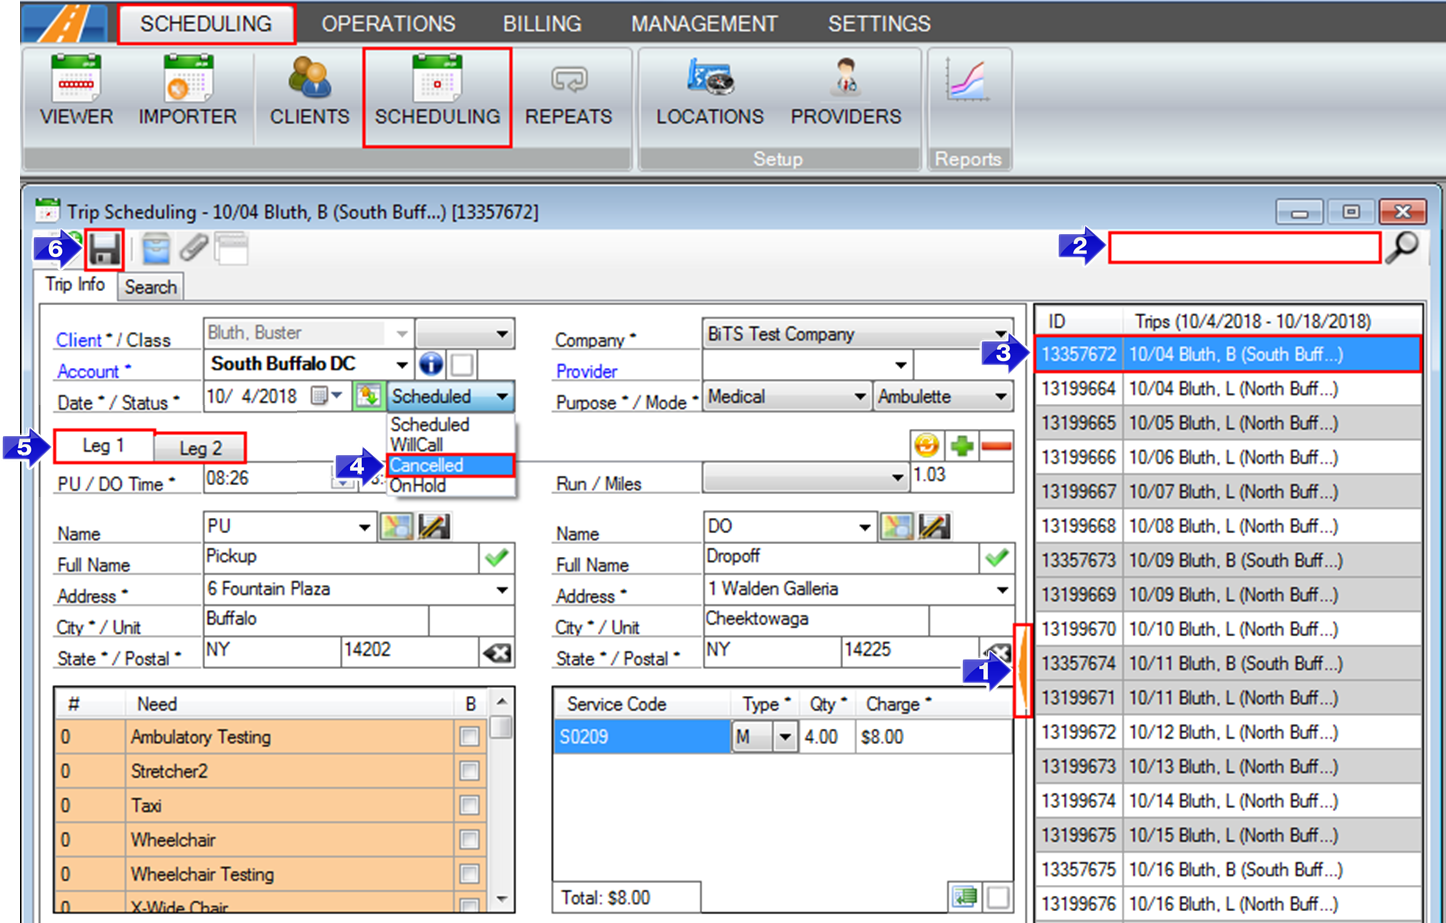
1. Click the orange arrow to view recent trips.
2. Search for the trip you'd like to cancel.
3. Select the trip you'd like to cancel.
4. Select Cancelled from the status drop-down.
5. If multiple legs need to be Cancelled, select each leg and repeat step 4.
6. Once all legs are changed to Cancelled, save your changes.
Method 2 (Dispatch - Cancel Checkbox):
Navigate to the Operations tab, then select the Dispatch icon.

1. To cancel a trip, check the box in the X column.
Method 3 (Dispatch - Status Updates):
Navigate to the Operations tab, then select the Dispatch icon.
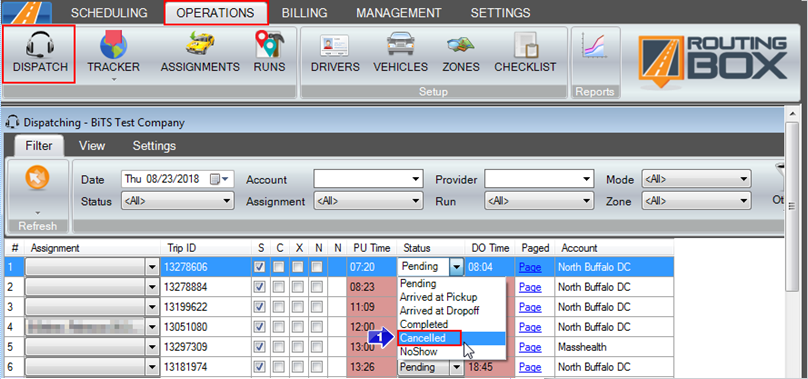
1. To cancel a trip, change the status in the Status column to Cancelled.
Method 4 (Dispatch - Multiple Trips at Once):
Navigate to the Operations tab, then select the Dispatch icon.
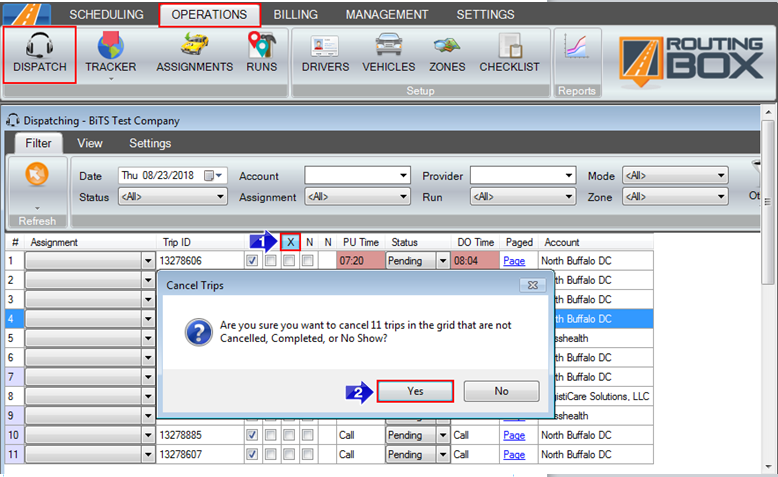
1. To cancel all trips that are currently in the Dispatch grid with a status that is not Cancelled, Completed, or No Show, double click the header of the X column.
2. You will be prompted to verify the cancellations. Click Yes.
Related Articles:
How to Schedule a Trip
How to Add an Exception Date to a Repeating Trip
How to Create No Show/Cancel Reasons
How to Create a Custom View
Key Terms:
Cancel, Cancellation, Delete, Dispatch, Operations, Scheduling, Trip, DispatchFormHelp, TripSchedulingFormHelp