![New Founders Software-White.png]](https://help.intelligentbits.com/hs-fs/hubfs/New%20Founders%20Software-White.png?height=50&name=New%20Founders%20Software-White.png)
Navigate to the Scheduling tab, then select the Clients icon.
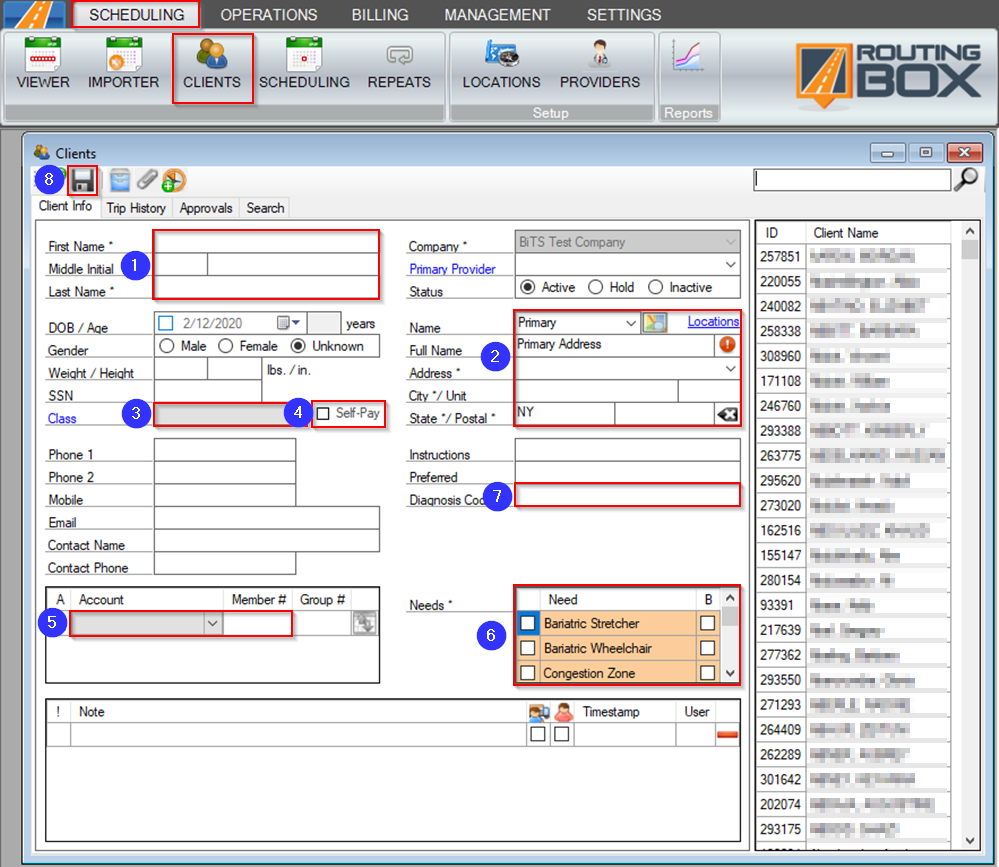
1. Enter the client's First Name and Last Name.
2. Enter the client's Primary Address. This is the location where the majority of the client's trips will begin and/or end.
3. A Client Class can be added to categorize the client.
4. If the client is going to be paying for their own trips, click the Self-Pay check box to make a self-pay account in the client's own name.
5. An Account is the entity that will be paying for the client’s trip. If the Account requires a Member Number (ex: CIN for Medicaid), it can be entered in the Member # column.
6. The Needs grid is where you choose the seating and other needs of the client. The seating need dictates the client's seating requirements, whether they are Wheelchair, Ambulatory, or Stretcher.
Note: the B checkbox will indicate the driver is to bring the equipment to the passenger whereas the value column to the left will indicate the quantity of seating needs.
7. If applicable, a Diagnosis Code can be entered here. This Diagnosis Code will be included when generating a CMS 1500 or 837P.
8. Click the floppy disc to save your changes to the Client Profile.
Video Link:
Related Articles:
How to Create a Client Class
How to Create a Need
How to Create an Account
How to Enter a Client Approval
Key Terms:
Account, Client, Diagnosis, Member, Need, Passenger, Patient, Profile, Self-Pay, ClientsFormHelp