![New Founders Software-White.png]](https://help.intelligentbits.com/hs-fs/hubfs/New%20Founders%20Software-White.png?height=50&name=New%20Founders%20Software-White.png)
Method 1 - Importer
Navigate to the Scheduling tab, then select the Importer icon.
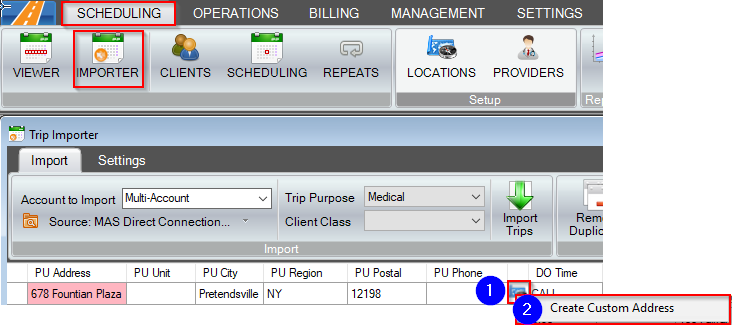
1. The trip with the invalid address error will have the bad address highlighted in red. Right click the replace address icon  at the end of this address.
2. Select Create Custom Address from the menu.
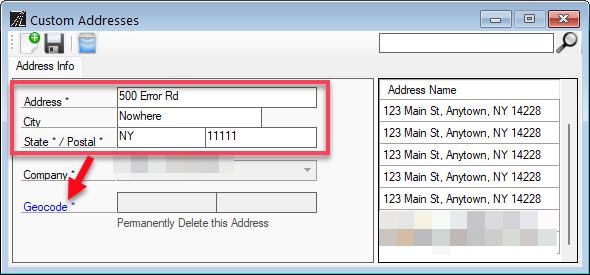
3. The Custom Addresses window will open. Your address will be pre-populated. Make any necessary changes then click Geocode.
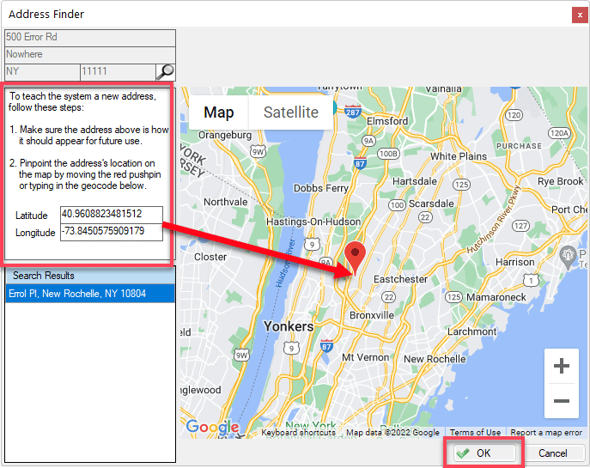
4. Verify on the map that the red pin is placed over the correct location. If it is not you can drag/zoom the map to the correct location and then Right-Click to drop the pin on the new location. This will update the Latitude and Longitude. Click OK to accept your geo-coordinates.
5. Click the floppy disc icon to save your changes. You can now go back to the Importer and successfully import any trips with this address. (You might have to close out of the importer and reopen that screen for successful import)
Method 2 - Trip Scheduling
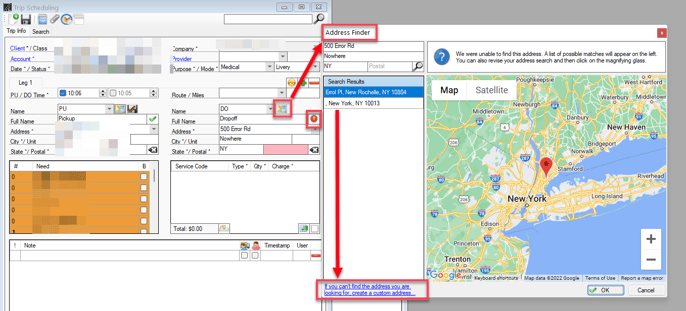
A custom address may also be necessary when creating a trip in Trip Scheduling. If RoutingBox does not recognize the address that is entered into the PU or DO field, you will be prompted to create a Custom Address.
1. The Address Finder window will open automatically if an address is not recognized. If it isn't automatically detected, click the map/magnifying glass icon. If the correct address does not show in the search results in the Address Finder, click "If you can't find the address you are looking for, create a custom address..."
 2. Verify on the map that the red pin is placed over the correct location. If it is not you can drag/zoom the map to the correct location and then Right-Click to drop the pin on the new location. This will update the Latitude and Longitude. Click OK to accept your geo-coordinates.

3. Click Create to save your Custom Address.