![New Founders Software-White.png]](https://help.intelligentbits.com/hs-fs/hubfs/New%20Founders%20Software-White.png?height=50&name=New%20Founders%20Software-White.png)
Navigate to the Scheduling tab and then select the Viewer icon.

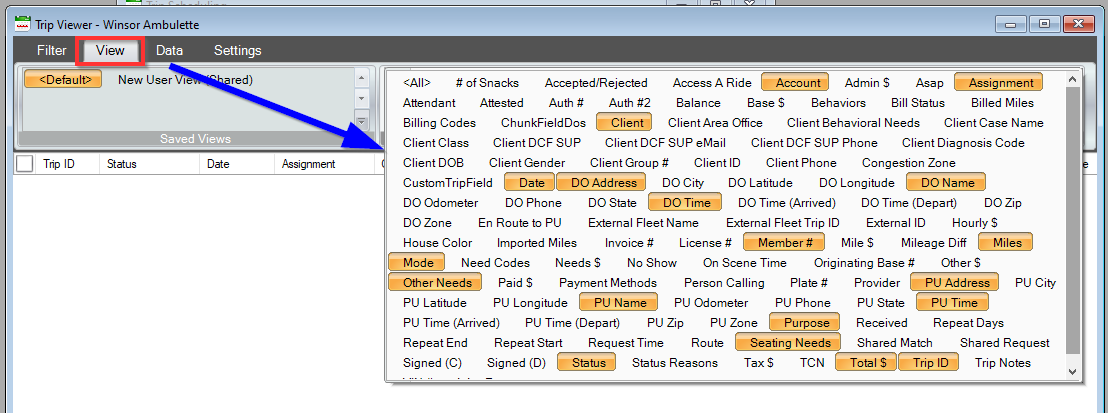
1. Select the View tab and customize the fields you want to see for export. Simply click on the items you'd like to add in as columns your grid and remove the items you'd no longer like to have in your view.
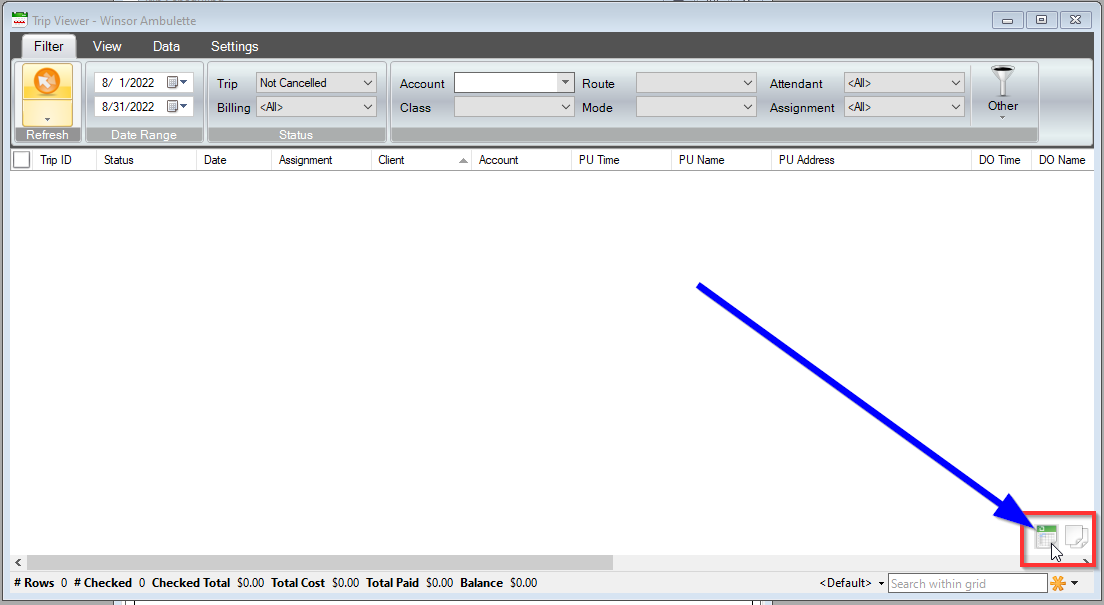
2. Specify a Date Range and input any other filters to specify data you need to review

3. Click the refresh button to view the information selected in grid
4. Move the mouse cursor to the bottom-right corner of the trip viewer screen until the Export to Excel and Copy icons appear
- The Export to Excel (in green) will create and save a .csv/Excel copy of the Trip Viewer screen to where you select.
- The copy icon works like the copy and paste function on your computer, allowing you to paste the information into a different document.
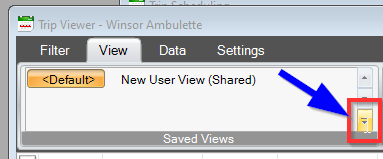
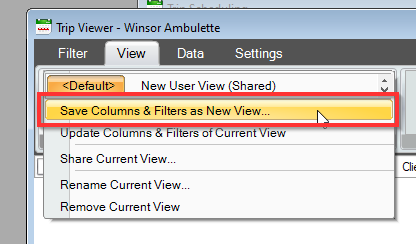
- 5. If you'd like to save this view for later use, select the view tab, click on the down arrow in the 'Saved Views' section and select the option "Save Columns and Filters as a New View"