![New Founders Software-White.png]](https://help.intelligentbits.com/hs-fs/hubfs/New%20Founders%20Software-White.png?height=50&name=New%20Founders%20Software-White.png)
Navigate to the Operations tab, then select the Dispatch icon.

OR
Navigate to the Scheduling tab, then select the Viewer icon.
Both the Dispatch Screen and the Trip Viewer allow for Views to be saved.
1. On the Filter tab, choose the parameters you would like in your Saved View from the available dropdowns. Any filters you choose here can also be saved in your custom view.
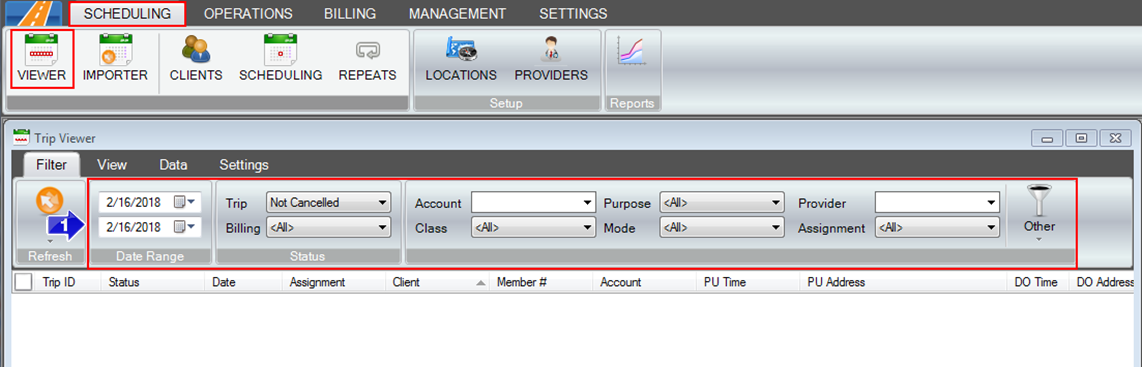
2. Next, select the View tab. (See below)
3. Choose the columns you would like to appear in your Saved View. Selected columns will be highlighted in orange. The bottom arrow to the far right shows all available options.
4. Left click and drag columns to reorder them. You can also click the edge of a column and drag to resize it. 
5. Once you have you filters and columns adjusted to your liking, it's time to Save your View.
From the "Saved Views" grid in the top left, click the arrow on the bottom to get a drop-down with all save options, see below.

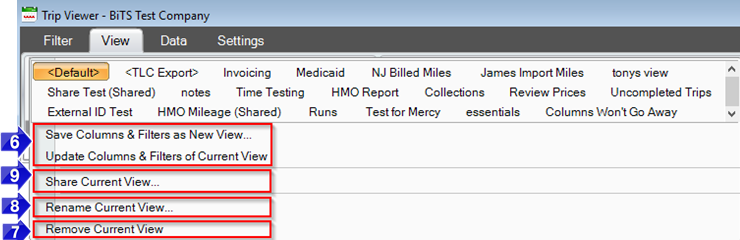
6. Here, you can save a new view (Save Columns & Filters as New View) or alter an existing one (Update Columns & Filters of Current View).
7. Remove Current View will delete the currently-selected view.
8. Rename Current View will rename the currently-selected view
9. Share Current View, when clicked, will share the view to another user account, bringing up the dialogue window you see below.
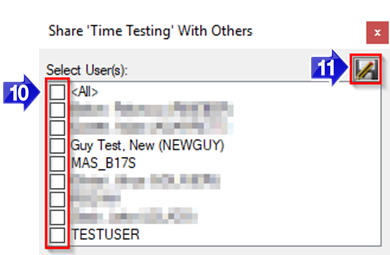
10. These checkboxes indicate the user(s) who will receive access to the shared view.
11. After selecting the correct users you wish to share the views with, click the floppy disk in the top right to save the settings. These users may have to log out and log back in to see the view appropriately.
Remember, saved views include the column order and filters you set in steps 1-4!
Video Link: