![New Founders Software-White.png]](https://help.intelligentbits.com/hs-fs/hubfs/New%20Founders%20Software-White.png?height=50&name=New%20Founders%20Software-White.png)
Method 1 (Trip Scheduling):
Navigate to the Scheduling tab, then select the Scheduling icon.
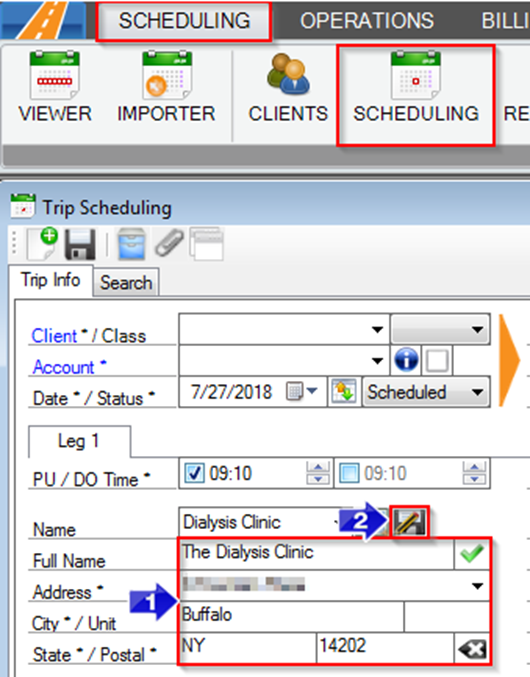
- Type the address on the trip.
- Click the save location icon. This will open the Locations window with the address already entered. Make any necessary edits, then follow the steps below to save the location.
Method 2 (Locations)
Navigate to the Scheduling tab, then select the Locations icon.
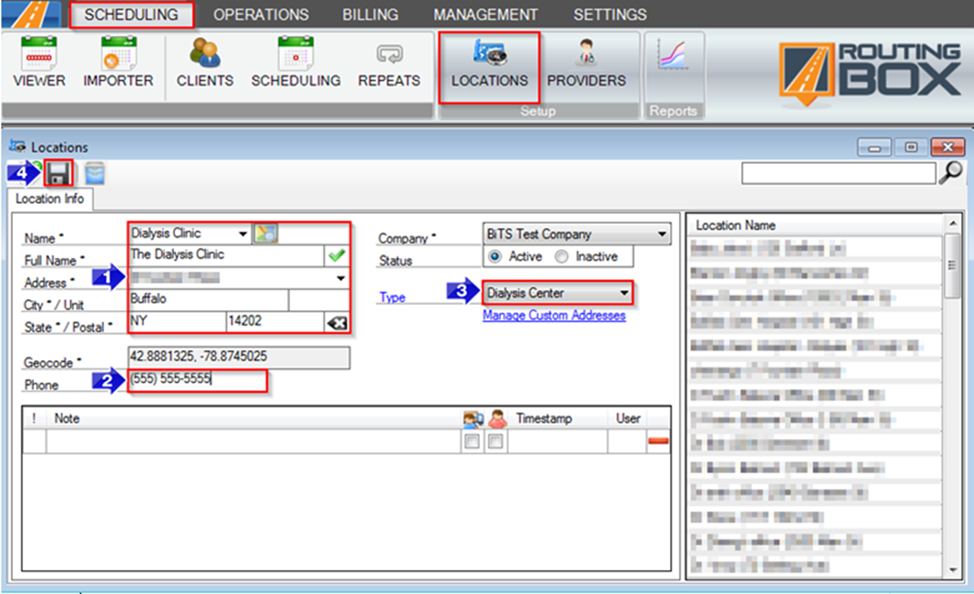
- Type the following required fields: Name, Full Name, Address, City, State, and Postal.
- A Phone number can be added to the Location Profile.
- If you’d like to assign a location Type, it can be selected from this drop-down.
- Click the floppy disc to save your changes.
Video Link:
Related Articles:
How to Create a Custom Address
Key Terms:
Address, Location, AddressesFormHelp, TripSchedulingFormHelp