![New Founders Software-White.png]](https://help.intelligentbits.com/hs-fs/hubfs/New%20Founders%20Software-White.png?height=50&name=New%20Founders%20Software-White.png)
In the Desktop version of RoutingBox:
Navigate to the Management tab, then select the Users icon.
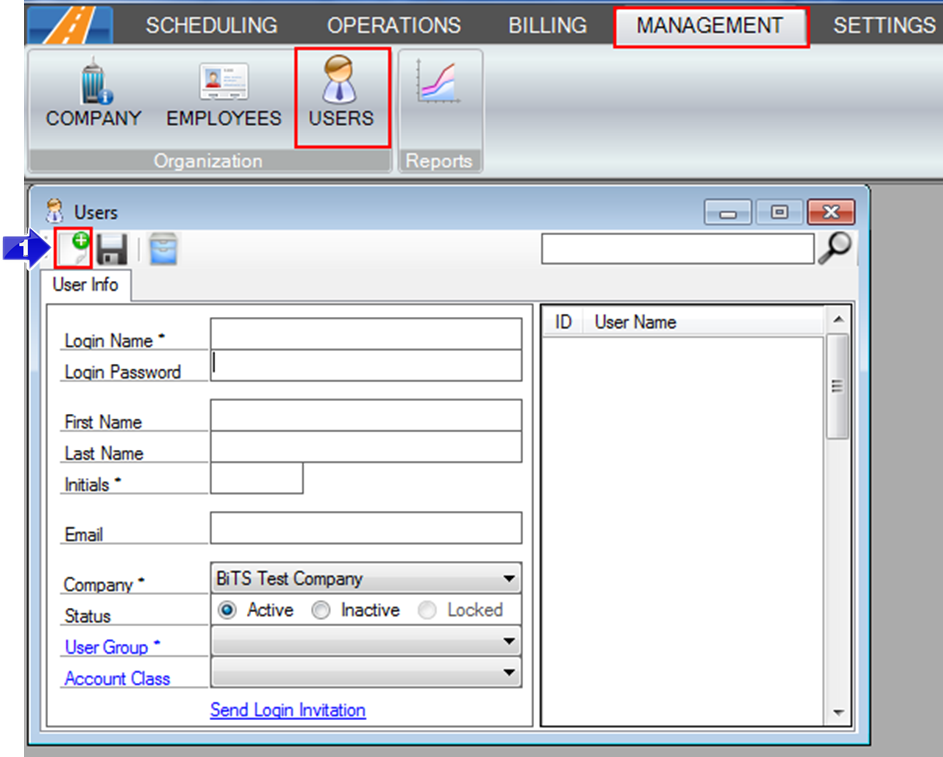
1. Select the new icon to create a new user.
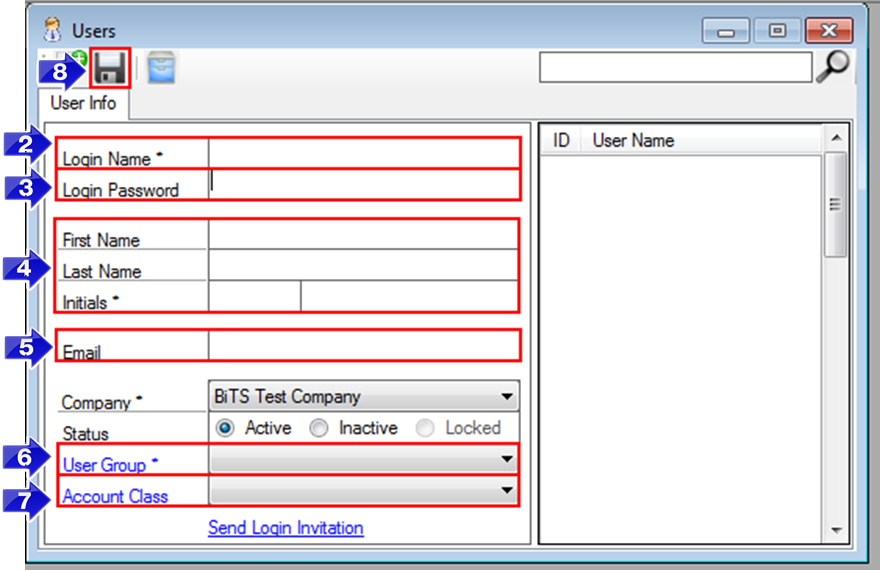
2. Enter a Login Name for the user. We recommend using the team member's first initial and last name as a default.
3. Leave the Login Password blank. The new user will be prompted to create a password after they login for the first time.
4. Enter the user's First Name, Last Name, and Initials. The initials will be displayed in the Audit Trail to show which user made a specific change.
5. Enter a valid Email for the user. The email address can be used to send a password reset notification when necessary.
6. Enter the User Group and the Account Class. User groups can be used to allow access to specific features in RoutingBox. Account Class can specify which Account Classes the user has access t0.
8. Click the floppy disc to save your changes.
Once the new User is created, they can login at:
app.routingbox.com using your unique Company Code as their password for the first time.
Video Link:
Related Articles:
How to Send User Login Invitation
How to Set Permissions
How to Use the Audit Trail
Key Terms:
Initials, Login, Password, Reset, User Group, UsersFormHelp