![New Founders Software-White.png]](https://help.intelligentbits.com/hs-fs/hubfs/New%20Founders%20Software-White.png?height=50&name=New%20Founders%20Software-White.png)
When a driver completes the checklist using RoutingBox Mobile, the information is saved in the cloud and accessible from the RoutingBox desktop application for reporting purposes.
Navigate to the Operations tab, then select the Checklist icon.
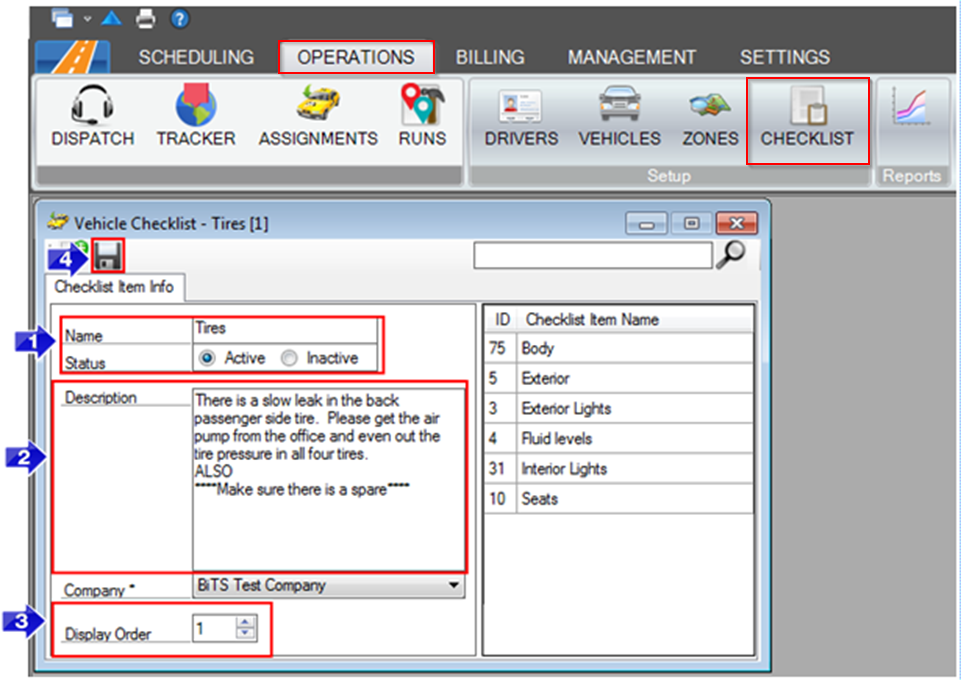
1. Enter the Checklist Item Name you would like to add to the Vehicle Checklist. Active items will display in the vehicle checklist in RoutingBox Mobile. Inactive items are hidden from the checklist.
2. You can enter a Description in this field. It is not required and will not appear on the mobile device when the drivers are completing their checklist.
3. The Display Order can be edited to show the order checklist items will display in RoutingBox Mobile.
4. Click the floppy disc to save your Checklist item.
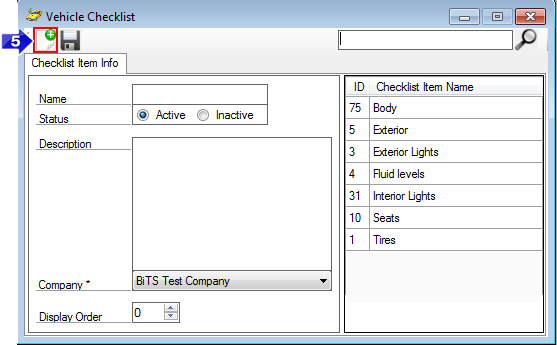
5. Click the plus icon to add a new Checklist Item Name.
If you would like to turn on the Vehicle Checklist setting, contact our Support Team at (716) 202-9121.
Related Articles:
How to Tell if the Driver Checklist is Completed
How to View and Edit Odometer Readings
Key Terms: Checklist, Display Order, Report, Active Vehicles, Odometer, Check Parts, Check Car, Mandatory Checklist, Vehicle, Pre-Checklist, Post-Checklist, Checklist Items, Checklist Item Name