![New Founders Software-White.png]](https://help.intelligentbits.com/hs-fs/hubfs/New%20Founders%20Software-White.png?height=50&name=New%20Founders%20Software-White.png)
Navigate to the Operations tab, then select the Vehicles icon.
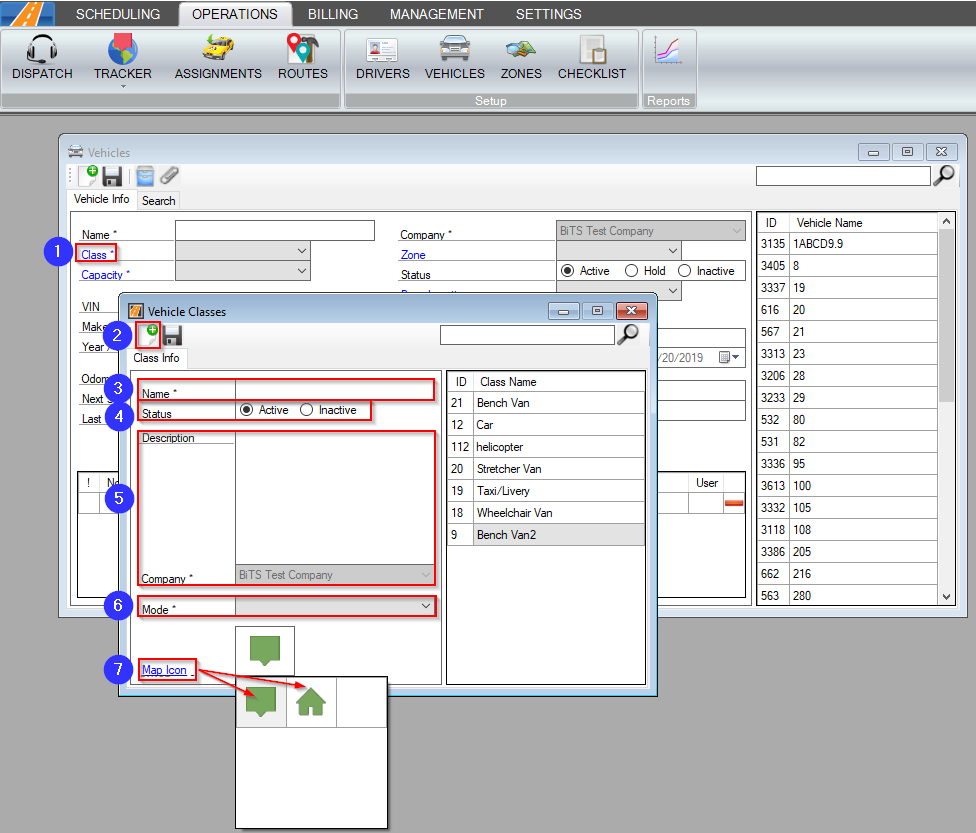
1. Click the Class link in the Vehicle Profile. The Vehicle Classes window will open.
2. Click the new icon to create a new vehicle class.
3. Enter the Name of the vehicle class. This is a required field.
4. Set the Status of the vehicle class. This defaults to Active. Changing the status to Inactive will remove this Class as an option from the drop-down list in the Vehicle Profile.
5. Enter an optional Description to summarize the vehicle class.
6. Choose the Mode for the vehicle class from the drop-down. This is a required field.
The Mode field is used to prevent trips from being assigned to incorrect mode types in Dispatch. A setting can be activated to warn or prevent dispatchers from assigning a vehicle with a mismatched mode to a trip. Contact RoutingBox Support for more information.
The mode also helps to determine accurate rates in the Trip Services screen.
7. Map Icon - Click on this to select a specific icon to be displayed in the Tracker screen for this vehicle class.
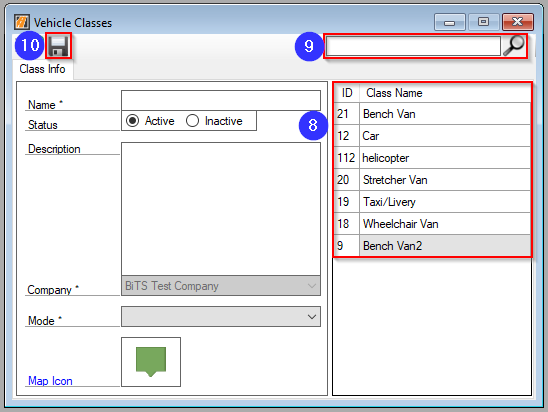
8. Existing vehicle classes can be reviewed in this list.
9. Use the search tool to filter down what appears in the Class Name list.
10. Click the floppy disc icon to save your changes.
Key Terms:
Class, Mode, Vehicle, Vehicle Class, VehiclesFormHelp