![New Founders Software-White.png]](https://help.intelligentbits.com/hs-fs/hubfs/New%20Founders%20Software-White.png?height=50&name=New%20Founders%20Software-White.png)
Navigate to the Billing tab, then select the Accounts icon.

1. Click the Class link. The Account Classes window will open.
2. Select the new icon to create a new Account Class.
3. Enter the Name of the Account Class. This is a required field.
4. Set the Status of the Account Class. This defaults to Active. Updating the status to Inactive will remove that position from the drop-down list on the Account Profile.
5. Enter an optional Description to summarize the Account Class.
6. Select a Color for the Account Class. This is a required field and is used to identify the Account Class a trip is scheduled under in Dispatch.
7. Existing account classes can be reviewed from this list.
8. Use the search tool to filter down what appears in the Class Name list.
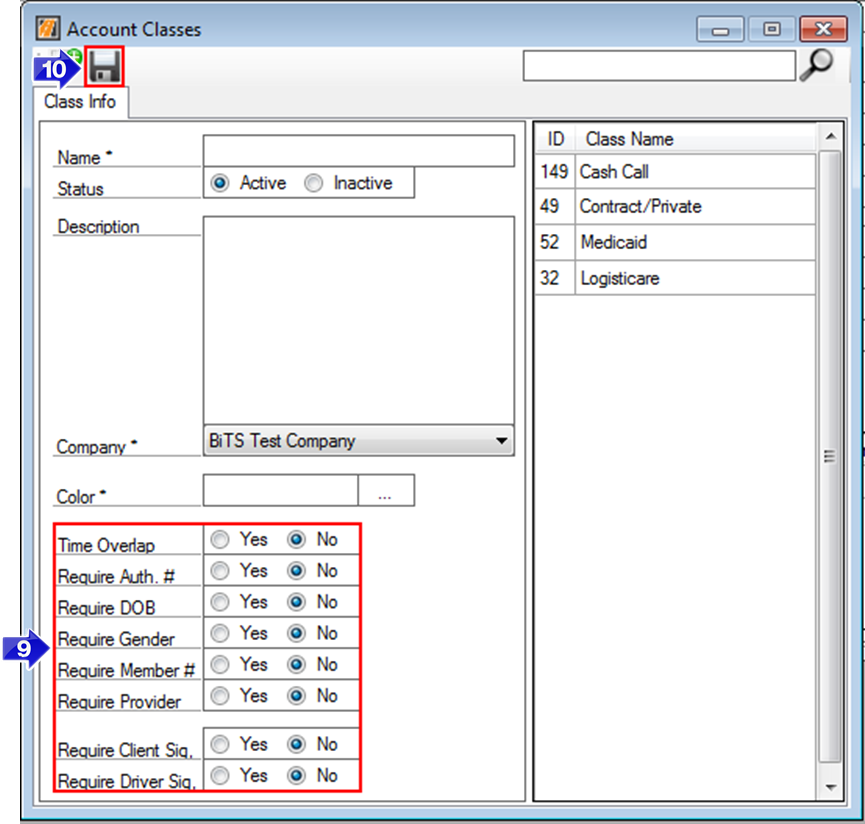
9. The Account Class requirements can be set to Yes or No.
If Time Overlap is set to Yes, trips will be able to have overlapping scheduled times for clients. If set to No, RoutingBox will alert you of overlaps for trips scheduled under that account class.
If any Require fields are set to Yes, a trip or client cannot be saved/completed without that information captured. For example, a new client cannot be saved to an Account class that has Require DOB set to Yes without a DOB saved on the profile.
10. Save your changes.
Related Articles:
How to Add Color Coding to Account Classes
How to Create an Account
How to Search for an Inactive Account
How to Search for an Invoice Number
Key Terms:
Account, Billing, Class, Inactive, Require, Signatures, Status, AccountsFormHelp