![New Founders Software-White.png]](https://help.intelligentbits.com/hs-fs/hubfs/New%20Founders%20Software-White.png?height=50&name=New%20Founders%20Software-White.png)
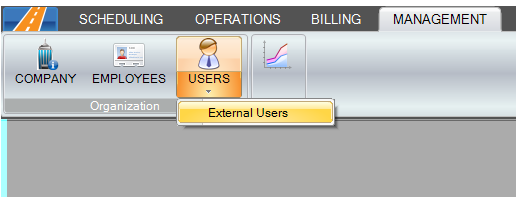
1. To set up an external user, go to the management tab and click on the small arrow below the "users" icon. This will give you the option to create external users.
2. This will open the following screen:
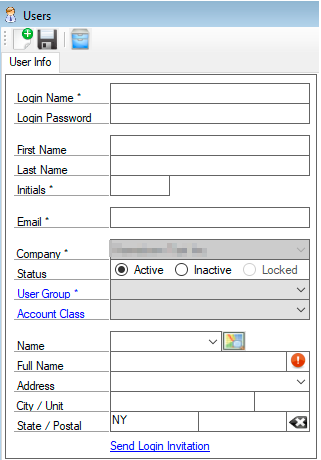
From here, you'll enter a login name for the user.
Next, you'll want to leave the password blank (an email will be sent inviting them to create a password which they'll do from the web portal).
You'll then fill in the user's first name, last name, initials, email field, and user group.
3. The next part will depend on how you want to restrict the user(s) in the portal. You have three options:
-Location--You can enter in the facility's address which will allow the user to only see trips with a pick up or drop off at the address for all clients; regardless of the account they're affiliated with. (If you opt for this method, feel free to leave account class empty!) This is great for dialysis centers and facilities.
-Account Class--Allows the booking portal user to only see trips for clients associated with a certain account class such as Medicaid. Be mindful of the fact that the account class chosen may include several accounts. If this is the case, you may want to consider creating a new account class for this particular account.
-A combination of both Location and Account Class
4. Lastly, send a login invitation to the user so they can set up their password and send them the link to access the portal!