![New Founders Software-White.png]](https://help.intelligentbits.com/hs-fs/hubfs/New%20Founders%20Software-White.png?height=50&name=New%20Founders%20Software-White.png)
Navigate to the Operations tab, then select the Dispatch icon.
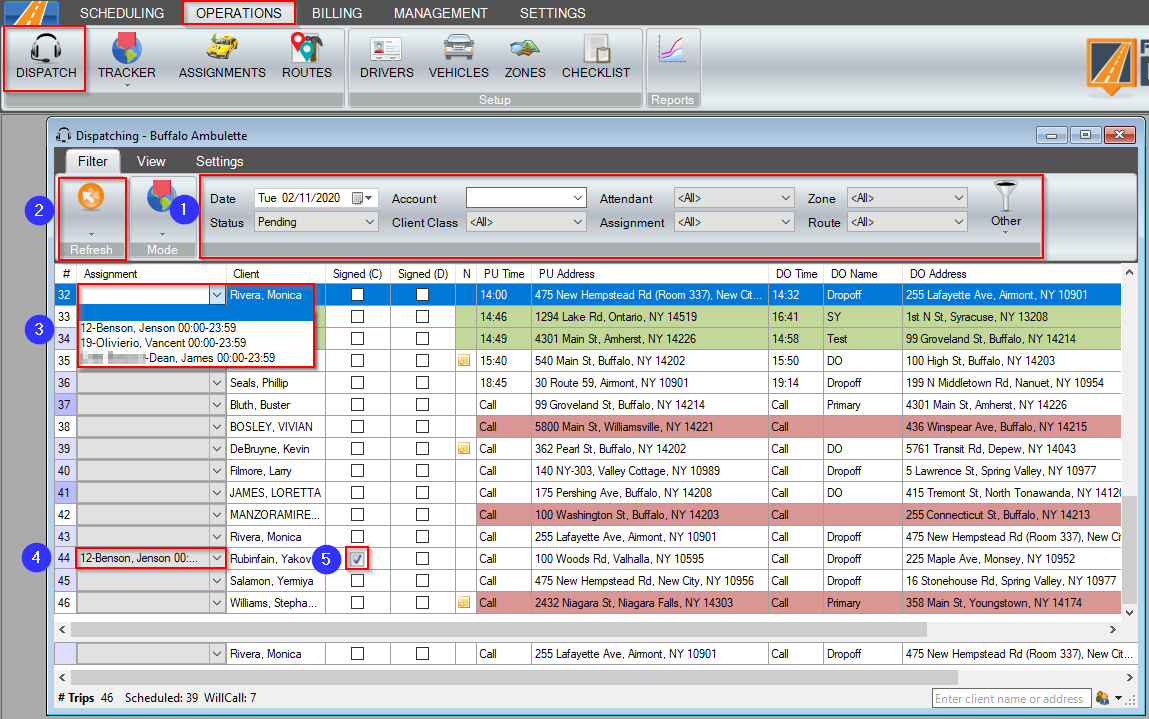
1. Choose the Date you would like to view. The filters can be used to narrow down the trips that will appear in the grid. Status, Account, Assignment, Provider, Route, Mode and Zone are all filter options.
2. Click Refresh to load trips with the selected filters into the grid.
3. Select which driver and vehicle will be assigned to a trip by clicking the drop-down menu in the Assignments column. If a driver's name is not visible, an assignment for the day will need to be created for them in the Assignments window.
4. Once an Assignment has been selected, the driver’s name and vehicle will be displayed in the Assignment column.
5. You can dispatch a trip by placing a checkmark in the Dispatch (D) column after a driver has been assigned. Please contact BiTS Support if you would like this column to auto-check when an Assignment is selected for the trip.
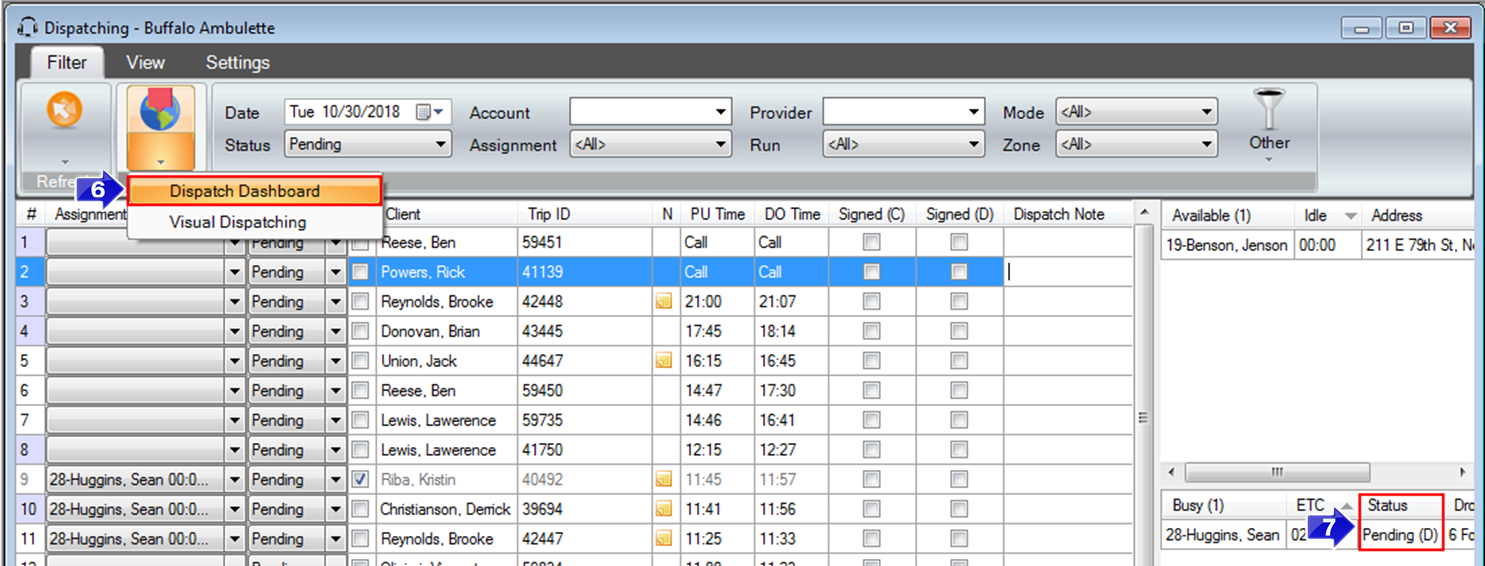
6. The Dispatch Dashboard can be added to the Dispatch screen by selecting it from the Mode drop-down. This will give you an overview of your Available and Busy drivers.
7. The driver will show as Busy with a Pending (D) Status if a trip has been dispatched to the driver. The D signifies that the driver has been dispatched.
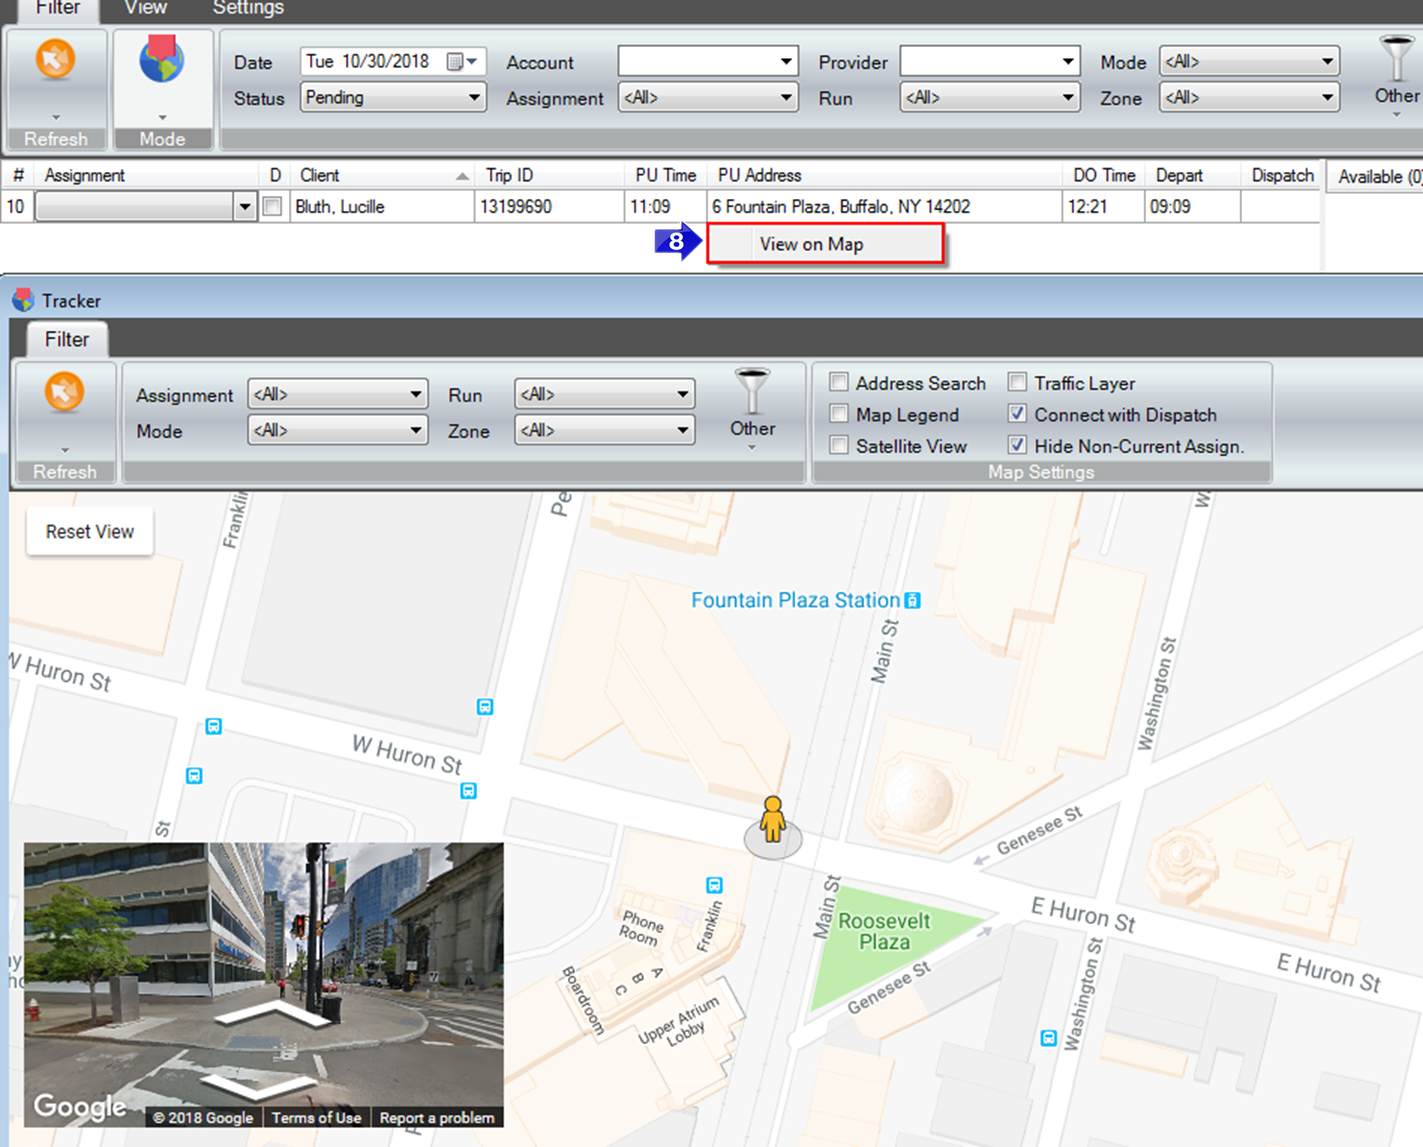
8. Right click on a PU Address or DO Address in Dispatch and select View on Map to display the driver and vehicle location in the Tracker.
Video Link:
Related Articles:
How to Assign Typical Vehicles
How to Copy a Trip
How to Create a Custom View
How to Create a Driver
How to Schedule a Trip
How to Use the GPS Feature
Key Terms:
Assignment, Dashboard, Dispatch, Driver, Map, Tracker, Trips, Vehicle, DispatchFormHelp