![New Founders Software-White.png]](https://help.intelligentbits.com/hs-fs/hubfs/New%20Founders%20Software-White.png?height=50&name=New%20Founders%20Software-White.png)
Navigate to Scheduling tab, then select the Importer icon.
1. Choose your Account.
Start typing the name of the Account in the top left, until it becomes available in the Account dropdown to choose from.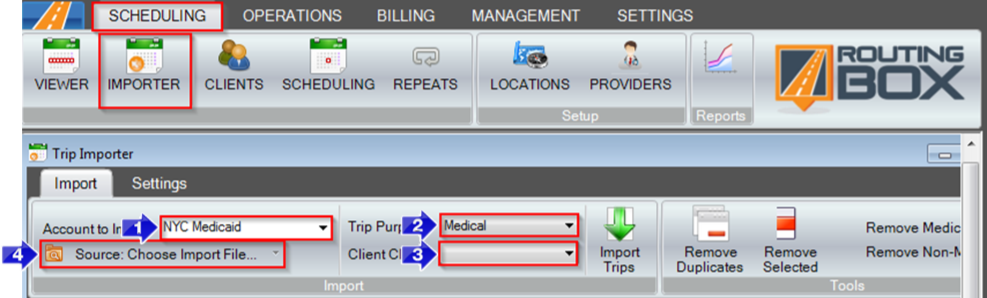 2. Make the necessary adjustments to your dropdown filters at the top. Most transporters keep their trip purpose as Medical.
3. IF you're using Client Classes to group your clients - choose the one you'd like to import trips under. (you might not be using client classes!)
4. Click Source: Choose Import File to find the file you saved on your computer from the broker portal / mobility manager.

5. Select the import file that you have saved to your computer.
6. Click Open to upload the import file.
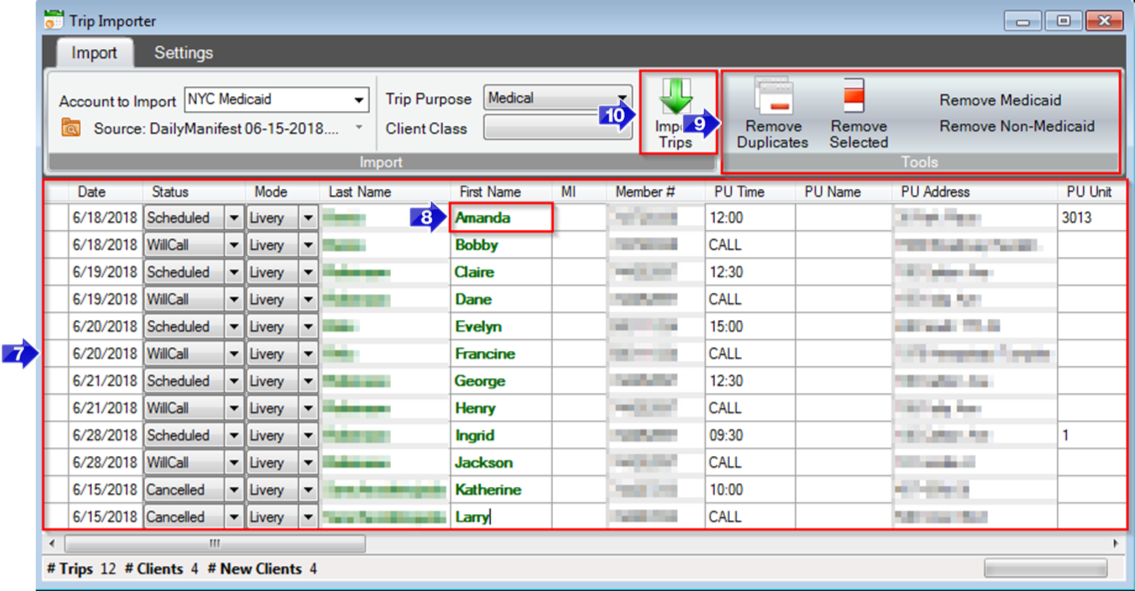
7. The main grid will display the trip details. Here, you can review and make changes to any trip prior to importing. At this step - trips are NOT imported yet. They are visible in the importer window for final review before importing.
8. If a client is new, their name will be displayed in green, and a new Client Profile is automatically created upon import.
9. From the Tools menu, you can Remove Duplicates, Remove Selected, Remove Medicaid, and Remove Non-Medicaid prior to importing. Remove Duplicates will only remove the trips if they have previously been imported.
10. To import trips into RoutingBox, click Import Trips. When a trip successfully imports into RoutingBox, it will disappear from the main grid. Any trips that need further attention prior to import will remain in the grid.
Video Link: