![New Founders Software-White.png]](https://help.intelligentbits.com/hs-fs/hubfs/New%20Founders%20Software-White.png?height=50&name=New%20Founders%20Software-White.png)
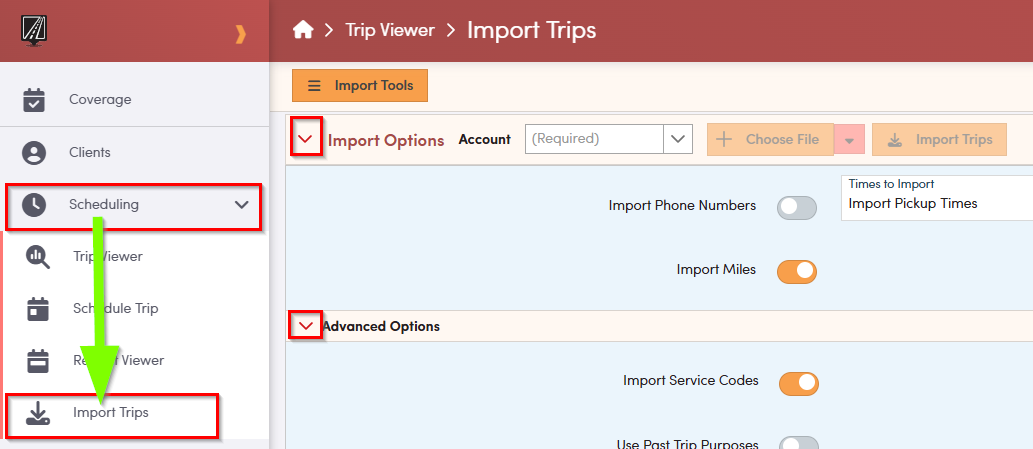
To review Trip Importer settings, click on the Scheduling tab in the left hand menu bar. From there select Import Trips. The Import Trips screen will then open.
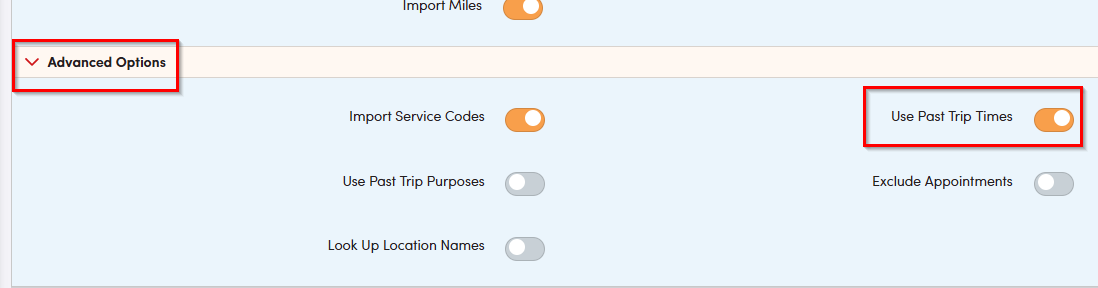
Note: You may need to click the arrows in order to see the Import Options and Advanced Options
Importer Settings:
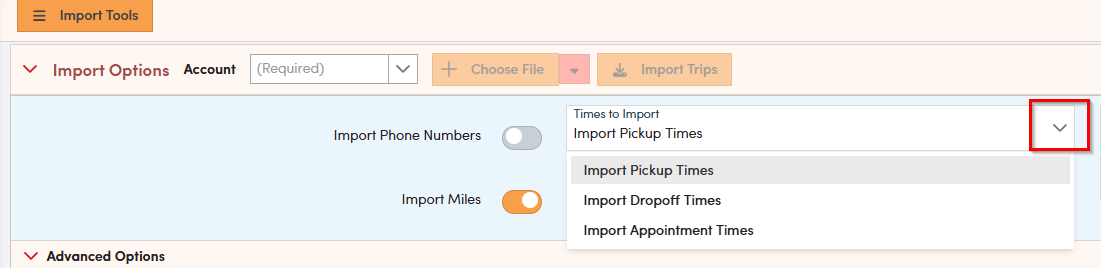
1. Import Pickup/Drop-off/Appointment Times: Choose whether trips will be scheduled based off the pickup time, drop-off time or the appointment time from the import file (given the import file includes PU/DO/Appt times). RoutingBox will then calculate the other times based on the approximate travel time from the pickup location to the drop-off location. To select one of these options you will need to click the times to import down arrow.
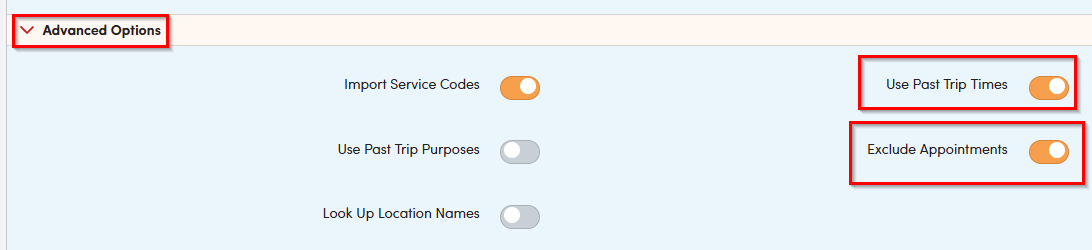
2. Use Past Trip Times: If this setting is checked and orange, the Importer will review this client's trip history for the past 8 days. If any trip in the client's history falls within the time tolerance* and has the same address and the same account, then the historical time will be used, rather than the time provided on the current import file. The trip will also be added as a repeat to the existing trip's repeat. If the existing trip does not belong to a repeat, a repeat will be created. Use past trip times is found under advanced options.
3. Exclude Appointments: If the “Use Past Trip Times” setting is active, Exclude Appointments can be selected. Trips with the Medical purpose will be excluded from the time corrections. Exclude Appointments can be found under Advanced Options.
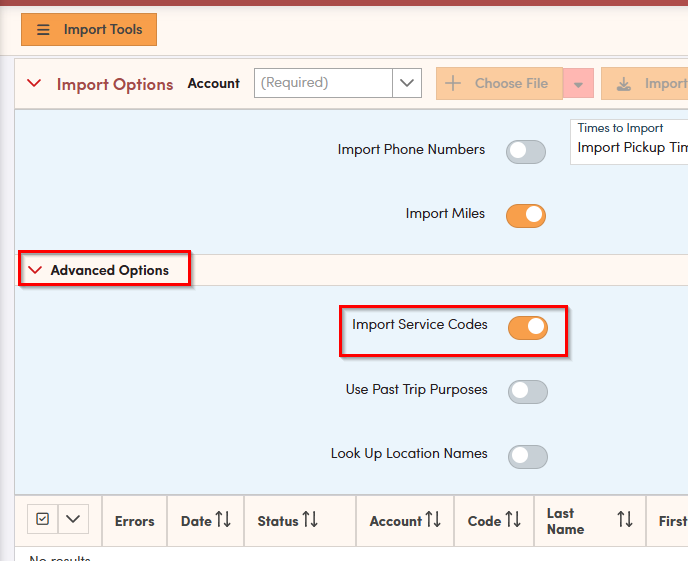
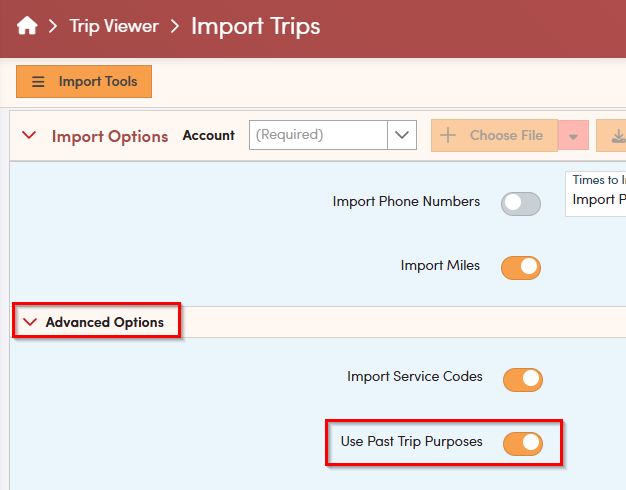
4. Import Service Codes: When checked, if service codes are provided on the import file, this setting will apply the service codes provided on the import file to the trip leg, rather than the service codes setup in the Trip Services screen for this account. Import Service Codes is a default setting and can be found under Advanced Options.
5. Use Past Trip Purposes: Much like the “Use Past Trip Times” setting, this setting will look at past purposes used for this client, on trips within the time tolerance* and with the same address and with the same account. If the purpose is changed consistently when you import, the saved purpose will be used, rather than the purpose provided on the import file. Use Past Trip Purposes can be found in Advanced Options.
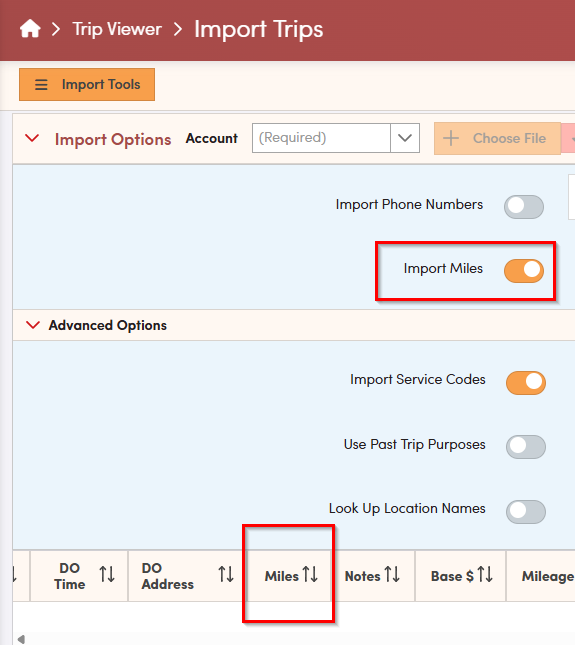
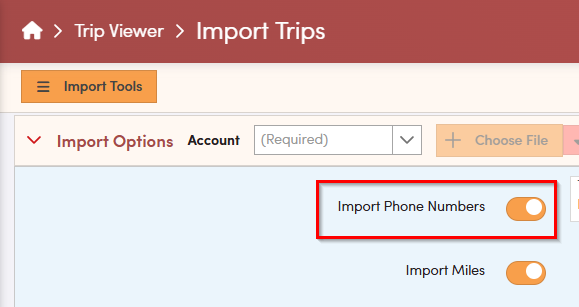
6. Import Miles: This setting will import the mileage provided on the import file. The imported mileage will be visible under the Miles header once imported. You may need to scroll over to view the miles header. If a trip leg has imported mileage, this will be used when applying rates, rather than the calculated mileage. Import Miles can be found under Import Options.
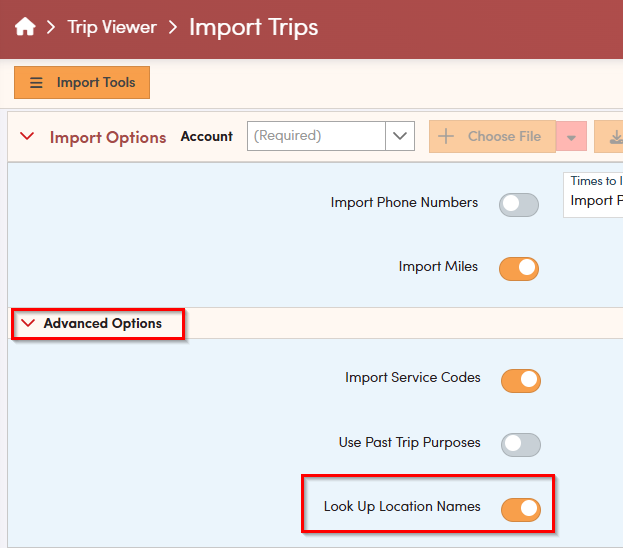
7. Lookup Location Names: If this setting is checked, the corresponding saved location names from RoutingBox will be used in the Full Name field on the trip leg. Lookup Location Names can be found under Advanced Options.
8. Import Phone Numbers: If this setting is checked, the phone number in the Client Profile will be replaced with the phone number from the import file, if they are different. Import Phone Numbers can be found in Import Options.
9. Notes Visible to Dispatcher: This will import notes from the file and make them visible in the Dispatching screen. The Notes Visible to Dispatcher can be found in Import Options in the Note Options drop down.
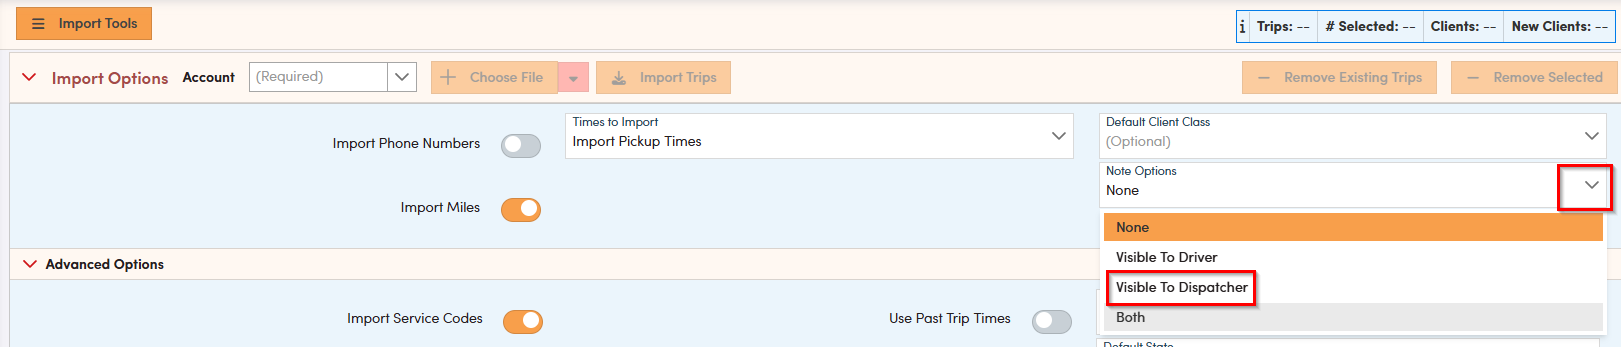
10. Notes Visible to Driver: This will import notes from the file and make them visible to drivers via RoutingBox Mobile and on driver manifests. Notes Visible to Driver can be found in Import Options in the Note Options drop down.
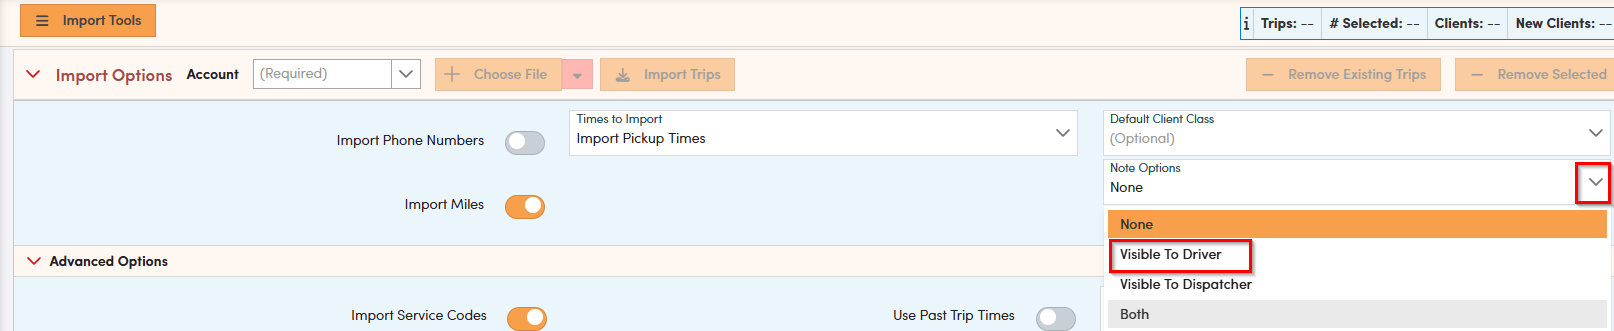
The is an option to select both Visible to Driver and Visible to Dispatcher notes in the Note Options drop down.