![New Founders Software-White.png]](https://help.intelligentbits.com/hs-fs/hubfs/New%20Founders%20Software-White.png?height=50&name=New%20Founders%20Software-White.png)
To Create a User group, follow the How to Create and Manage User Groups in RoutingBox Web knowledge article.
In the left hand menu bar navigate to Settings, then select the Users icon.

The user screen will open in a new window. If you have many users, you may need to move between pages using the arrows at the bottom of the screen. You can also locate a specific user by searching by name or applying additional filters. To search, enter the first name, last name, or both in the search bar, and then select **Search**. Once you have located the user you are looking for click anywhere on the bar with their name.

The selected user’s information will appear in a pop-up window. This view allows you to review the user’s details and manage the user group currently assigned to them. To change the group click on the user group name and select from the list. If you need to edit the user group follow the How to create and manage user groups article.
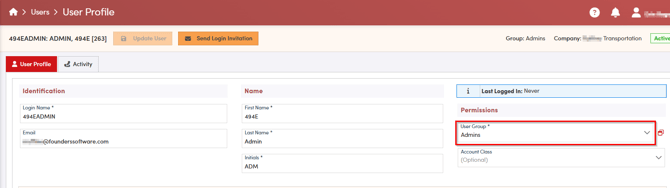
You may also limit user access with the Account Class field. Specifying an Account Class here will limit access the internal user has to account, client, and trip information relative to that account class only.