![New Founders Software-White.png]](https://help.intelligentbits.com/hs-fs/hubfs/New%20Founders%20Software-White.png?height=50&name=New%20Founders%20Software-White.png)
Method One:
Navigate to the Operations tab then select the Dispatch icon.
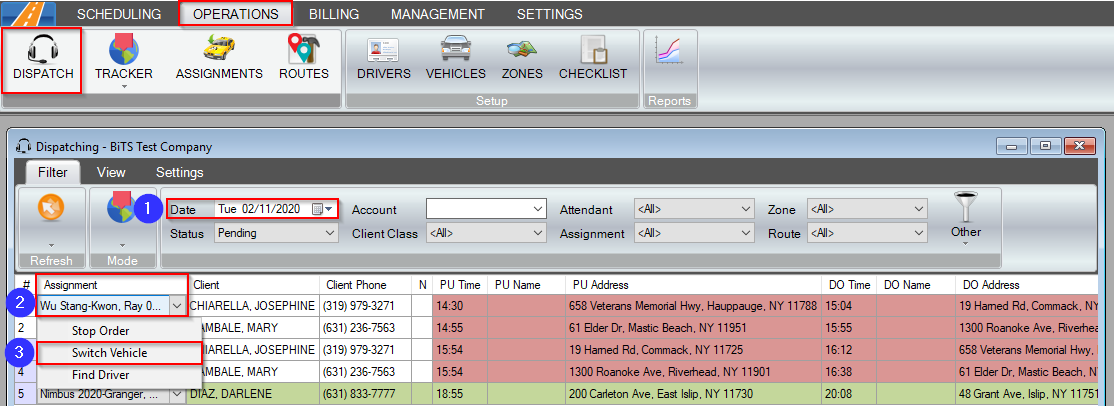
1. Enter the Date you would like to view and Refresh if necessary (the Dispatch window defaults to today’s date).
2. Under the Assignment column, right-click on the driver you would like to switch vehicles for.
3. Select the Switch Vehicle option to open the Switch Vehicle window.

4. From the drop-down menu, select the vehicle you would like to switch the driver to.
5. Select the Switch button. This will end the driver’s assignment in their current vehicle and begin a new assignment in their new vehicle.
Method Two:
Navigate to the Operations tab then select the Assignments icon.
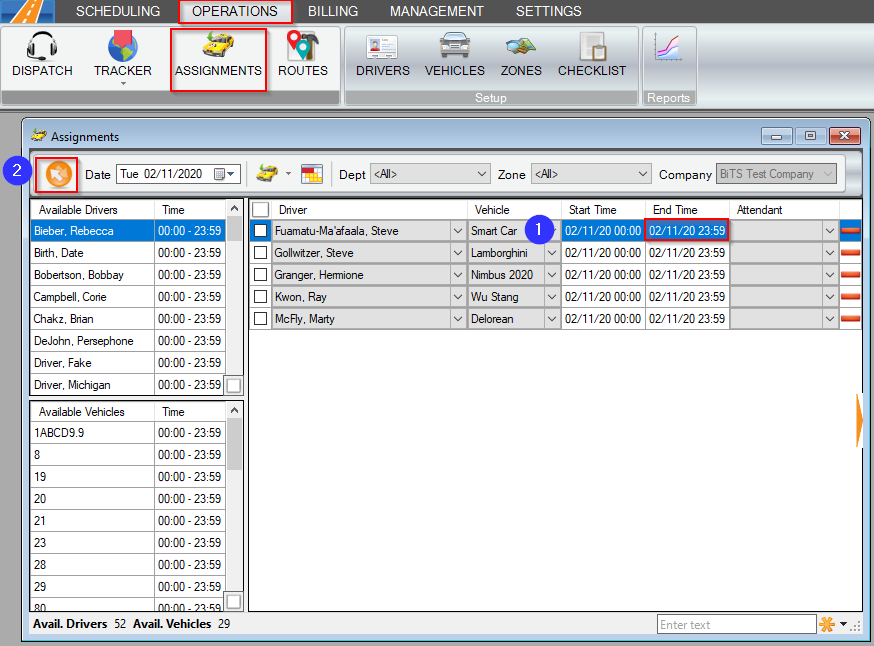
1. In the End Time column, enter the time that the driver will end that shift.
2. Refresh the screen.
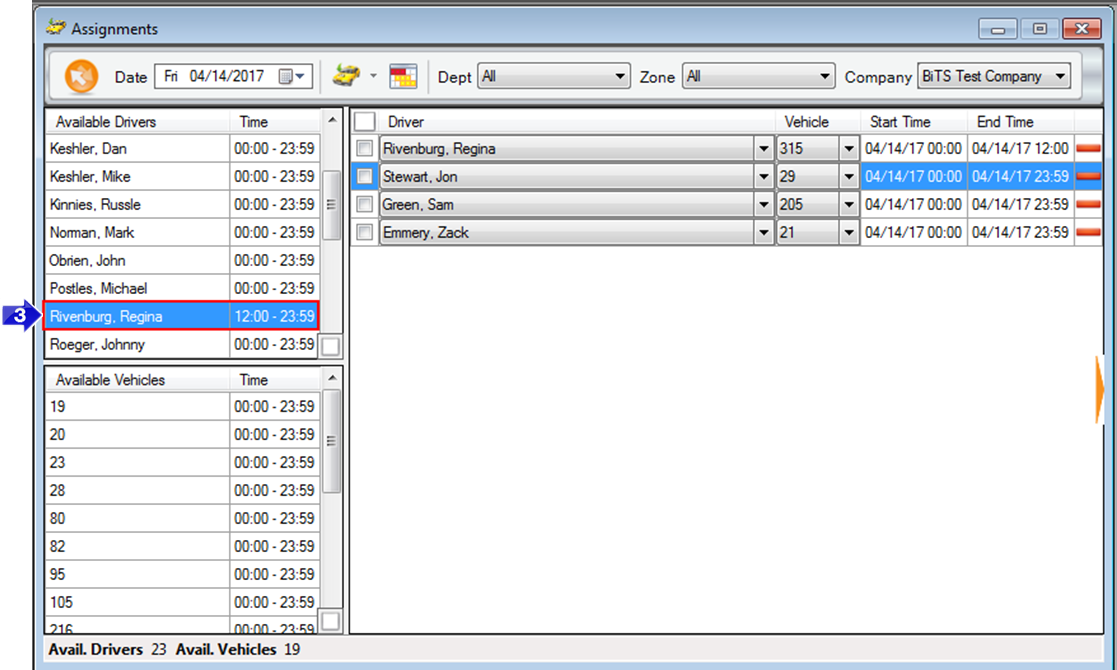
3. The driver now appears back in the Available Drivers grid. Select them to add a second assignment.

4. Select the second vehicle for that driver from the Vehicle drop-down grid.
5. You will notice that the driver is now assigned for two different shifts with two different vehicles, on the same day.
Related Articles:
How to Create a Vehicle
How to Create Capacity
How to Assign Vehicles
Key Terms:
AssignmentsFormHelp, Vehicle, Shift, Driver, Assign, Dispatch, Switch Vehicles, End Time, DispatchFormHelp