![New Founders Software-White.png]](https://help.intelligentbits.com/hs-fs/hubfs/New%20Founders%20Software-White.png?height=50&name=New%20Founders%20Software-White.png)
Navigate to the Scheduling tab, then the Viewer icon.
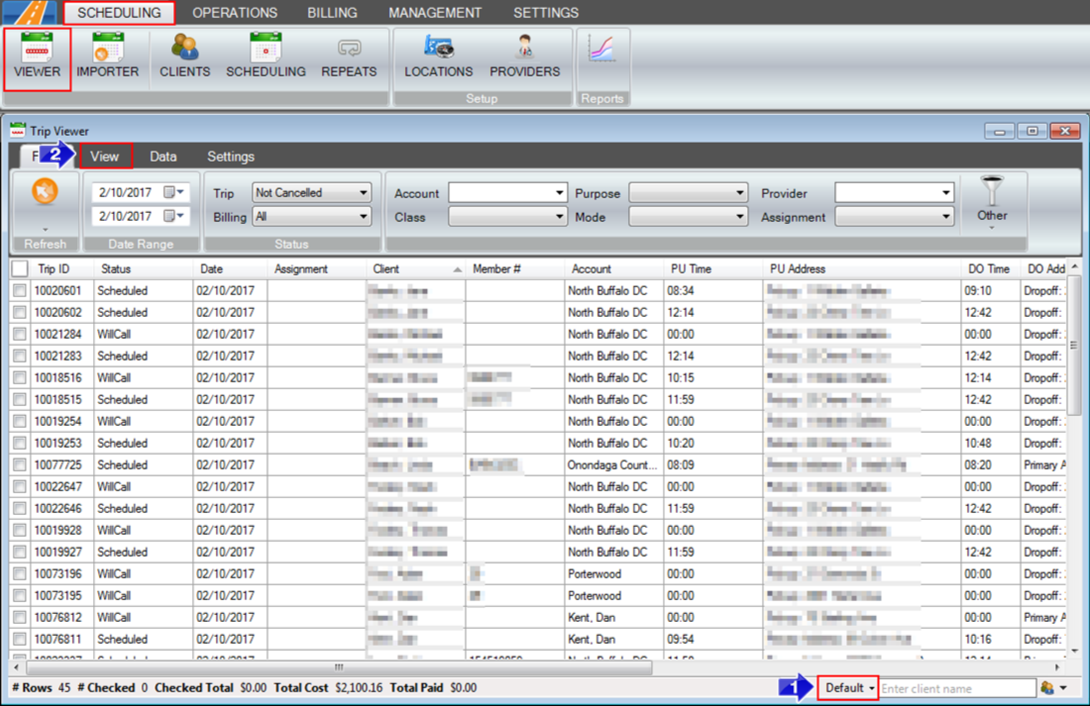
1. The bottom right of the screen contains a quick menu with any saved views for your username. For more information on switching views using this method see Method 1.
2. The View tab can be selected and a list of saved views for your username will be available. For more information on the View tab, see Method 2.
Method 1:

1. Select the black drop-down menu. A list of available saved views will generate.
2. Select the view that you would like to switch to.
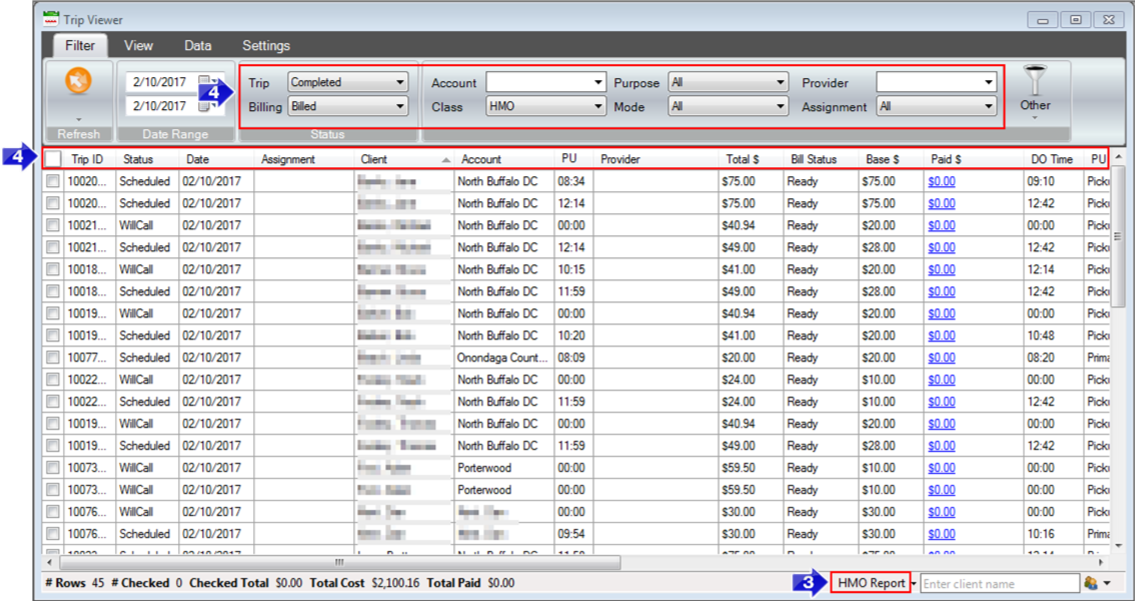
3. In this example, we have selected HMO Report. Where it used to say Default, it is now showing the current view that we have selected.
4. Any filters that have been selected for this view, as well as column headers have been updated after the view was selected.
Method 2:
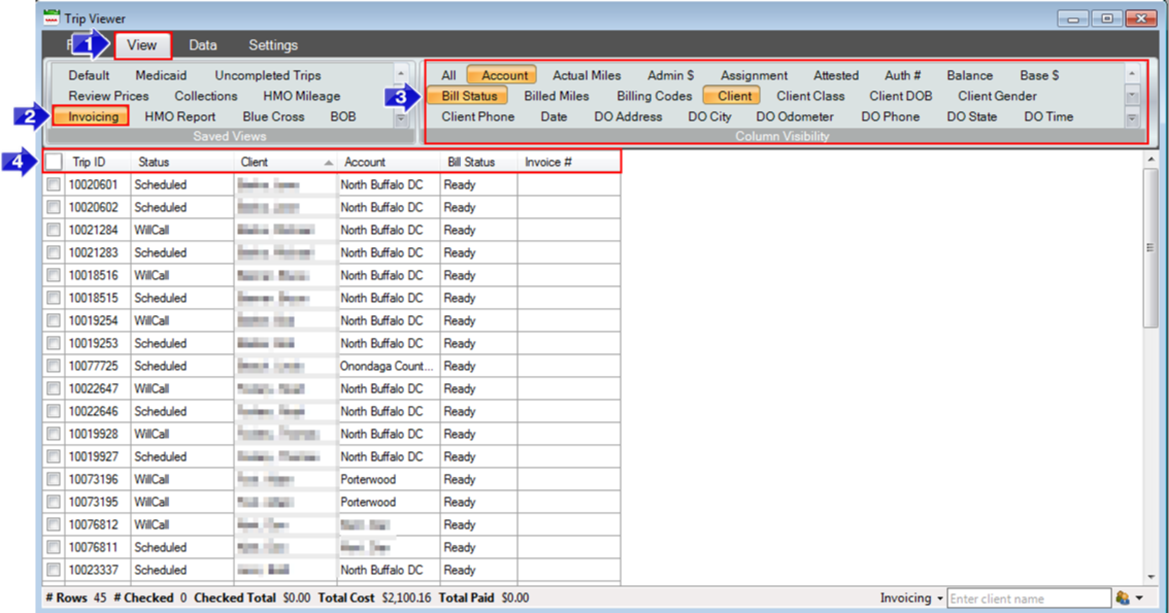
1. Select the View tab.
2. Select the view you would like to use from the Saved Views box.
3. Any column headers that are visible in this view are marked orange in the Column Visibility box.
4. The column headers are now displayed below to match the selected saved view options.
Related Articles:
How to Review Trips
How to Use the Trip Viewer Quick Search
How to Create a Custom View
Key Terms:
Custom View, Trip Viewer, View, Saved View, TripViewerFormHelp