![New Founders Software-White.png]](https://help.intelligentbits.com/hs-fs/hubfs/New%20Founders%20Software-White.png?height=50&name=New%20Founders%20Software-White.png)
Since many brokers require transporters to record digital trip data including GPS and timestamps - the Attestation screen in RoutingBox Web allows any transporter to review that data for completeness.
1. Log into RoutingBox Web at app.routingbox.com
2. Using the sidebar on the left, click Billing
3. Click Attestation
4. Choose your Date Range, or pick a pre-defined range from the little calendar, as shown below: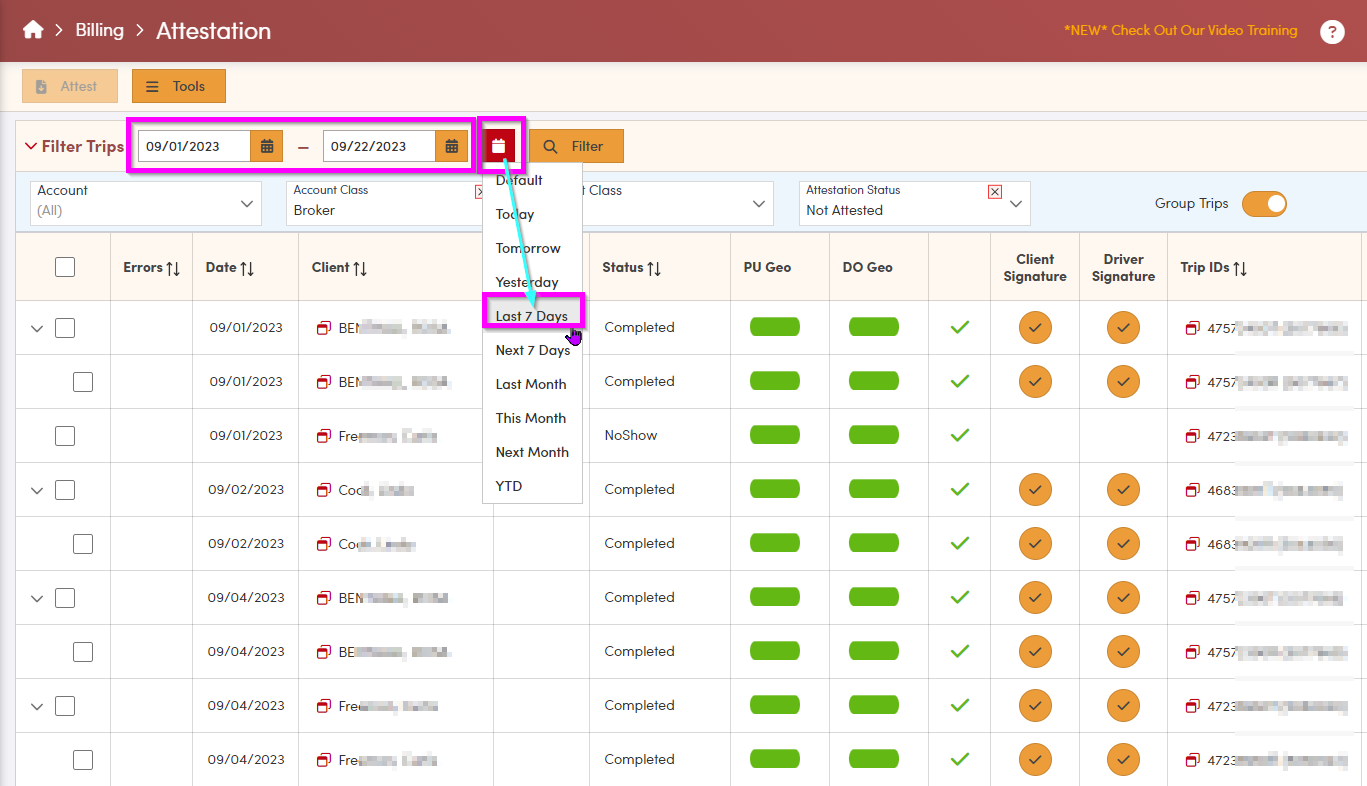
5. Next, choose either an Account, Account Class, or Client Class of trips to view for that date range (you might have to click the little down arrow next to Filter Trips to show Filters)
6. Once you've set the date range and dropdowns - Click the orange Filter button to see trips.
Reviewing Trip Data with GPS / Geolocation
Although the most important item to look for on the Attestation screen is the Green Checkmark, the PU Geo and DO Geo columns are also color coded to show how accurate the GPS / Geolocation data is. The colors indicate the quality of the GPS data, but the Green Checkmark indicates the overall accuracy of trip completeness.
If you're using RoutingBox Web to Attest to MAS trips, remember - only trips with Green Checkmark are "attestable" in RoutingBox.
- Green indicates that the GPS data collected by the driver's device around the expected stop location is considered very close and robust (many pings obtained).
- Yellow indicates that the GPS data collected by the driver's device around the expected stop location is considered fairly close and less robust (fewer pings obtained).
- Red indicates that the GPS data collected by the driver's device around the expected stop location is considered minimal (possibly just a single ping) and/or far away (but GPS data was still provided and is therefore still attestable).
- Gray indicates that no GPS data was captured around that stop and is therefore not attestable through RoutingBox.
After glancing at the GPS data - you'll want to focus on the column with the Green Checkmarks and Red X's. Hover over either icon to get all the timestamp details, or to view which timestamps are missing. See example below:
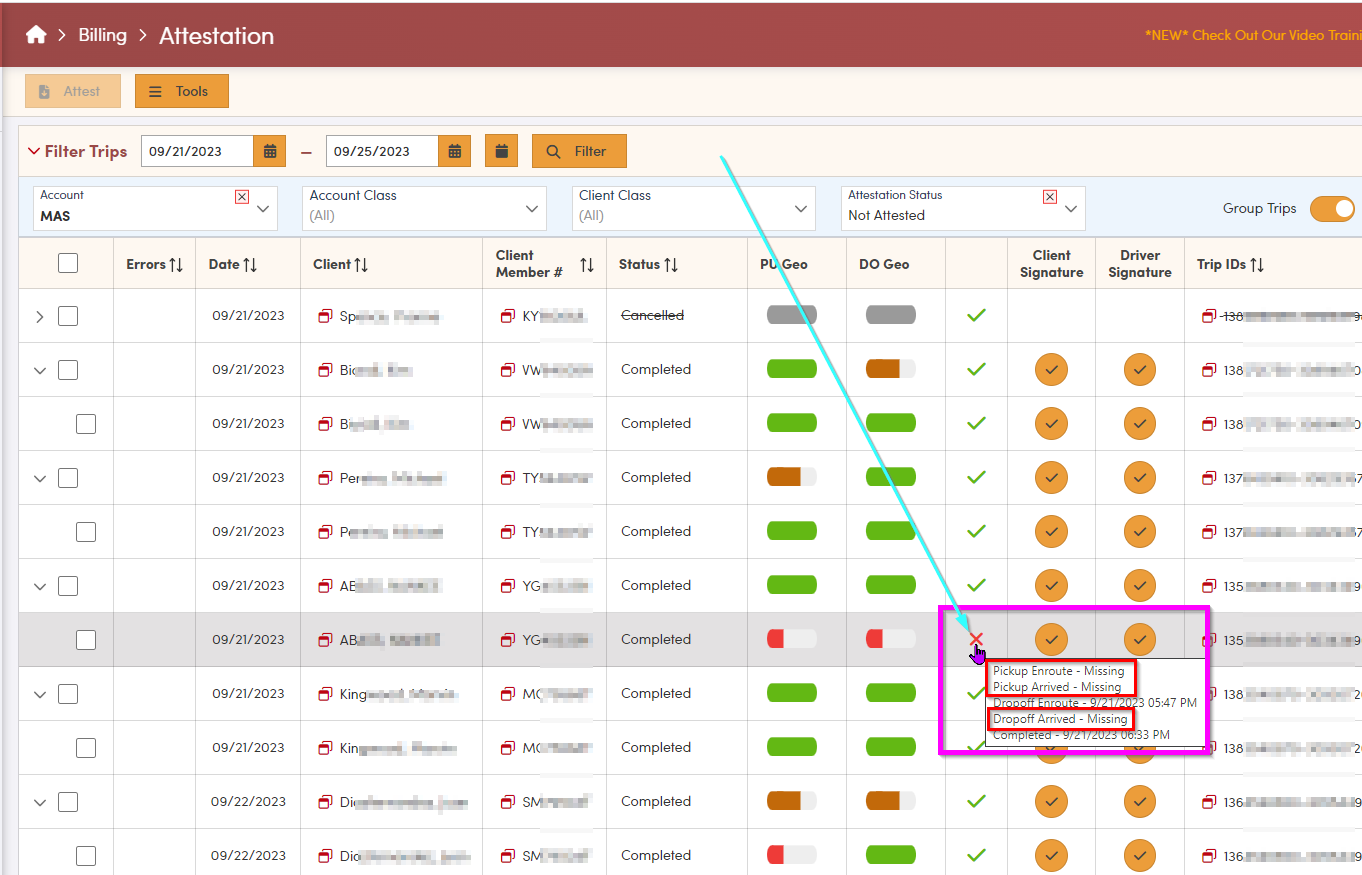
If a status is missing, it means the driver did not mark that status on this trip, so no timestamp or GPS location was recorded for that portion of the ride.
To prevent this from happening on future rides, drivers can refer to the RoutingBox Mobile Training Video or read the article, What is a Trip Status?
To review signatures saved on the trips, click the checkmark in either signature column to bring the full signature into view.
Using the Attestation screen is a good way to review trips for timestamps, signatures and GPS data completeness.
Attesting to MAS Trips in RoutingBox Web
After trips have been reviewed for completeness, use the first column to check off the trips that you'll be attesting to, as shown below.
Remember - MAS requires Attestation for full trip sets, so each trip leg must have a green checkmark in order for the group to be attestable. Trips with a Red X must be attested to in the MAS Portal.

One all the trips you'd like to attest to in MAS are checked off on the left, click the Attest button in the top left corner.
Click Attest once more on the pop-up to submit your trips to MAS directly.
Please Note: It takes some time for the attested trips to display on the MAS portal.
Also, you must import your MAS trips using the MAS Direct Connection or MAS Auto Importer in RoutingBox to attest using the MAS Direct Attestation feature.