![New Founders Software-White.png]](https://help.intelligentbits.com/hs-fs/hubfs/New%20Founders%20Software-White.png?height=50&name=New%20Founders%20Software-White.png)
Routes are required to use the Optimization tool. Once your routes are created, navigate to the Operations tab and select the Optimization icon. From the Route Optimization screen, click the green "New Job" button.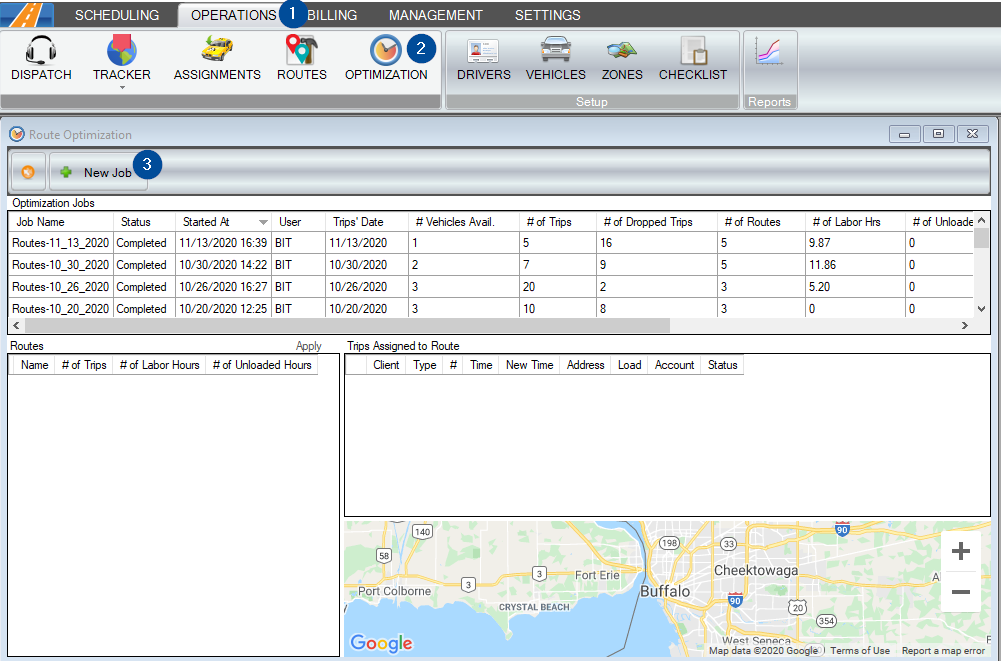
Step 1 will ask you to choose how you'd like to optimize.
This gives you the option of Routes or Assignments. Currently only Routes is available. Select Routes and click next.

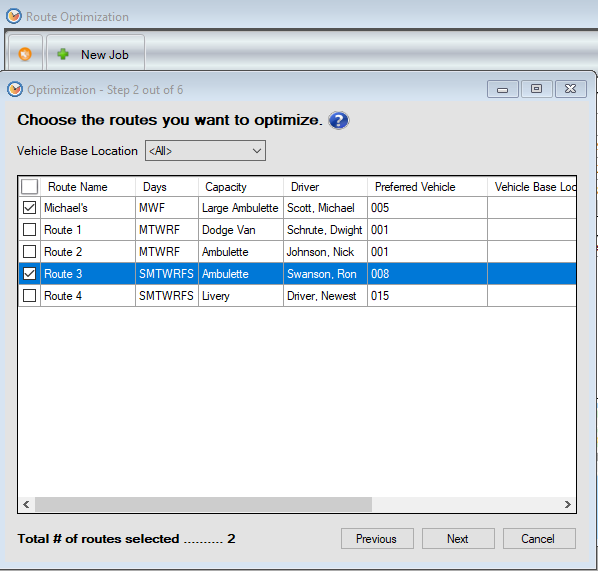
Step 2 is where you'll choose which routes to optimize.
This refers to which driver/vehicle we want to consider for trips. If an option is grayed out then the route is either missing required information (i.e. capacity, vehicle, or driver) or it does not operate on that day of the week. Select the checkbox to the left of each driver's name or the large checkbox to select all. Click next to go to the next step.
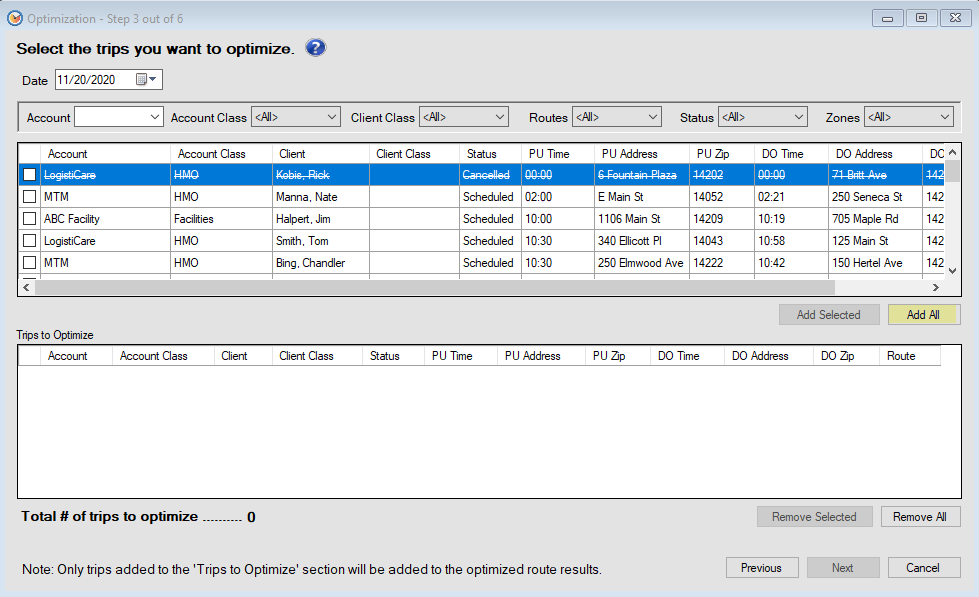
Step 3 is where you'll select the trips to optimize.
You can change the date, filter the Account, Account Class, Client Class, Route, Status of the trip, and/or Zone. At minimum, you'll want to ensure the Status reflects Scheduled to avoid optimizing On Hold or Cancelled trips.
Once you've applied the applicable filters, select the checkbox to the left of the trips you'd like to optimize or the "Add All" button. Trips that will be ran through the optimization algorithm will appear in the bottom section. Once done, click next.
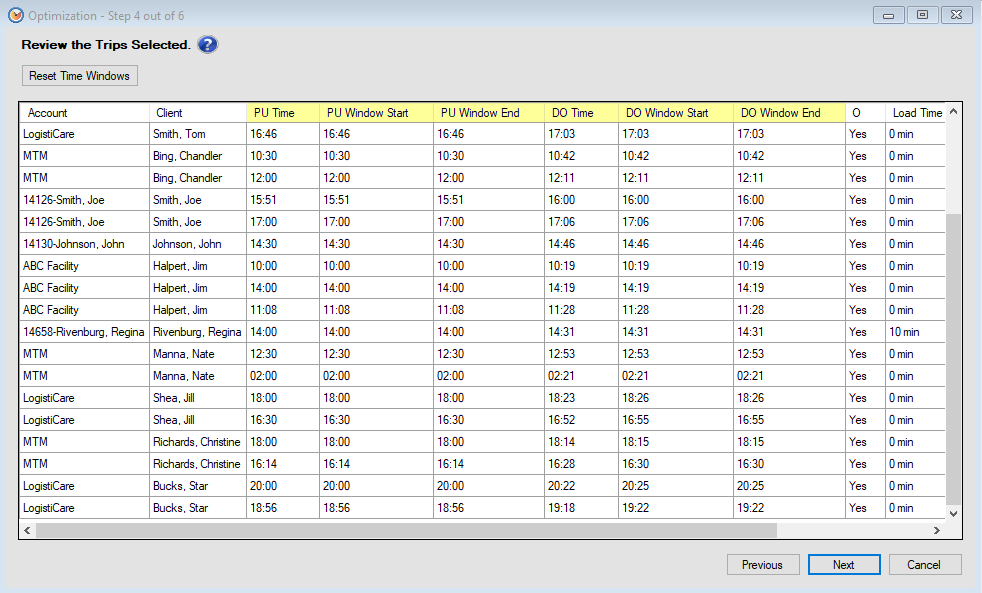
Step 4 is a review of the trips you've selected.
This is also the opportunity to Reset Time Windows (see Route Optimization Set-Up for more information). If needed, click the Reset Time Windows button in the upper left hand corner or select the next button.
Step 5 is your opportunity to adjust any settings before running optimization.
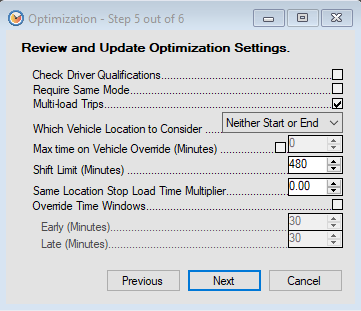
1. Check Driver Qualifications--When checked, will only assign trips with needs to routes who have a driver on it that will meet the qualifications.
2. Requires Same Mode--When checked, this will look at the vehicle to see which mode the vehicle class is associated with. Route Optimization will then only assign trips with that mode.
3. Multi-load Trips--When checked, will allow for the vehicle to have multiple passengers on board at the same time (recommended for best results).
4. Which Vehicle Location to Consider--Neither Start or End will disregard where the driver will begin and end their day. Both Start or End will ensure the driver starts and ends at the same location whether that be the company's base address or the park out address.
5. Max time on Vehicle Override (Minutes)--When checked, a client must be off the vehicle within the number of minutes displayed in the field.
6. Shift Limit (Minutes)--Restricts driver's route from exceeding this number.
7. Same Location Stop Load Time Multiplier--If trips begin or end at the same location at the same time; the load time (if applicable) on trips is adjusted for a more accurate calculation. Enter the amount you'd like the load times to be multiplied by (normally done as a decimal).
8. Override Time Windows--When checked, you'll be able to enter a value into the Early and Late Windows. Route Optimization will be granted the permission to push the pick-up and/or the drop off time by that many minutes; making the trip early or late.
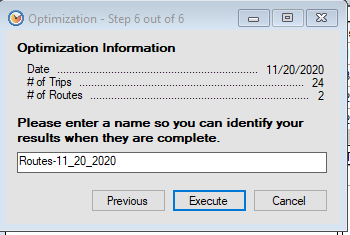
Step 6 acts as an overview of everything being ran through the optimization tool and allows you to change the name to easily find the results
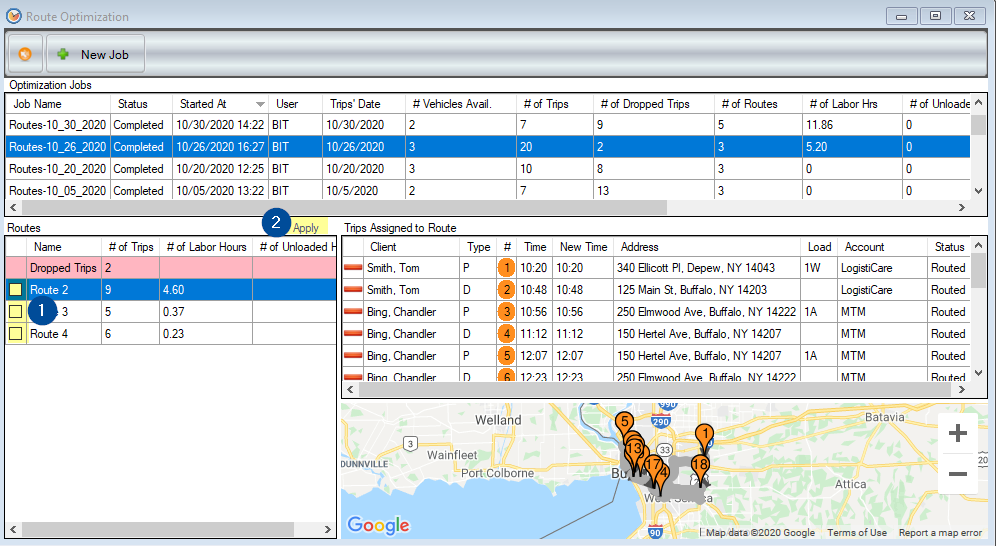
Once the job finishes processing the results, you'll be able to preview the trips assigned to each route from the Route Optimization screen. Note: This will not assign the trips for you.
When you're ready to assign the results, select the checkboxes to the left of the route(s) name and then click the Apply button shown below.
- To assign drivers, navigate to the assignments screen and enter or copy the drivers and vehicles scheduled for the day.
- Once all drivers and vehicles are entered, click the taxi icon to Assign Typical Routes by Driver or Vehicle depending on how you created your routes.
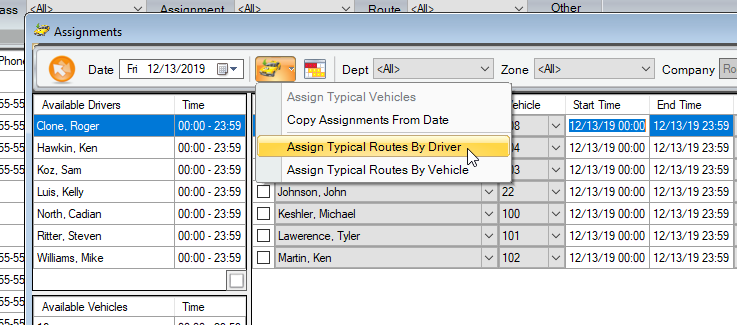
- Your trips will now be assigned to the correct driver on the Dispatch screen
Unsure if route optimization is included in your current subscription or have additional questions? Reach out to us today via live chat or email!