![New Founders Software-White.png]](https://help.intelligentbits.com/hs-fs/hubfs/New%20Founders%20Software-White.png?height=50&name=New%20Founders%20Software-White.png)
Navigate to the Scheduling tab, then select the Clients icon.
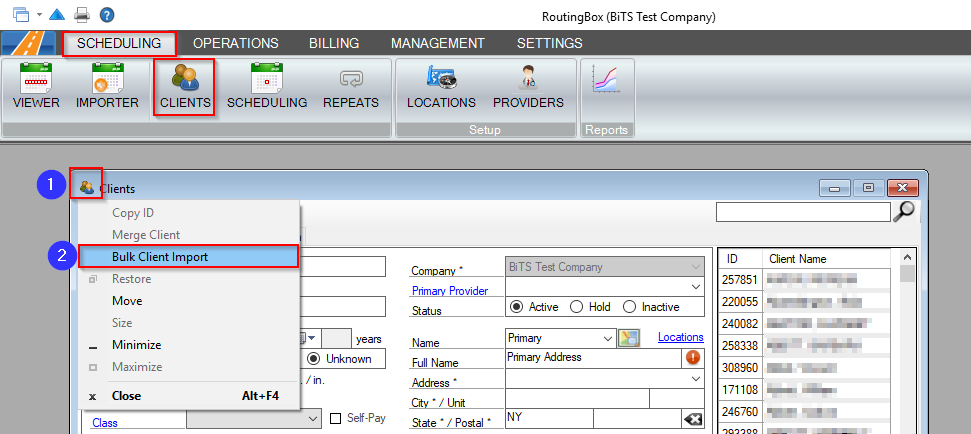
1. Click on the Client icon  at the top left corner of the Client screen..
2. Click on Bulk Client Import.
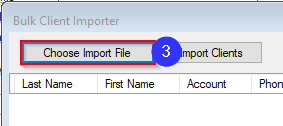
3. Click on Choose Import File and select your desired .csv file from your computer.
Note: You must use the template provided in the Bulk Client Importer. Any other file will not work. It is important NOT to change any headers or formatting.

4. Once the file loads into the grid, you can click into any field to edit the information.
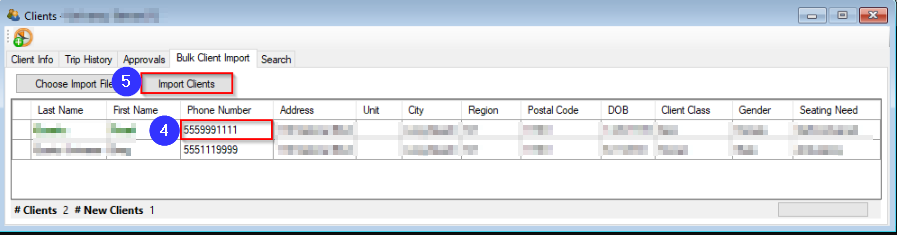
5. Click on Import Clients to import the client profiles into RoutingBox.
6. After clicking Import Clients, you will be notified if a client cannot (or should not) be imported. An alert icon  will populate if there is a problem or window icon
  if the client already exists.
Key Terms:
Client, Client Profile, Import, Client Import, Bulk Client Import, .csv file