![New Founders Software-White.png]](https://help.intelligentbits.com/hs-fs/hubfs/New%20Founders%20Software-White.png?height=50&name=New%20Founders%20Software-White.png)
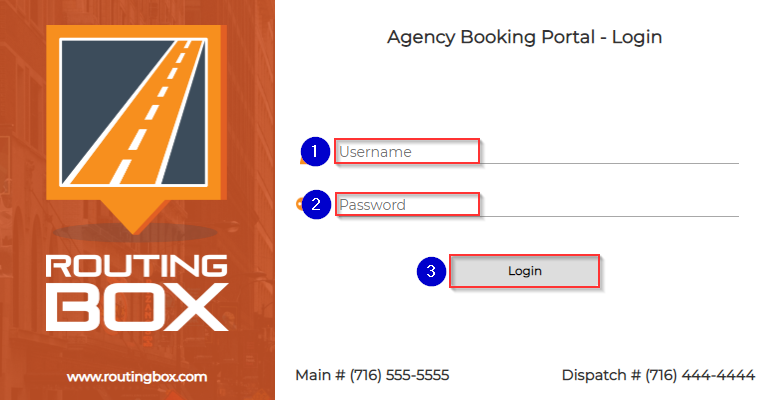
1. Enter the Username provided by the transporter with whom you're scheduling transportation.
2. Enter the Password provided by the transporter with whom you're scheduling transportation.
3. Click Login to enter the Booking Portal.
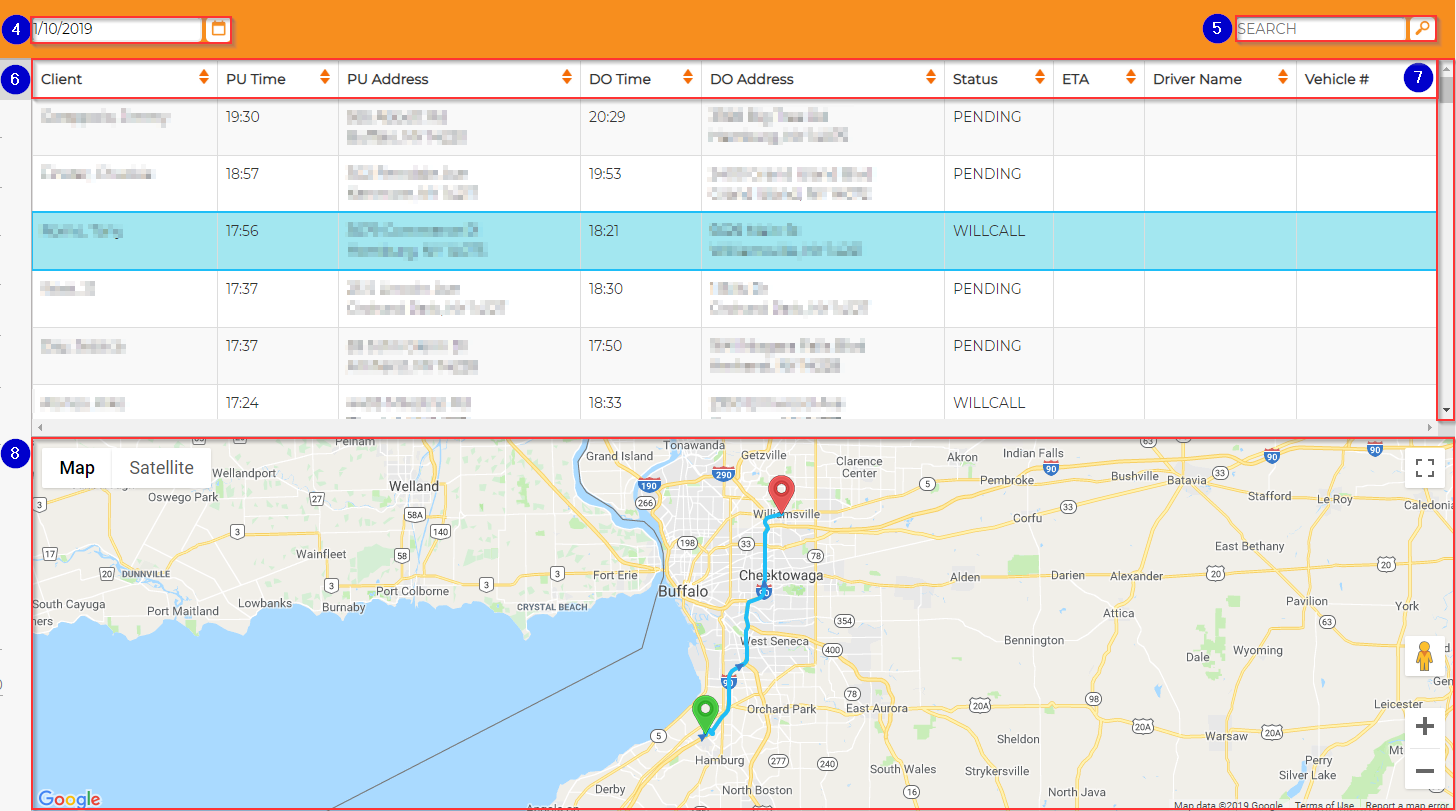
4. This field contains the Date to be viewed. The Date defaults to the current day, but it can be changed by manually typing a Date or selecting one by clicking the small calendar icon to the right of the field.
5. The Search field filters the trips shown based on matching words or partial words. The columns searched include Client (first or last name), PU Address, DO Address, Driver Name, and Vehicle #.
6. This header labels the information in each column. Patients displayed in this section have transportation scheduled for the selected date.
- Client shows the client last name displayed first
- The PU Time is the Scheduled Pick Up Time
- The PU Address is the address where the client will be picked up
- The DO Time is the Scheduled Drop Off Time
- The DO Address is the address where the client will be dropped off
- The Status column shows the status of a given trip, which can be any of the following values: pending, will call, completed, cancelled, or pickup_enroute
- Driver Name shows the driver first name displayed first
- The Vehicle # shows which vehicle the company has assigned to pick up the client
7. The scroll bar can be dragged up and down to display different trips.
8. The Map displays the PU location, DO location, and the expected route for the selected trip.
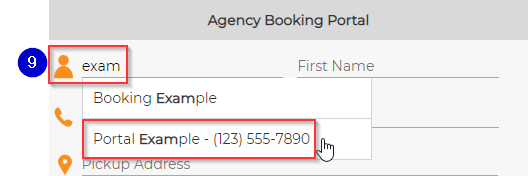
9. On the left side of the Booking Portal, there is a Last Name field. Use this field to search for your existing patients when scheduling transportation. Clicking the name of an existing patient will auto-fill as many fields as possible, shown below. Otherwise, enter the Last Name and First Name to create a new patient.
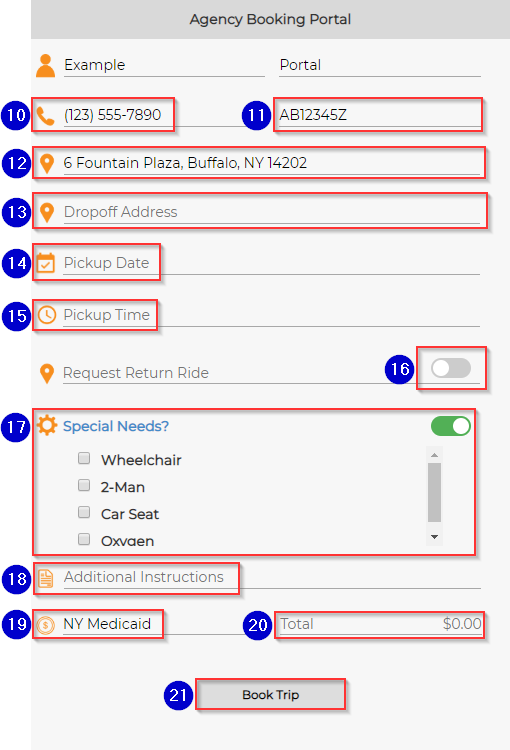
10. In Client Phone #, a phone number will populate if there is one saved on the transporter's profile for the patient.
11. The Member # field displays the patient's ID number.
12. The first time a transportation is scheduled for a patient, the Pickup Address will be added as this patient's primary address with the transportation provider. On subsequent transportation, the Pickup Address will be populated based on the primary address for the patient. Type in this field to add or replace the Pickup Address.
13. Enter the destination in the Dropoff Address field.
14. Enter the date transportation will take place in the Pickup Date field.
15. Enter the Pickup Time to indicate when a vehicle needs to arrive at the Pickup Address.
16. The Request Return Ride toggle defaults to grey, which indicates that no Return Ride has been requested. Click the toggle to create a Return Ride. The toggle will change to green to indicate that the patient or facility will contact the transporter when they're ready for their ride back. The Return Ride swill use the Dropoff Address as the starting point and return the patient to their initial Pickup Address.
17. The Special Needs? section displays additional needs for the patient. Check these needs off to indicate to the transportation provider that a specific need is necessary for this patient.
18. Type in the Additional Instructions field to provide any additional notes to the transportation provider or driver. (Examples: "Please call on arrival," "Please use the side entrance, " etc.)
19. The Payer field indicates the account that will be billed for this transportation. These options can be updated by the transportation provider.
20. Once addresses and a payer are added, the Total cost will be calculated here.
21. Clicking the Book Trip button will begin the validation process for scheduling the transportation.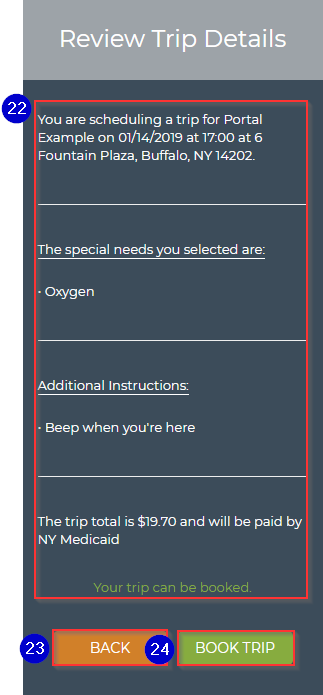
22. The upper section of the Review Trip Details window displays the Pickup Address, Time, Date, Special Needs, Additional Instructions, the Total Trip Cost, and the Payer selected.
23. Click Back to update this information.
24. Click Book Trip to schedule and send this information to the transportation provider.
Related Articles:
How to Create a Custom Export
How to Create a Client
How to Create an Account
Key Terms:
Booking Portal, Schedule, Transportation