![New Founders Software-White.png]](https://help.intelligentbits.com/hs-fs/hubfs/New%20Founders%20Software-White.png?height=50&name=New%20Founders%20Software-White.png)
Navigate to Operations tab, then select the Tracker icon.
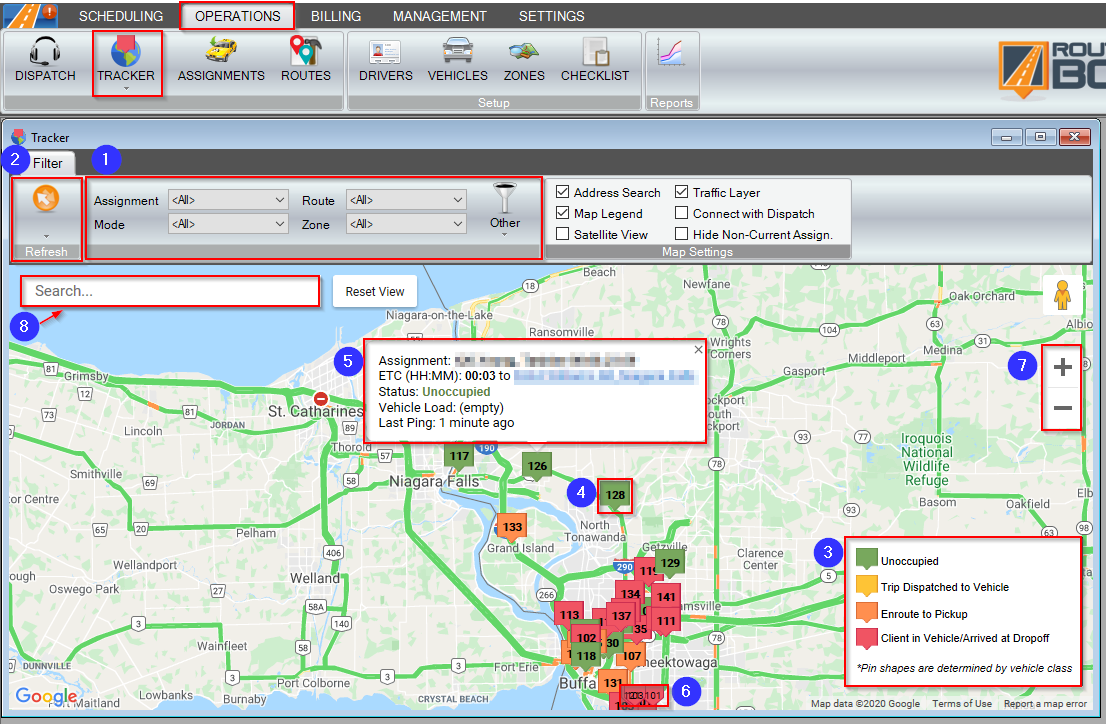
1. The map can be filtered to display vehicles based on Assignment, Mode, Route, Zone, or Qualification.
2. You can set the Tracker to Auto-Refresh by clicking on the down arrow and selecting the frequency, or it can be refreshed at any time by clicking the Refresh button.
3. The Map Legend can be displayed on the bottom right of the Tracker. This can be toggled on or off by checking or unchecking the Map Legend setting.
 Unoccupied
 Trip Dispatched to Vehicle
 Enroute to Pickup
 Client in Vehicle/Arrived at Drop-off
4. The markers on the screen display the vehicle number.
5. Hovering over the marker will display information about that vehicle’s current Assignment, ETC (estimated time to completion), Status, Vehicle Load, and Last Ping.
6. Markers pointing to the edges of the screen indicate that the vehicle is not currently on this part of the map. Clicking on the edge marker or scrolling in that direction will display the vehicle at its current location.
7. To zoom in and out, use the buttons on the top right of the map or the scroll wheel on your mouse.
8. To Search for a location, type the address in the search bar and hit enter.
Related Articles:
How to Review Tracker History
How to Search for an Address
How to Toggle Map Settings
Key Terms:
Assignment, Driver, GPS, Operations, Route, Tracker, Vehicle, Zone, TrackerFormHelp