![New Founders Software-White.png]](https://help.intelligentbits.com/hs-fs/hubfs/New%20Founders%20Software-White.png?height=50&name=New%20Founders%20Software-White.png)
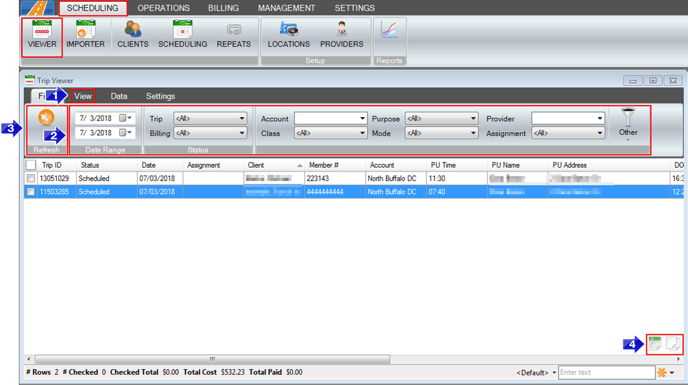
Navigate to the Scheduling tab, then select the Viewer icon.
-png-1.png)
1. Choose the Date or Date Range you would like to review.
2. Use the filters to further narrow down what trips will appear in the grid.
3. Click Refresh to load the trips into the grid.
4. To change what trip information is displayed in the screen, click the View tab.
5. Choose what information will be shown by clicking the column names in the Column Visibility section. Columns that will be displayed are highlighted in orange.
- To review actual trip times, we recommend including the PU Time (Arrived), PU Time (Depart), DO Time (Arrived), and DO Time (Depart) columns.
- To review trips that are missing signatures, we recommend including the Signed (C) and Signed (D) columns.
- To review payments and billing status and payments, we recommend including the Bill Status, Total $, and the Paid $ columns. The Purpose, Mode, and Needs columns also impact billing and may also be helpful.
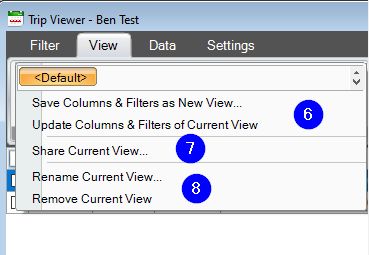 6. Here, you can save a new view (Save Columns & Filters as New View) or alter an existing one (Update Columns & Filters of Current View).
7. Share Current View, when clicked, will share the view to another user account, bringing up a dialogue window that will allow to specify which RoutingBox users should have access to the selected view.
7. Rename Current View will rename the currently-selected view, and Remove Current View will delete the currently-selected view.
How to Create a Custom Export
The Trip Viewer makes it easy to export data from RoutingBox for use outside of the application.
1. Select the View tab and customize the fields you want to see for export
2. Specify a Date Range and input any other filters to specify data you need to review
3. Click the refresh button to view the information selected in grid
4. Move the mouse cursor to the bottom-right corner of the trip viewer screen until the Export to Excel and Copy icons appear
- The Export to Excel (in green) will create and save a .csv/Excel copy of the Trip Viewer screen to where you select.
- The copy icon works like the copy and paste function on your computer, allowing you to paste the information into a different document.
Using the Data Tab in the Trip Viewer
The Trip Viewer also allows RoutingBox users to make bulk changes for multiple trips at once.
Navigate to the Scheduling tab, then select the Viewer icon.
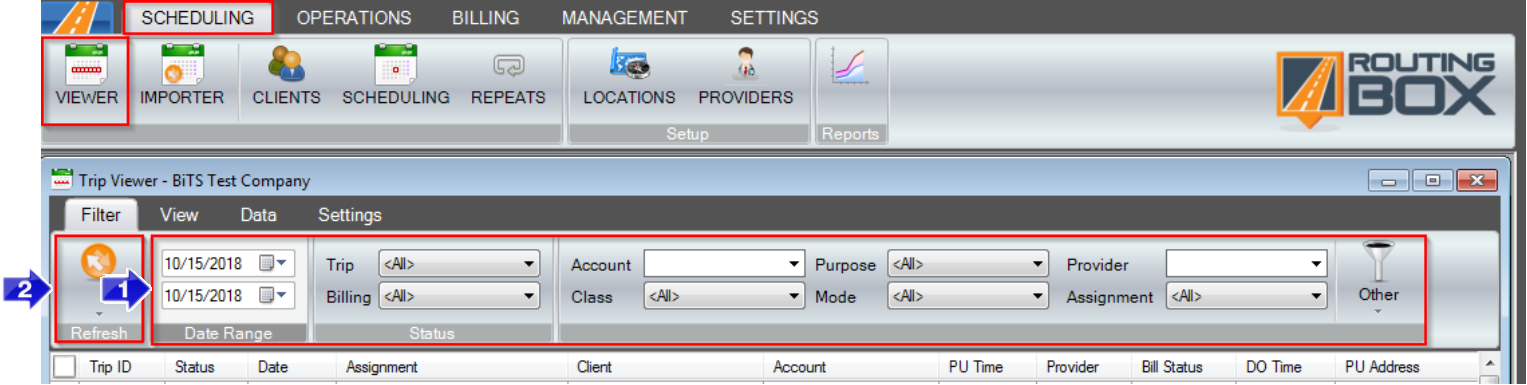
1. Use the filters to narrow down what trips will appear in the grid.
2. Once you've selected your filters, click Refresh to populate the grid.
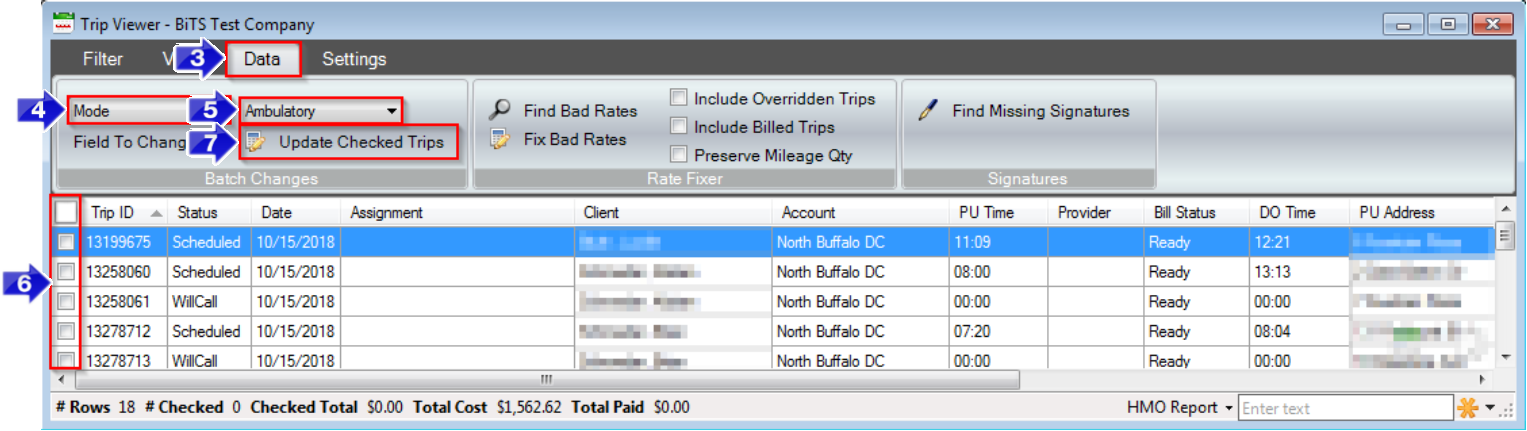
3. Select the Data tab.
4. Select the Field To Change.
5. Select what you'd like this field changed to from the drop-down.
6. Select the trips you would like to edit. If you click the box at the top, all trips in the grid will be selected.
7. Click Update Checked Trips.
How to Use the Bad Rate Fix Tool
If the rates on an account are updated and we want those changes to be reflected on existing trips, the Trip Viewer allows you to update rates and procedure codes on multiple trips all at once.
Navigate to the Scheduling tab, then select the Viewer icon.
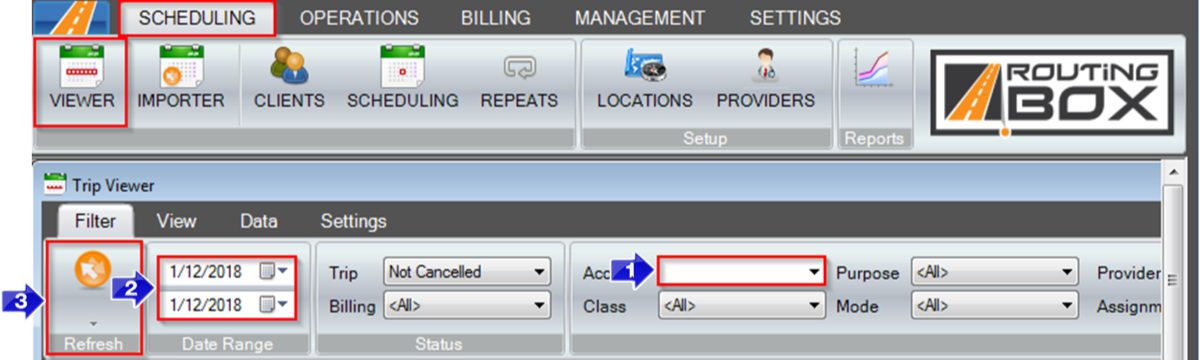
1. Enter the Account.
2. Select the Date Range.
3. Click the Refresh button. Trips with the selected filters will populate in the grid.
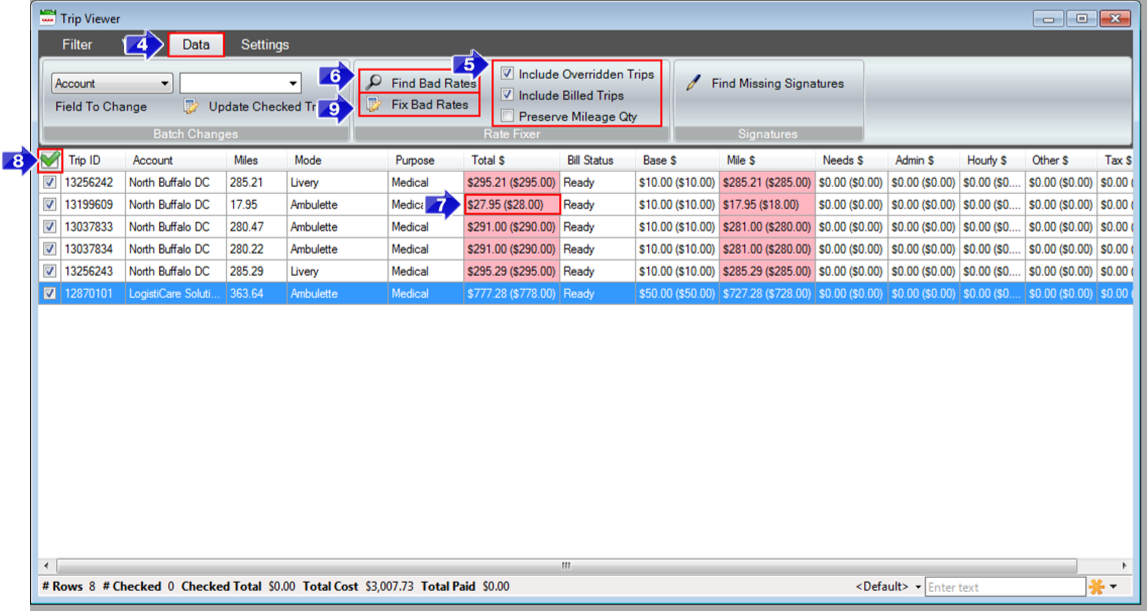
4. Select the Data tab.
5. Check the boxes to select the types of trips that should be checked for bad rates.
6. Click Find Bad Rates. Trips with an incorrect procedure code or rate will remain in the grid.
7. The current rate appears in the left side of the rate columns. The updated rate appears on the right side in parenthesis. Verify the new rates are correct before updating the trips.
8. Check this box to select all trips. You can also check specific boxes if you would only like certain trips updated.
9. Click Fix Bad Rates. All rates have been updated once the grid is emptied.
Video Link: