How to View and Edit Odometer Readings
RoutingBox allows you to view and edit odometer readings using four different methods.
Method One, Assignments Screen:
Typically, this method should be completed first, before making the odometer corrections elsewhere.
This method will allow you to view and edit a driver’s starting and ending odometer reading for their shift, as entered on the Vehicle Checklists.
Navigate to the Operations tab and select the Assignments icon.
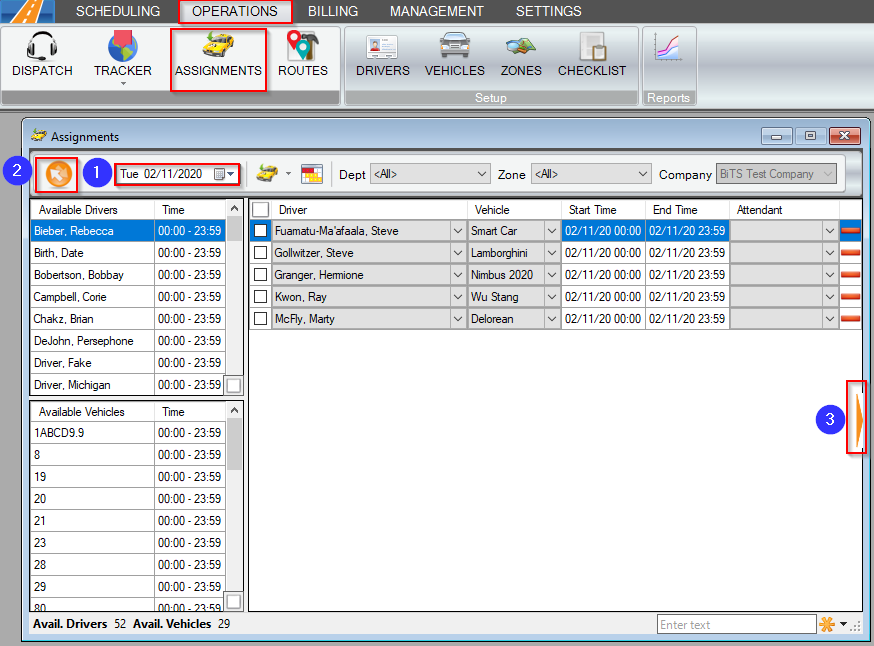
1. Select the Date you would like to view.
2. Refresh the screen.
3. Select the orange arrow to pop open the Assignments screen.
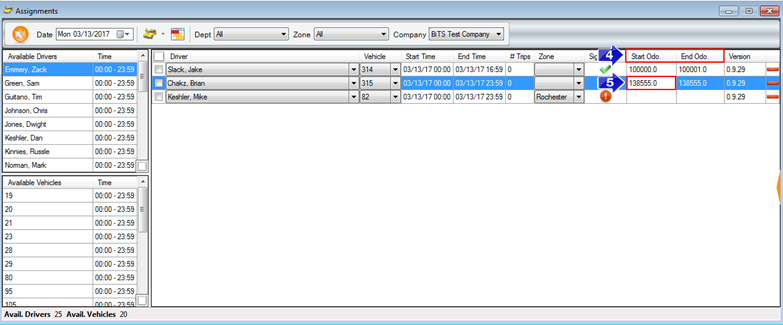
4. The Start Odometer and End Odometer columns show the odometer reading entered through the check list prior to starting trips and once all trips are completed.
5. If needed, the Start Odo. and End Odo. fields can be edited. Select the field you would like to edit and enter the correct odometer reading.
Method Two:
This method will allow you to view and edit the most recently saved odometer reading for a vehicle.
Navigate to the Operations tab and select the Vehicles icon.
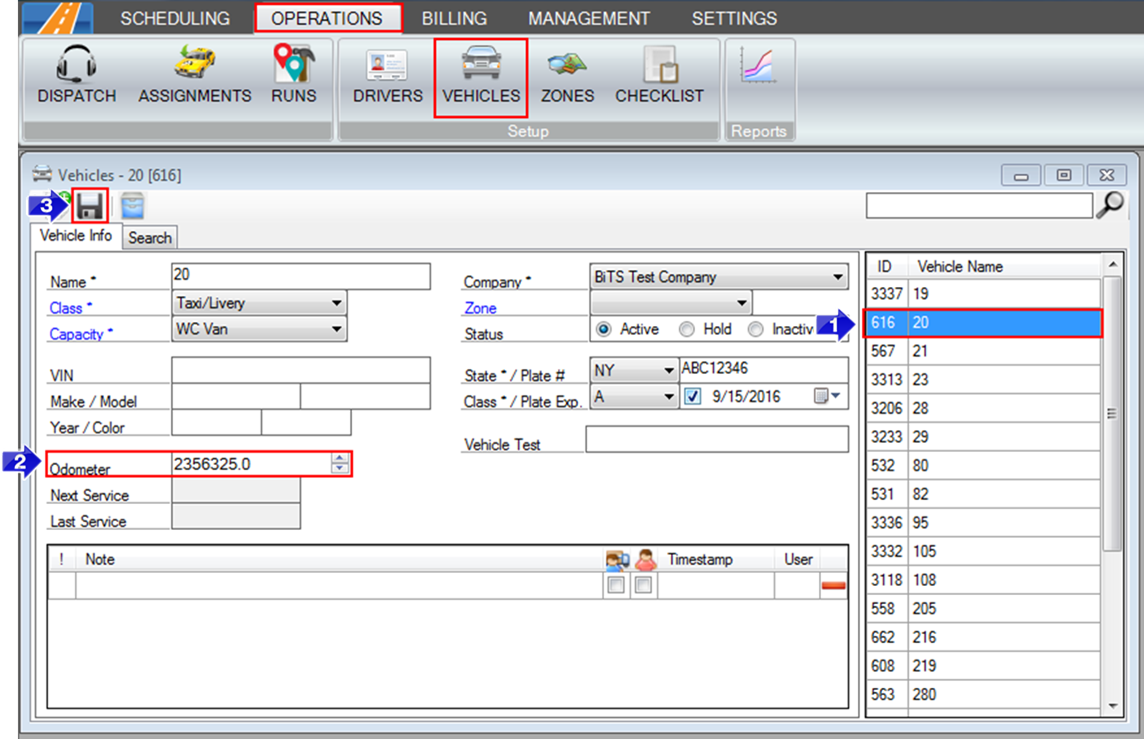
1. Select the Vehicle you would like to edit from the list.
2. On the Odometer field, adjust the reading by either typing into the field or using the arrows next to the field.
3. Save your changes.
Method Three:
This method will allow you to view and edit the PU and DO odometer readings for each trip.
Navigate to the Operations tab and select the Dispatch icon.
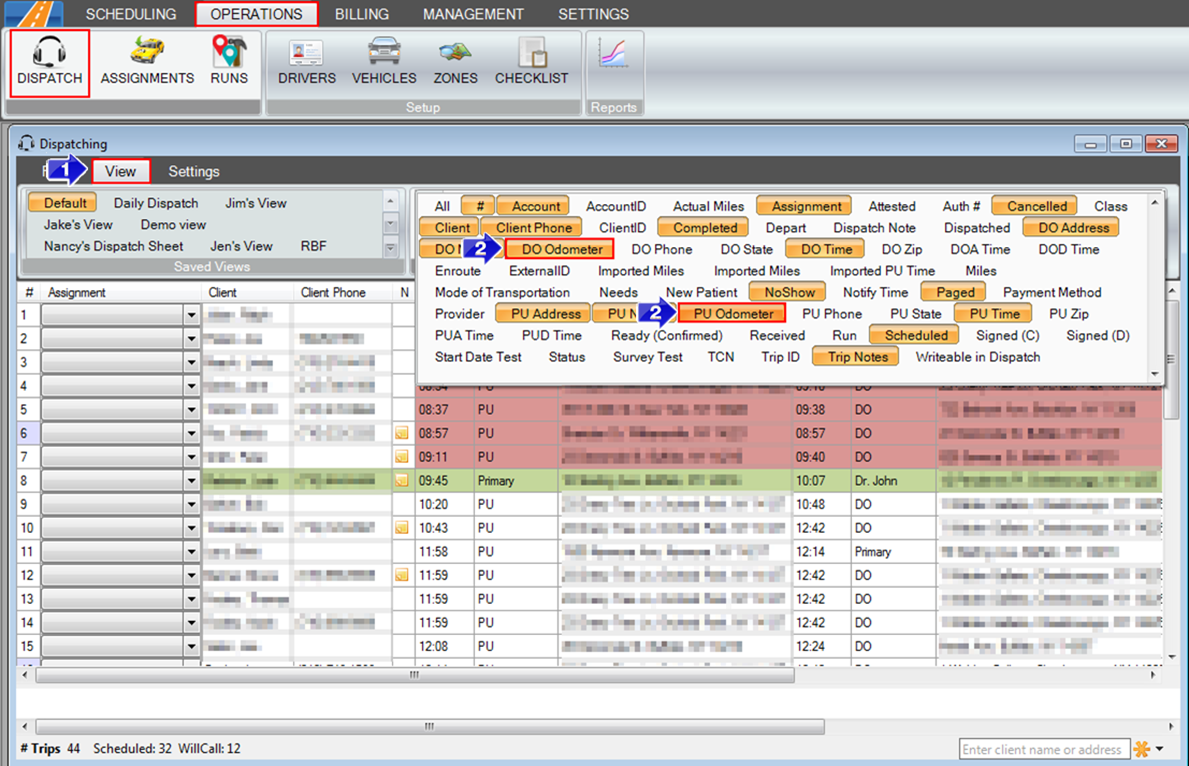
1. Select the View tab.
2. Select the DO Odometer and PU Odometer columns under Column Visibility.
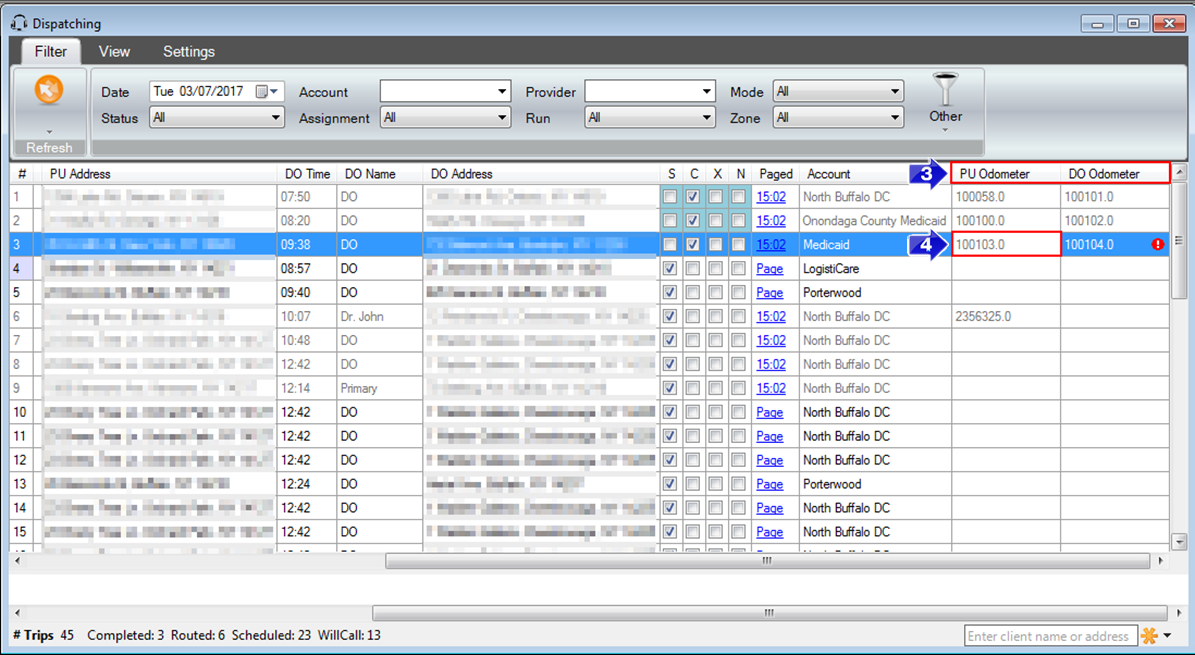
3. The PU Odometer and DO Odometer columns will display what the driver has entered into the mobile app at each stop.
4. Click on the PU/DO Odometer fields to edit the information in the grid.
Method Four:
This method allows you to edit or view an odometer reading from the Trip Scheduling screen.
Navigate to the Scheduling tab and select the Scheduling icon.
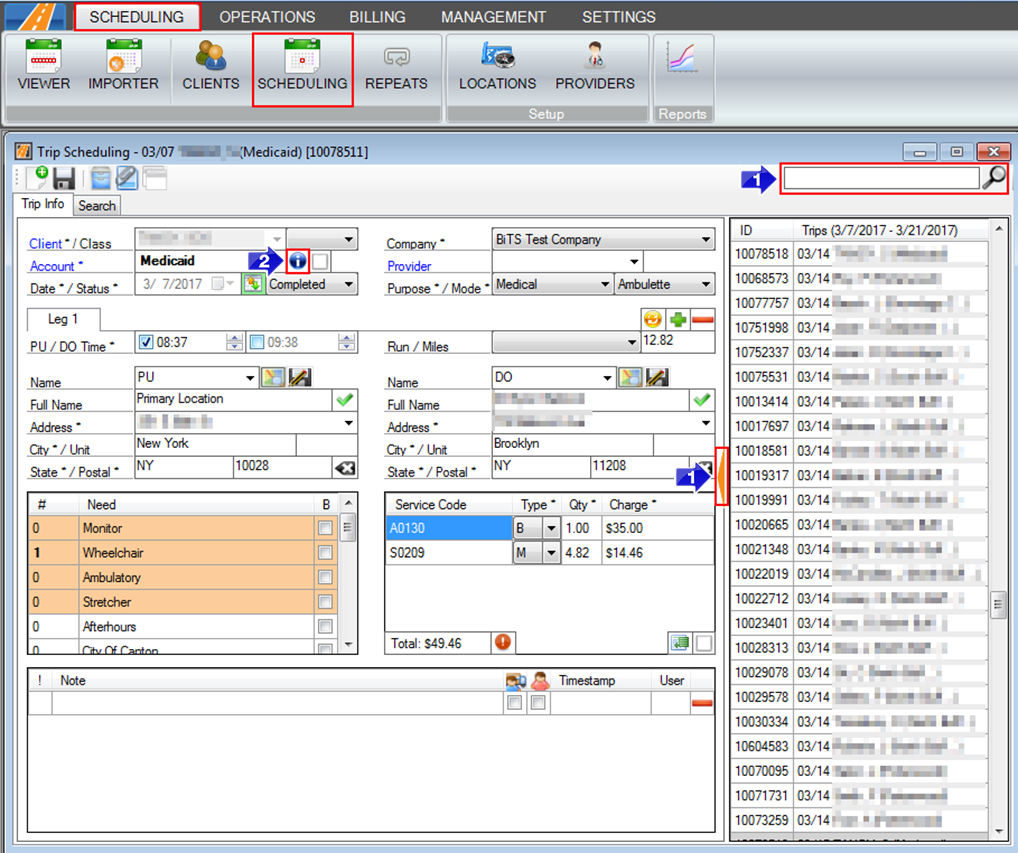
1. Select the orange arrow to view the trips grid, then select a trip or search for one in the Search bar.
2. Select the blue info icon. Further information about the trip will be viewable on this screen.
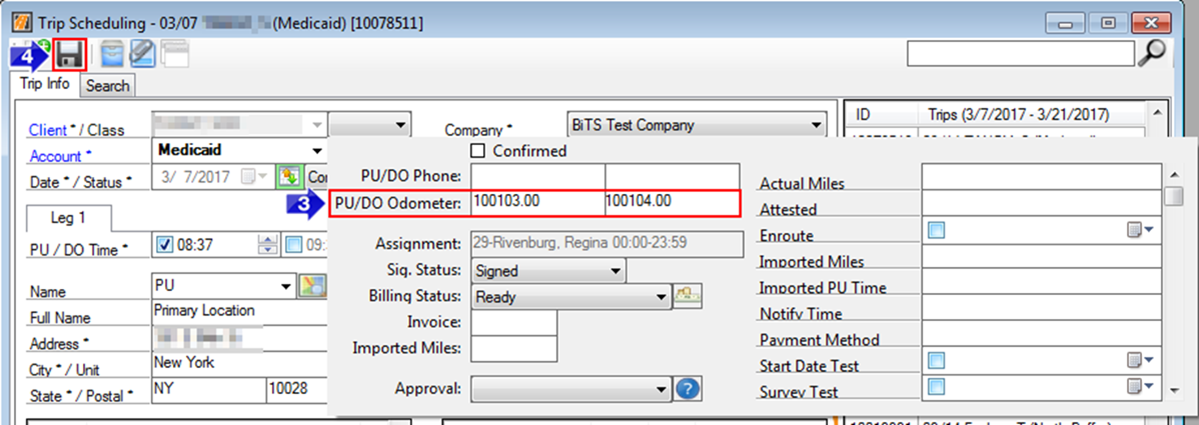
3. The PU/DO Odometer fields will be displayed. Edit this information by typing into the fields.
4. Save any changes.
![New Founders Software-White.png]](https://help.intelligentbits.com/hs-fs/hubfs/New%20Founders%20Software-White.png?height=50&name=New%20Founders%20Software-White.png)