![New Founders Software-White.png]](https://help.intelligentbits.com/hs-fs/hubfs/New%20Founders%20Software-White.png?height=50&name=New%20Founders%20Software-White.png)
Navigate to the Scheduling tab, then select the Scheduling icon.
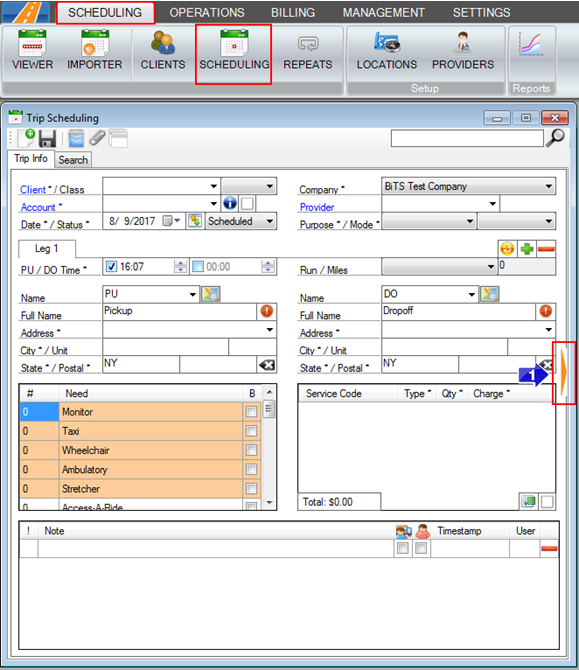
1. Click the orange arrow on the right side of the screen.
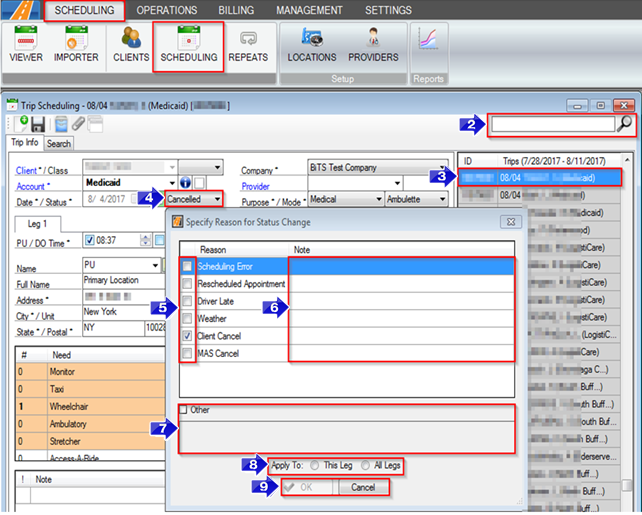
2. Type the client name or trip ID into the search bar and click the magnifying glass to find the trip you would like to review.
3. Click on the trip you would like to review.
4. If the status is no show or cancelled, right click the status to open the Specify Reason for Status Change
5. You can add and remove Reasons for the status change by clicking in the check boxes.
6. You can add a more specific Note regarding the reason for the status change here.
7. You can add a custom status change reason by clicking the Other check box and adding notes in the corresponding box.
8. Choose whether you would like to apply this status change to This Leg or All Legs.
9. Click OK to apply your changes or click Cancel if you have no updates to make.
Note: Your company must have the setting activated to allow you to specify the reason for a status change. Please contact support if you would like to activate this setting.