![New Founders Software-White.png]](https://help.intelligentbits.com/hs-fs/hubfs/New%20Founders%20Software-White.png?height=50&name=New%20Founders%20Software-White.png)
Menu Bar
RoutingBox includes clearly labeled tabs for each functionality set available within the software. Below, we have an overview of what you can access within each section.
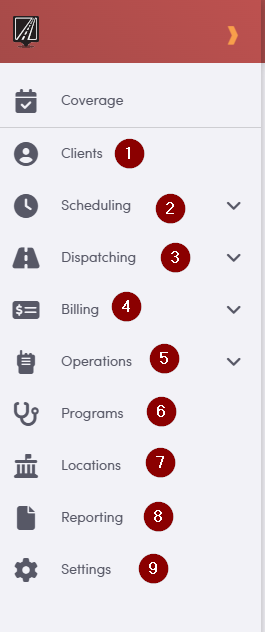
1. Clients: The Clients tab is where you can view your full list of clients and create new client profiles.
2. Scheduling: The Scheduling tab is where you can view, import, and manage all of your trip data, as well as create and adjust trip schedules.
3. Dispatching: The Dispatching tab is where you can monitor live trips, assign vehicles and drivers, and manage real-time changes to your schedules.
4. Billing: The Billing tab is where you can generate billing, post payments, and upload remittances to keep your reimbursement process organized and up to date.
5. Operations: Here, you can access Route Builder to design and optimize your routes, as well as additional operations tools that support your day-to-day workflows. This menu also contains the Employee and Vehicle profiles, where you can review and manage important information about your team and fleet. Timekeeping is also found here, allowing you to track staff time and activity in one place.
6. Programs: The Programs tab is where you can create and manage Provider profiles for facilities and service locations that your Clients frequently travel to. If you are unsure how to configure Providers for your billing needs, please contact your CEM for guidance.
7. Locations: The Locations tab is where you can create and manage commonly used addresses, making it easier to enter accurate information quickly and update it as your operations evolve.
8. Reporting: The Reporting tab is where you can review detailed reports on billing, operational performance, and other key activities, helping you analyze trends, monitor productivity, and make informed decisions about your day-to-day operations.
9. Settings: The Settings tab is where you can adjust system preferences to tailor how RoutingBox supports your day-to-day operations.
Dashboard
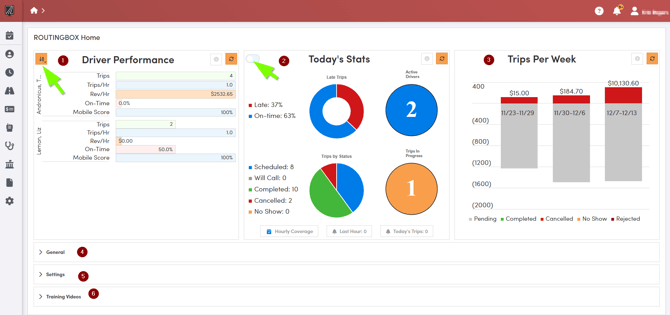
On the home screen when first logging into RoutingBox Web you will see the dashboard. The dashboard has a quick view of a few metrics including driver performance, today's/tomorrow's stats and trips per week.
1. In the Driver Performance section, use the orange button with the arrow and “A–Z” icon to organize your data. With this control, you can display drivers from least to most productive (the default view), change to a table layout for easier comparison, sort by driver name, and download the Driver Performance data to support deeper analysis and reporting.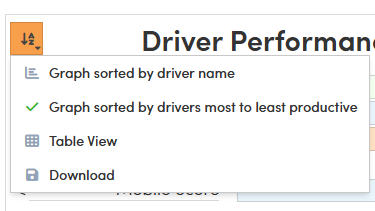
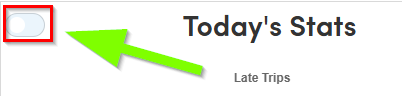
2. The Today’s/Tomorrow’s Stats section gives you a quick snapshot of your on-time versus late performance, the number of trips currently in progress, how many drivers are active, and the total count and status of your trips for the day. To switch between viewing today’s and tomorrow’s data, use the toggle in the top left-hand corner of this section.
3. Trips per Week provides a quick visual summary of how many trips your organization is completing and the revenue those trips are generating over time.
4. General is a section that provides shortcuts to the most frequently used areas of RoutingBox, allowing you to access key tools and workflows quickly from the dashboard.
5. Settings on the Dashboard provides a direct shortcut to key configuration options, mirroring what you can access through the main Settings tab.
6. Training Videos provides a quick shortcut to educational video resources for RoutingBox, allowing you to visually learn key features and workflows step by step.