![New Founders Software-White.png]](https://help.intelligentbits.com/hs-fs/hubfs/New%20Founders%20Software-White.png?height=50&name=New%20Founders%20Software-White.png)
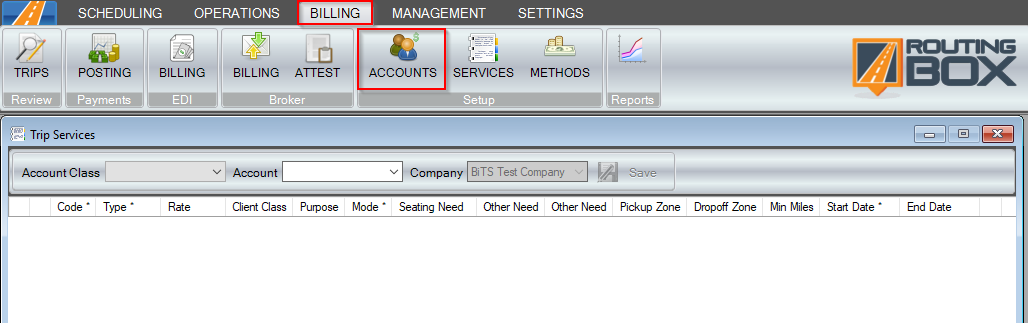
Access the Trip Services by clicking the Billing tab and clicking the Services icon.
1. Your services can be applied by Account or by Account Class, so these will need to be created before your service codes. You can select either at the top of the grid. Each Account or Account Class will have its own Trip Services setup. Here, we've selected the Fake Fake account.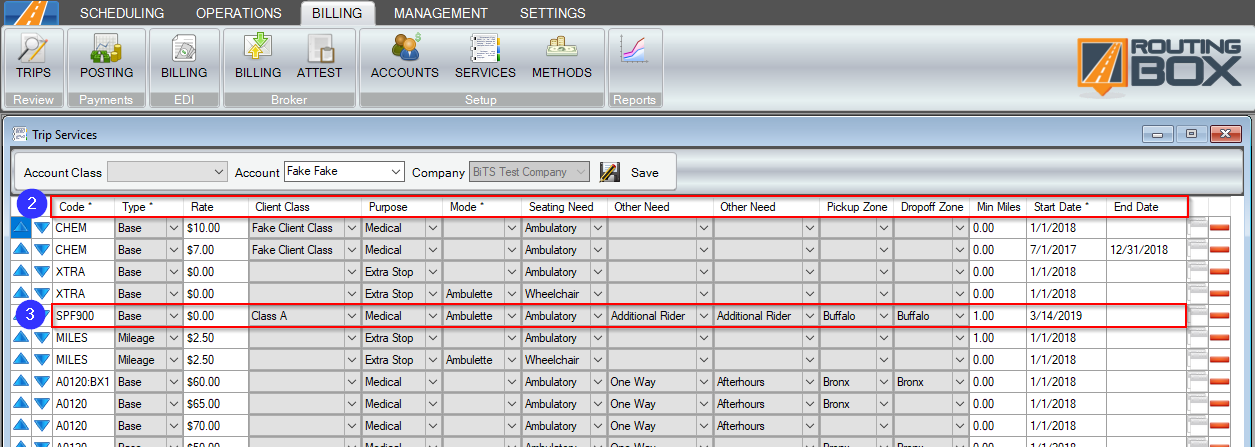
2. Along the top of the grid, you'll notice a number of columns. Each column is a description of the rate or a filter that narrows the trip criteria when the rate is applied.
3. Each row shows a rate that will be applied should the column filters be applicable.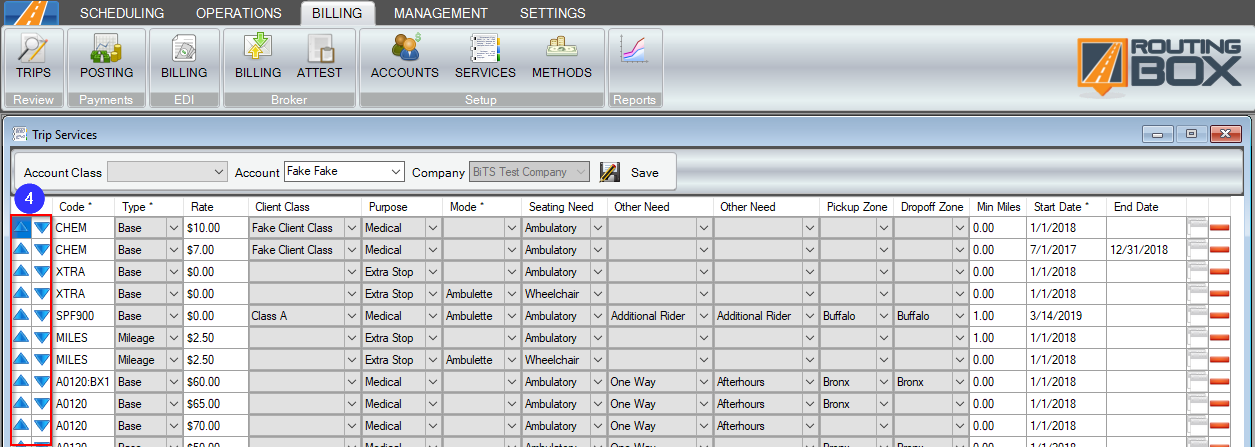
4. The up and down arrow columns on the far left can be clicked to arrange the rates in different vertical orders.
This is important because the Trip Services screen is read by RoutingBox in a left to right and top to bottom way, much like English writing/reading. This will be covered in more detail as we review our example grid at the bottom of the screen.
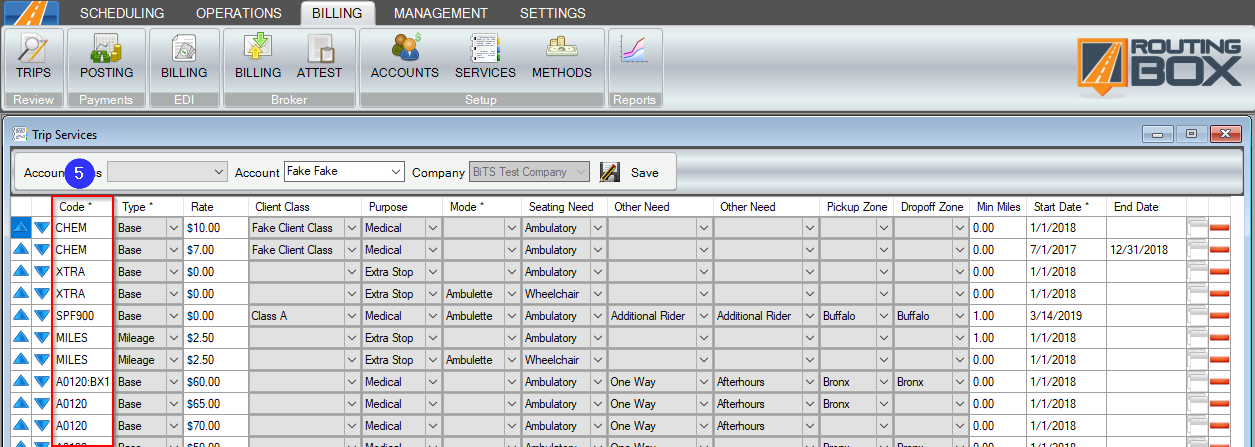
5. The Code column indicates the code that will appear on invoices and in electronic billing files that represent this claim line. To learn how to edit and use these, check our Trip Services - Codes article.
6. The Type column indicates the type of service code to be applied. There are several options to choose from in the drop-down, and will apply rates differently depending on the selection. Detailed further in our Trip Services - Type article, the basic choices are as follows:
-Base; applied once per viable trip leg
-Mileage; applied per unit of mileage calculated for the trip
-Need; applied when the appropriate Need is marked on the trip
-Admin; any administrative charges, applied for per triggered leg
-Hourly; applied per hour unit calculated for trip
-Tax; calculated as a percentage of total billable amount
-Other; used for tolls of other charges not applicable for another type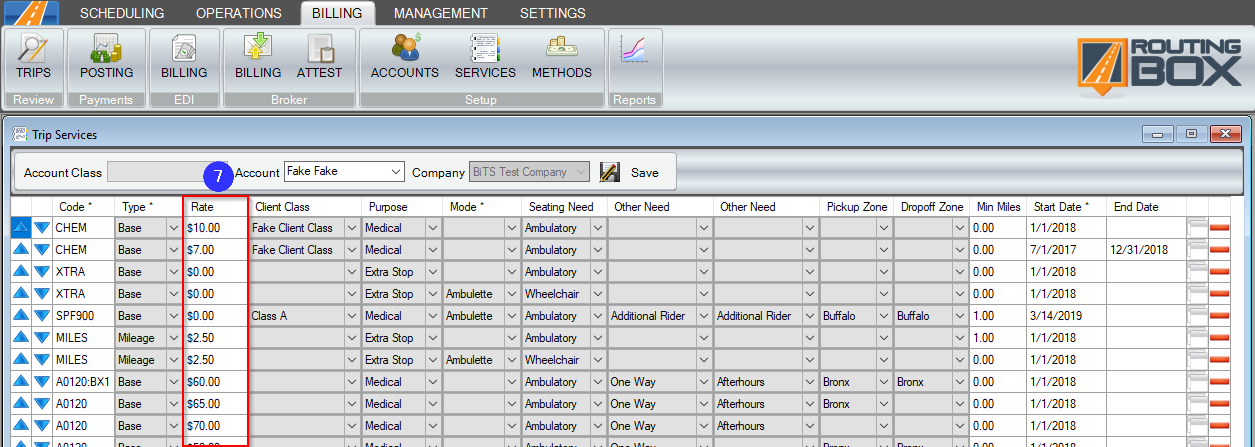
7. A Rate is the cost applied to the trip, dependent on the rate's Type. Most Rates are applied once per leg: Base, Need, Admin, Tax, and Other follow this set up. However, Mileage rates multiply based on the mileage of a trip; Hourly rates multiply based on the number of hours a leg takes from pickup to drop off.
8. The Client Class column provides a required client class to apply a specific service code. In this example, if the trip has the "Fake Client Class" assigned, the trip will receive this base charge, which will lock out any other base charge from being applied.
In this example, if an ambulatory trip has the Fake Client Class, it will receive the top rate.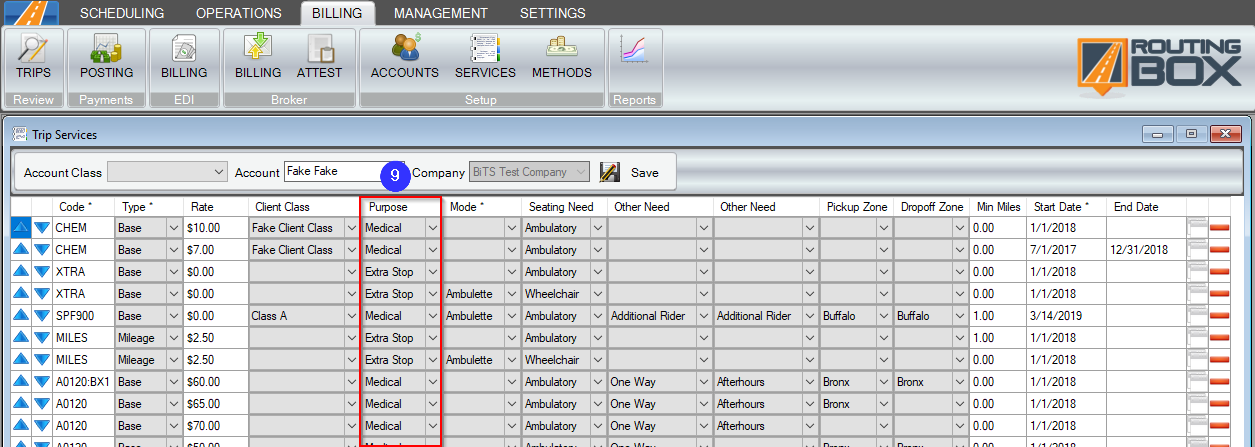
9. The Purpose column provides a required Purpose for the trip in order for a service code to be applied. If the Purpose listed does not match the trip, the service will not be applied.
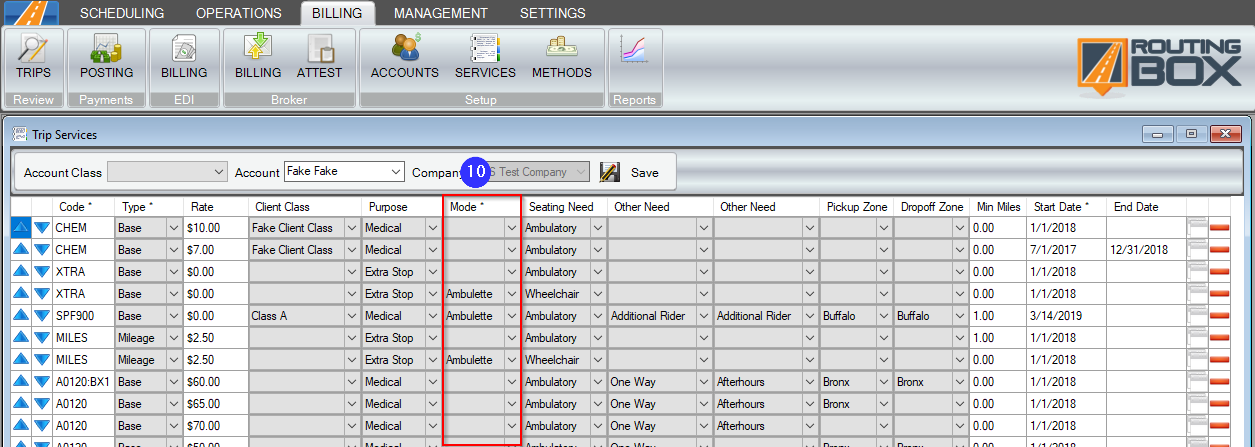
10. The Mode column must match a trip's mode and usually represents the type of vehicle used to transport a client.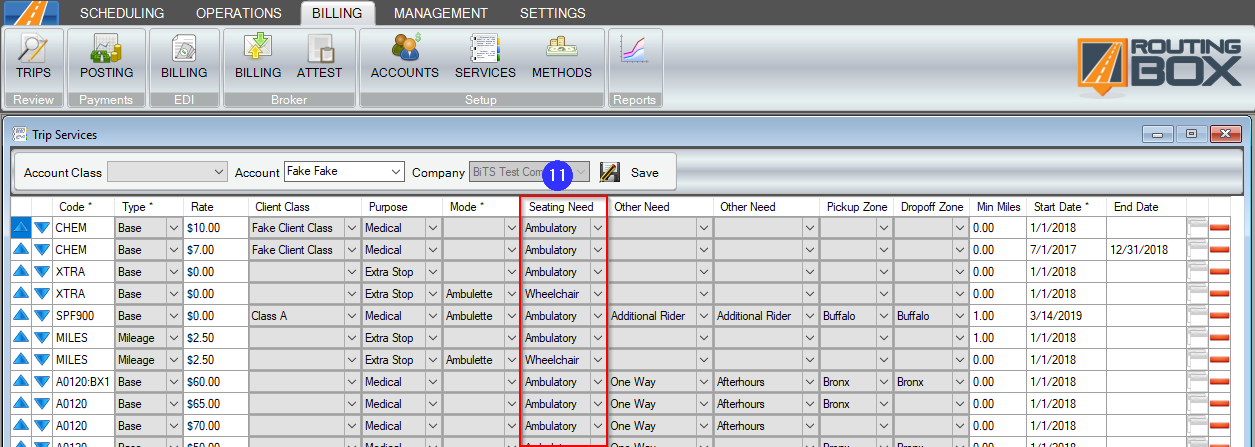
11. The Seating Need column indicates the type of seating need required for the client for this trip. Without matching the Seating Need in the column, the service code will not apply to a trip. Note: Seating Needs are a specific kind of Need.

12. Needs that indicate special requirements beyond just seating are listed in these two columns. A trip must match all needs shown in order to have the service code apply.
In this example, there are services to be applied for one way and afterhours, with different needs to be applied for just a One Way trip. If the trip requires oxygen, as well, there will be an additional Need type rate applied.
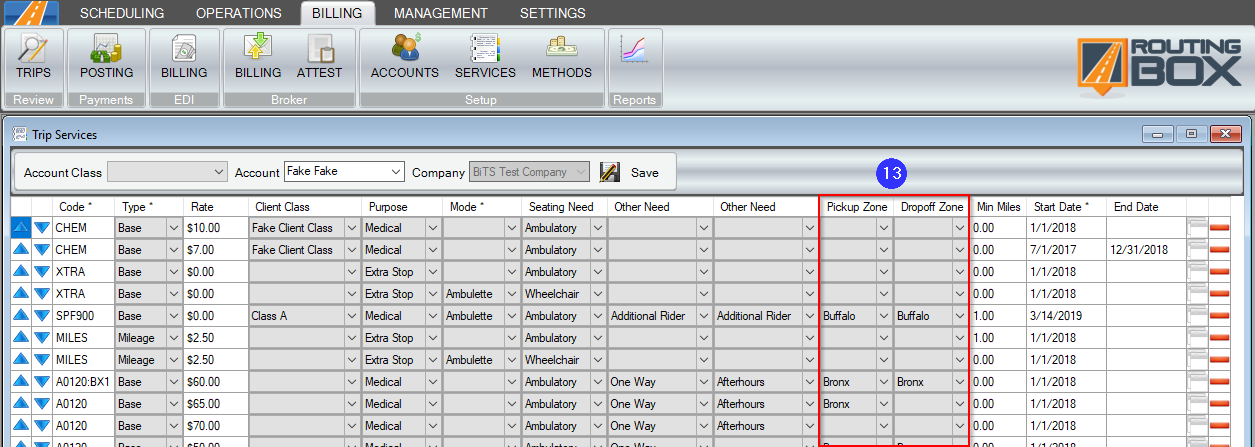
13. This indicates a specific pickup or drop off Zone that a trip must have for the rate to apply. All rates are applied per leg, and the pickup/drop off zones are based on the pickup and drop off address zip codes.
In this example, there are repeats of the lines above to allow for different pricing for trips that: begin and end in the Bronx; begin in the Bronx and end elsewhere; begin and end somewhere other than the Bronx.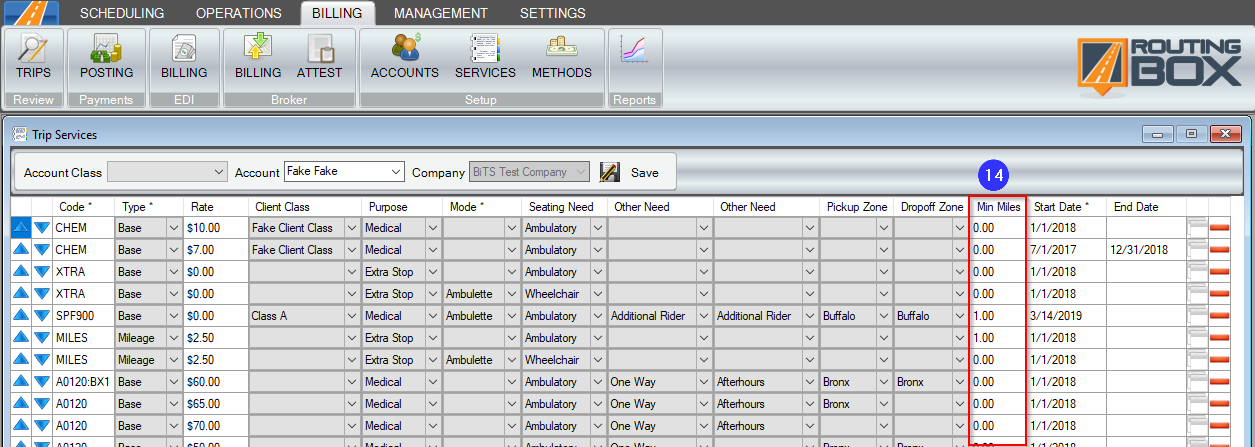
14. The Min Miles column indicates the minimum number of a miles a leg must travel before the rate starts to apply.
It's important to remember that minimum miles, when applied to a mileage type rate, will not apply until the mileage reaches the minimum.
For example, a 6.5 mile Wheelchair/Ambulette trip would have a total of 1.5 miles * $3.00 or $4.50 applied as a miles. This is because the trip was more than 5 miles, and the rate applied for each mile beyond the min miles.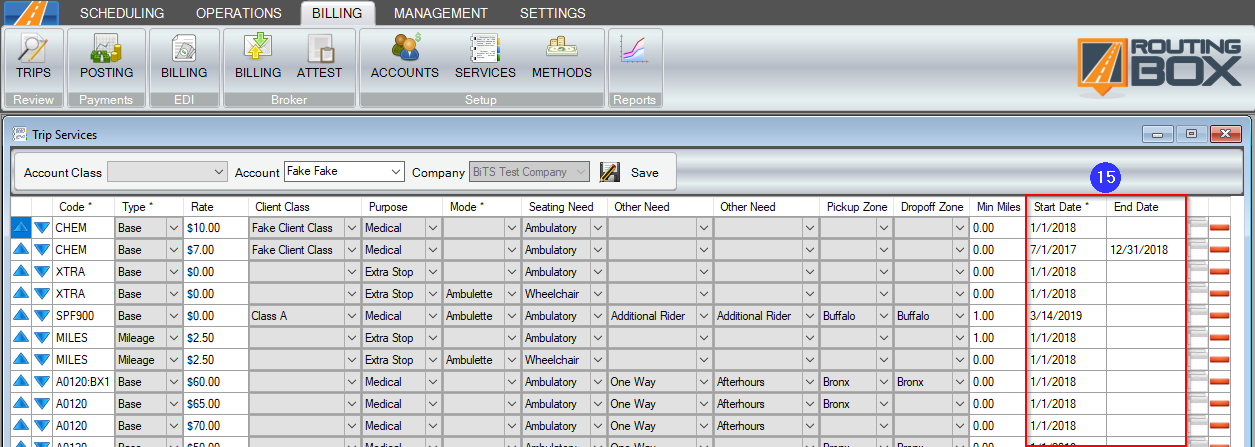
15. The Start Date and End Date columns indicate the date range a service rate will apply. While you can remove services, keeping old services in place with an expiration date allows a record of how the services have changed over time.
In our example, all of the shown services started on 01/01/2018 with the exception of the $7.00 Fake Client Class line. This service ended on 12/31/2017, and the new $10.00 rate began to apply for trips on 01/01/2018.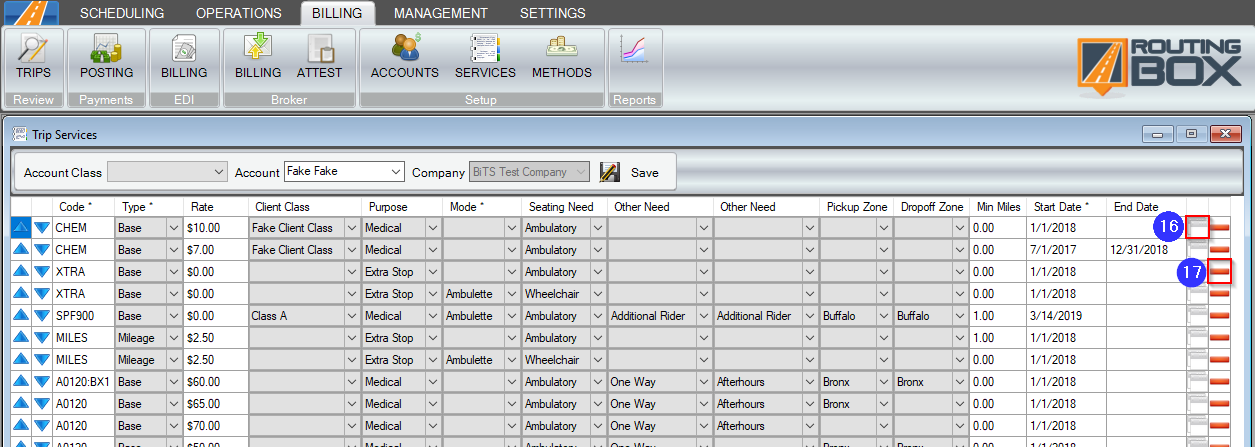
16. The Copy creates a duplicate line directly below the line copied.
17. The Remove deletes the entire service row.
Additional Notes:
The Trip Services Screen is read similarly to English: Left to Right, Descending. In order to apply a service code to a trip, each part of trip must match the specifications shown unless the field is blank on the line. If it does not, the system moves to the next lowest line to attempt a match. Once a specific type has been applied to a trip, another service code with that type will not be applied again.
Related Articles:
How to Enter Tolls in RoutingBox
How to Set Rates
Trip Services - Client Class
Trip Services - Code
Trip Services - Copy and Remove Rows
Trip Services - Min Miles
Trip Services - Mode
Trip Services - Other Need
Trip Services - Purpose
Trip Services - Rate
Trip Services - Seating Need
Trip Services - Start and End Date
Trip Services - Type
Trip Services - Zones
Key Terms:
Account, Billing, Code, Need, Rate, Service, Trip Service, TripServicesFormHelp