![New Founders Software-White.png]](https://help.intelligentbits.com/hs-fs/hubfs/New%20Founders%20Software-White.png?height=50&name=New%20Founders%20Software-White.png)
Navigate to the Scheduling tab, then select the Reports icon.
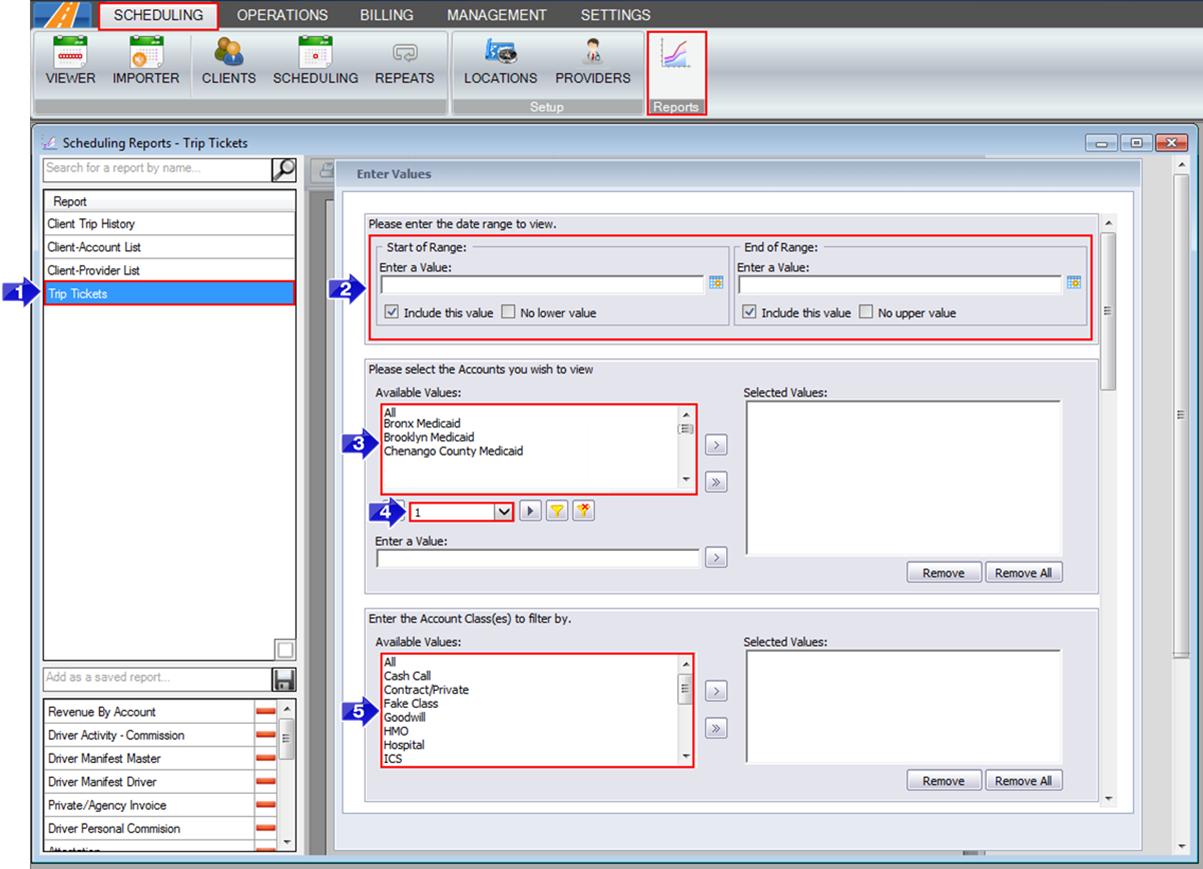
1. Double-click Trip Tickets.
2. Click the calendar icons to select the date range you would like to view.
3. Double-click the Accounts you would like to view.
4. Select this drop-down to view more Account options.
5. Double-click the Account Class(es) you would like to view.
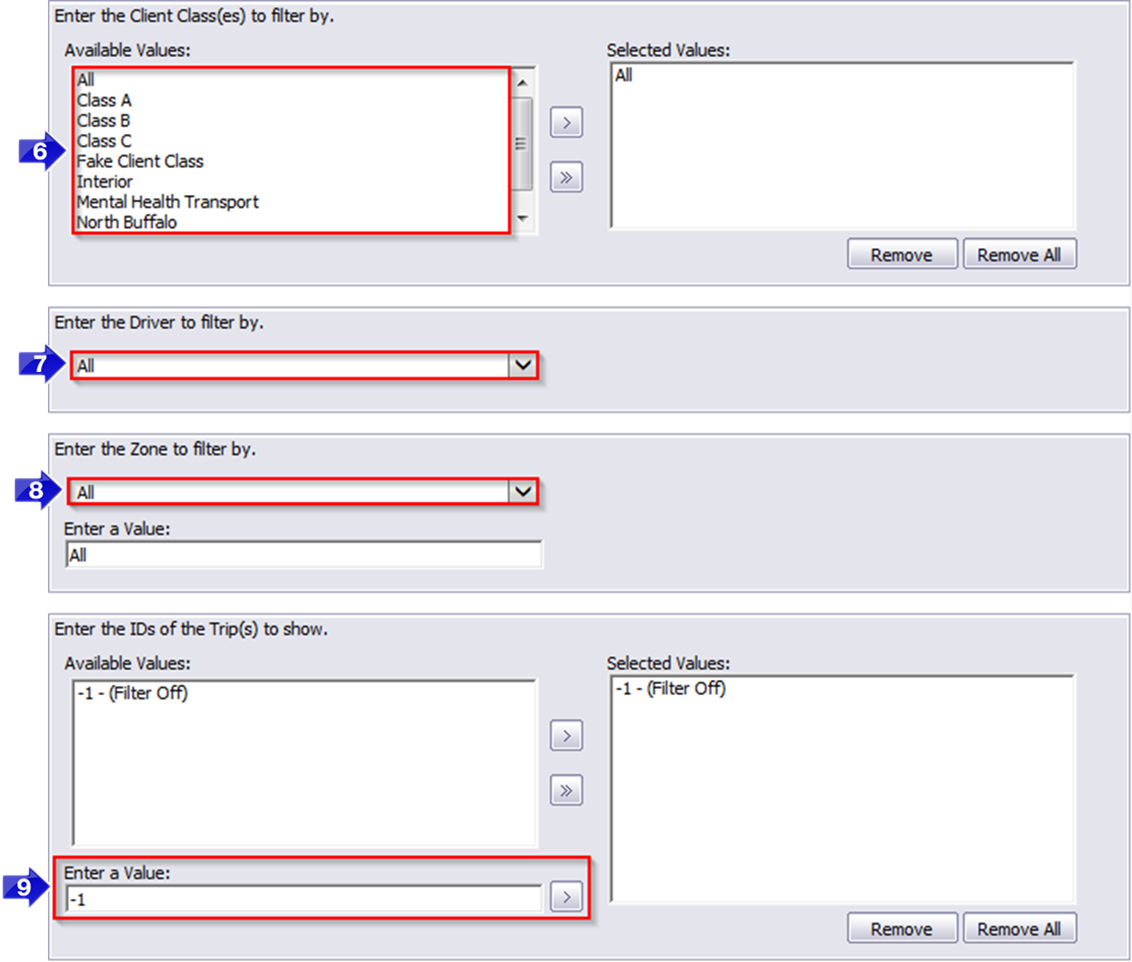
6. Double-click the Client Class(es) you would like to view.
7. If you would like to view trips for a specific Driver, select it from the drop-down menu.
8. If you would like to view trips from a specific Zone, select it from the drop-down menu.
9. To view a specific trip, enter the Trip ID, then click the arrow to add it to the Selected Values box.
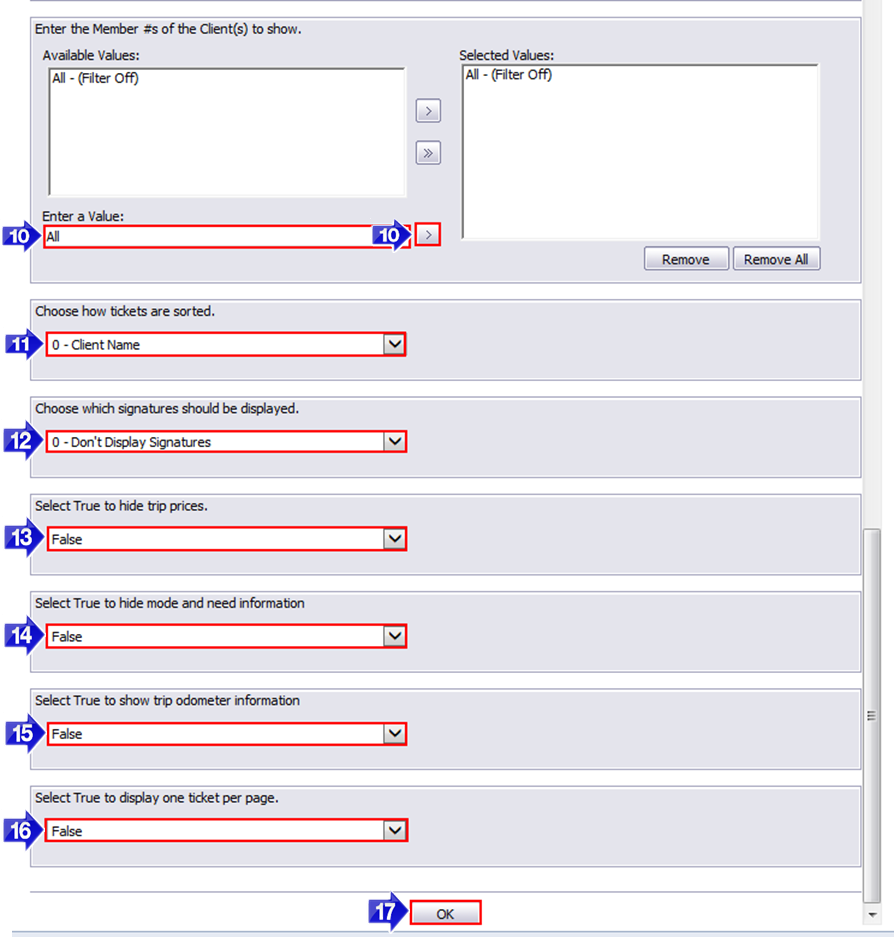
10. If you would like to view a specific client, enter their Member#, then click the arrow to add it to the Selected Values box.
11. Choose whether you would like to sort the tickets by Client name, Member # or Driver from the drop-down menu.
12. Choose which signatures should be displayed. You can also choose to view trips that are missing signatures.
Note: Client and driver signatures will only display if they were collected per trip using RB Mobile. To activate the signature setting, please contact BiTS Support.
13. Select if you would like to display trip prices.
14. Select is you would like to display mode and need information.
15. Select if you would like to display odometer information.
16. Select True to display one ticket per page. Select False to display multiple tickets per page.
17. Click OK to generate the report.
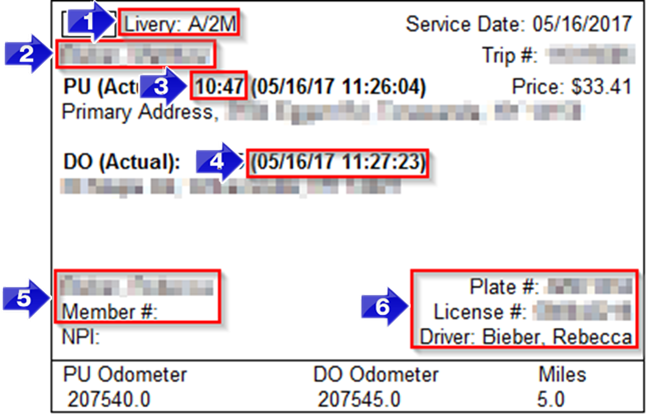
1. The mode and need codes that apply to the trip are displayed here.
2. The client's name is listed here.
3. This field shows the time the client was scheduled to be picked up and dropped off.
4. This field shows the time stamp of when the driver arrived at the pickup and drop-off.
5. This field shows the account name and Member # applied to this trip.
6. These fields show Driver information.

7. The report can be printed, refreshed or exported as a PDF, Excel, or Word document by selecting the appropriate option at the top of the Reports window.