![New Founders Software-White.png]](https://help.intelligentbits.com/hs-fs/hubfs/New%20Founders%20Software-White.png?height=50&name=New%20Founders%20Software-White.png)
Navigate to the Operations tab, then select the Reports icon.
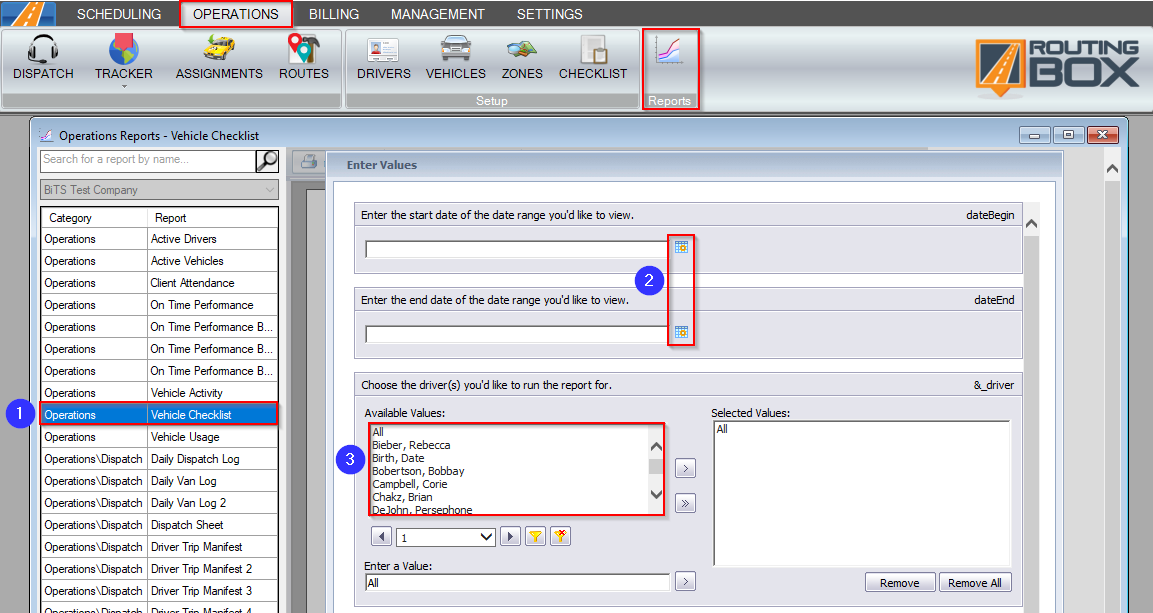
1. Double-click Vehicle Checklist.
2. Click the calendar icons to select the date range you would like to view.
3. Double-click the driver(s) you would like to view.
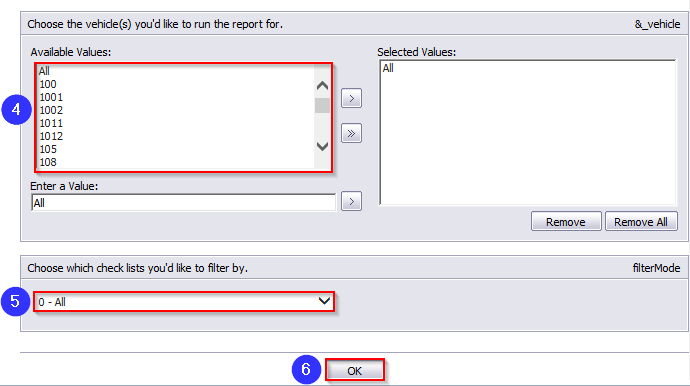
4. Double-click the vehicle(s) you would like to view. Each vehicle will display on a separate page.
5. Decide whether you would like to view all or only checklists with a checkmark in the defect column.
6. Click OK to generate the report.
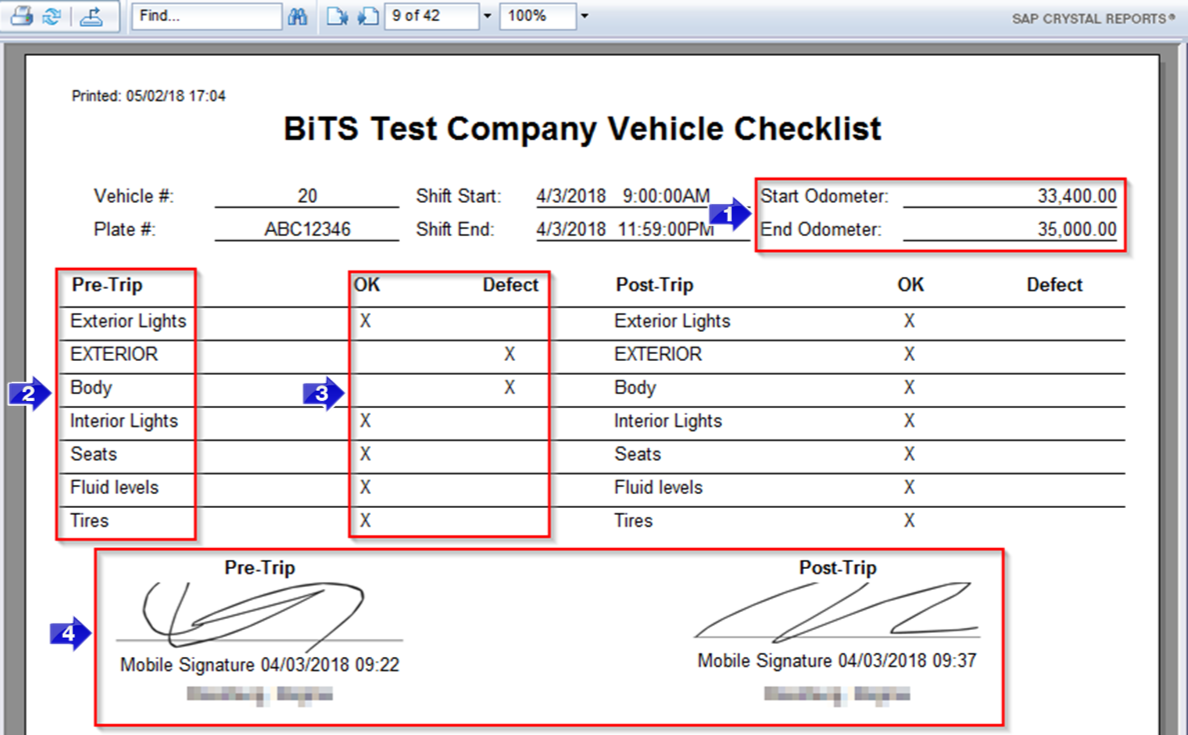
1. The Start Odometer and End Odometer will populate here unless the odometer readings were not entered when the checklist was completed.
Note: Odometer readings can be required prior to allowing a driver to complete their checklist. If you're interested in having this setting activated, please contact BiTS Support by phone, e-mail or chat.
2. The Pre-Trip and Post-Trip checklist markers will populate here. The checklist items can be customized in RoutingBox.
3. The drivers have the option to choose OK or Defect when they fill out their checklists on RoutingBox Mobile.
4. If the driver completed both of their checklists, the Pre-Trip and Post-Trip signatures will be displayed here. A date and timestamp will display on the report to show when the signature was captured.