![New Founders Software-White.png]](https://help.intelligentbits.com/hs-fs/hubfs/New%20Founders%20Software-White.png?height=50&name=New%20Founders%20Software-White.png)
In order to get RoutingBox Web Set-Up to your specifications you will need to add your information to the database. This article will instruct you on how to add your Modes of Transportation, trip needs, drivers, vehicles and payer accounts.
Completing these Set-Up items will allow you to be prepared to work with your Customer Success Manager on your first training session.
To login to RoutingBox Web, go to app.routingbox.com in your web browser.
Login with your credentials to go to the home screen.
Expand the Settings Menu at the bottom (shown below)
Click Modes of Transport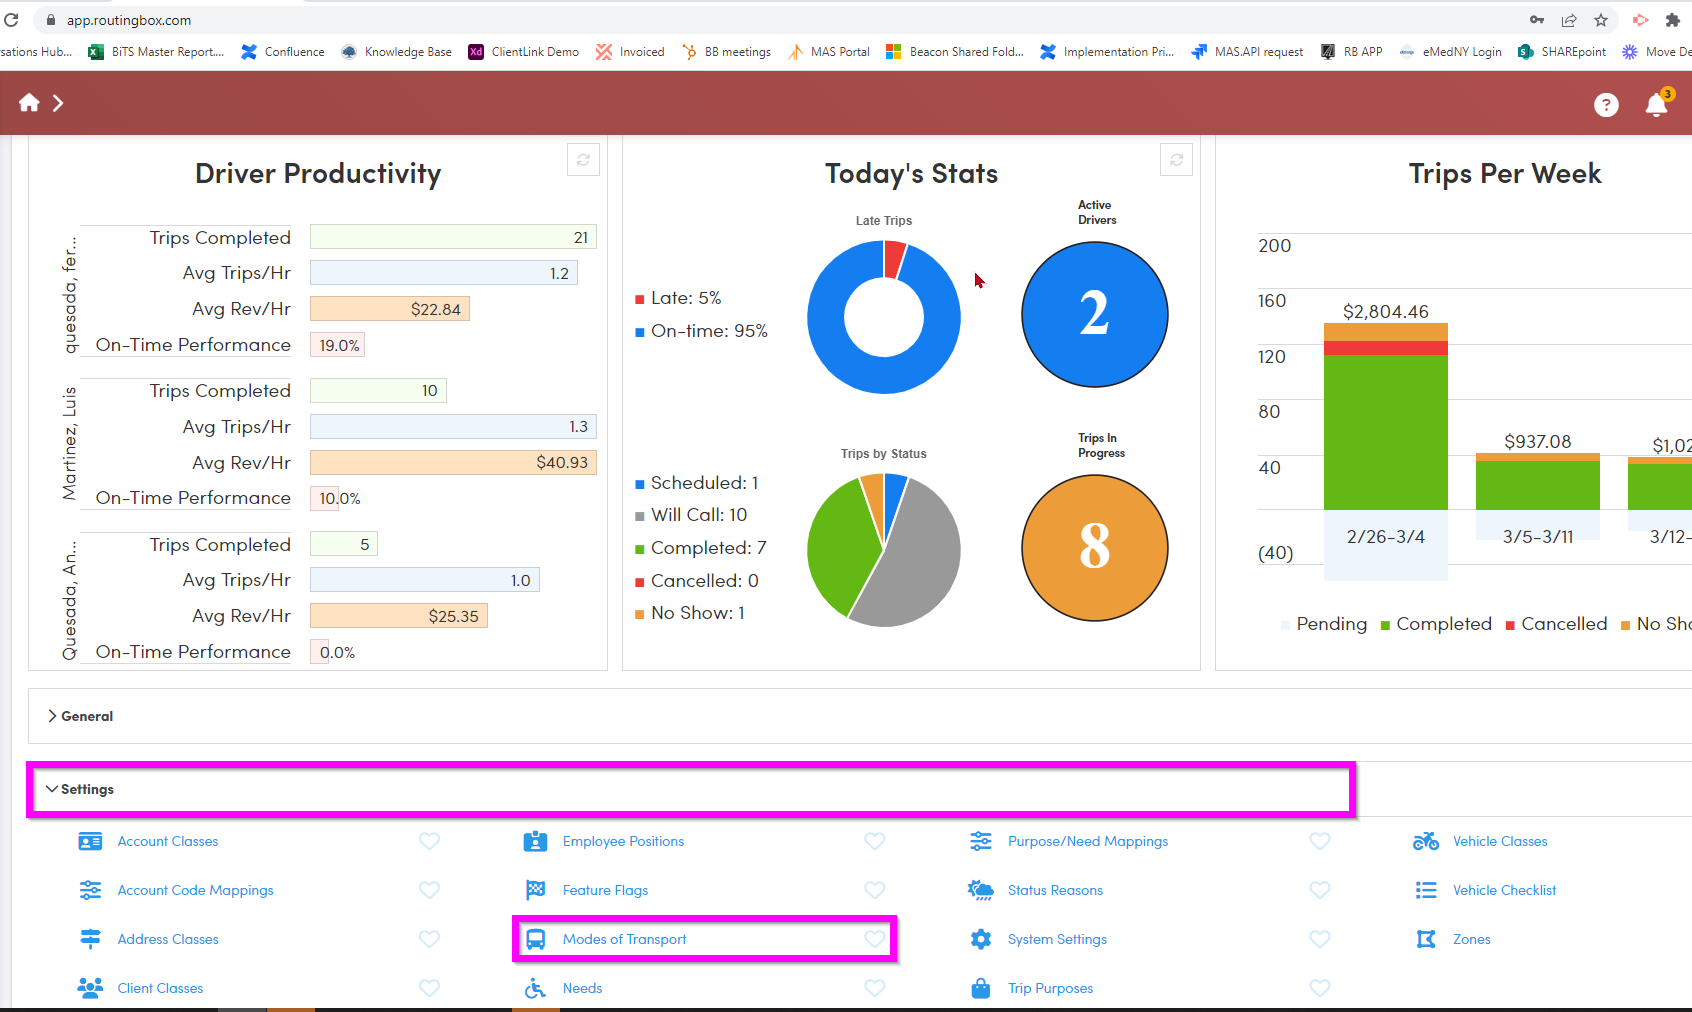
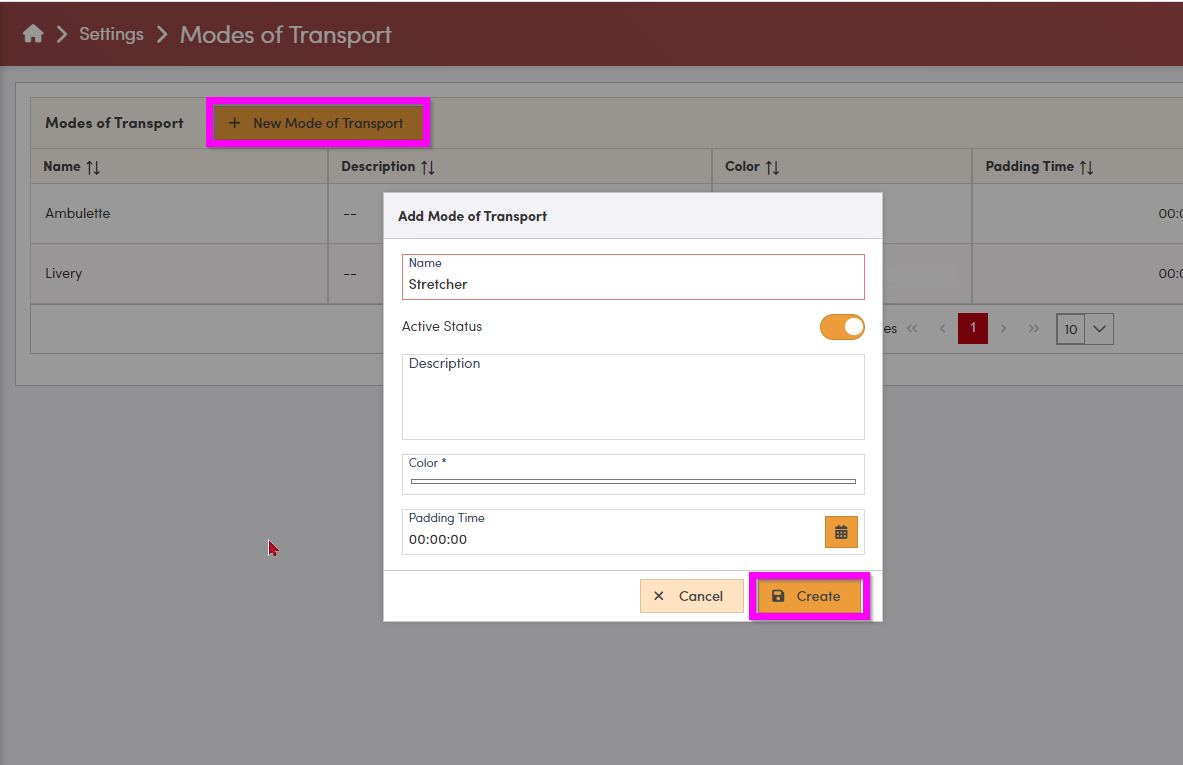
Ambulette and Livery are default Modes already created, but if you need to add other modes of transport, like Stretcher trips - click New Mode of Transport, add the new record and click Create.
More information on Modes of Transport can be found here: Modes of Transport in RoutingBox Web
Padding time is additional time added to the duration of trips with that Mode of Transport. Be careful adding padding time to seating needs, ask your Customer Success Manager if you have questions.
More information on Padding Time can be found here: Padding Time in RoutingBox Web
Next, add your specific Trip Needs.
Each trip has different requirements. RoutingBox lets you create Needs to make sure you have the right seating available for each client, the right equipment for each trip, and are charging the correct amount for each situation.
Back on the Home screen, under Settings at the bottom, Click Needs.
Two seating needs are already created for you - Wheelchair and Ambulatory. If you just made new modes, you'll want to create a seating need to match each mode.
More information on setting up Trip Needs can be found here: Trip Needs in RoutingBox Web
Communicate with your Broker to ask if they have specific requirements for Modes of Transport or Trip Needs!
Vehicle Set-Up - Classes and Capacities
Before you can add each of your Vehicles to RoutingBox, you need to establish what kinds of Vehicles you have.
Click the Home Icon
Expand the Settings Menu and choose Vehicle Classes.
There will be one class created for you already - Van. If you have other types of Vehicles besides Vans, you'll want to add a class for that type of vehicle.
Other typical Vehicle Classes are: Van, Sedan, MiniBus, Bus, etc.
To create new Vehicle Classes, click Settings (either at the bottom of the home screen, or at the bottom of the left navigation panel)
Click Vehicle Classes
Click New Vehicle Class
Name the class, choose a primary Mode of Transport for that vehicle, and click Create.
Once all your Vehicle Classes are set-up, next you'll need to establish the exact Seating Capacity for each Vehicle Class.
Click Settings (either at bottom of the home screen, or at the bottom of the left navigation panel)
Now, click Vehicle Capacities
Click New Vehicle Capacity, and create a specific capacity to match each of your Vehicle Classes. To do this, you'll add a number to indicate the maximum capacity for each Seating Need.
So if your class of Vans can fit 3 Ambulatory clients and 1 Wheelchair client at a time, put 3 for Ambulatory, and 1 for Wheelchair. 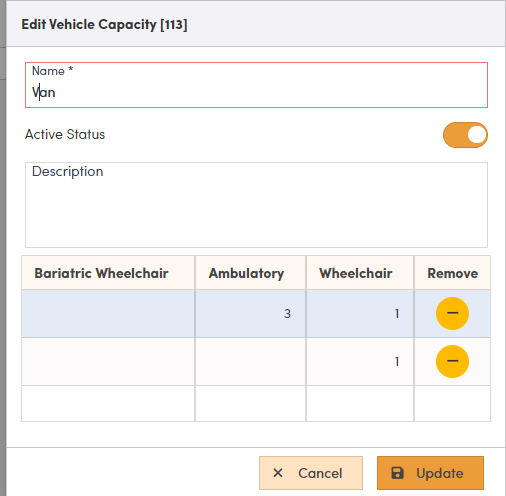
This tells RoutingBox that your Vans can fit up to 3 Ambulatory clients and 1 Wheelchair client at once.
Establish the correct Capacity for each of your Vehicle classes before adding your vehicles.
Adding Your Vehicles
Now that RoutingBox knows what kinds of trips you take, the kinds of vehicles you have, and the amount of clients they can fit - it's time to add each of your Vehicles to RoutingBox.
In left navigation panel, click Vehicles
Click New Vehicle
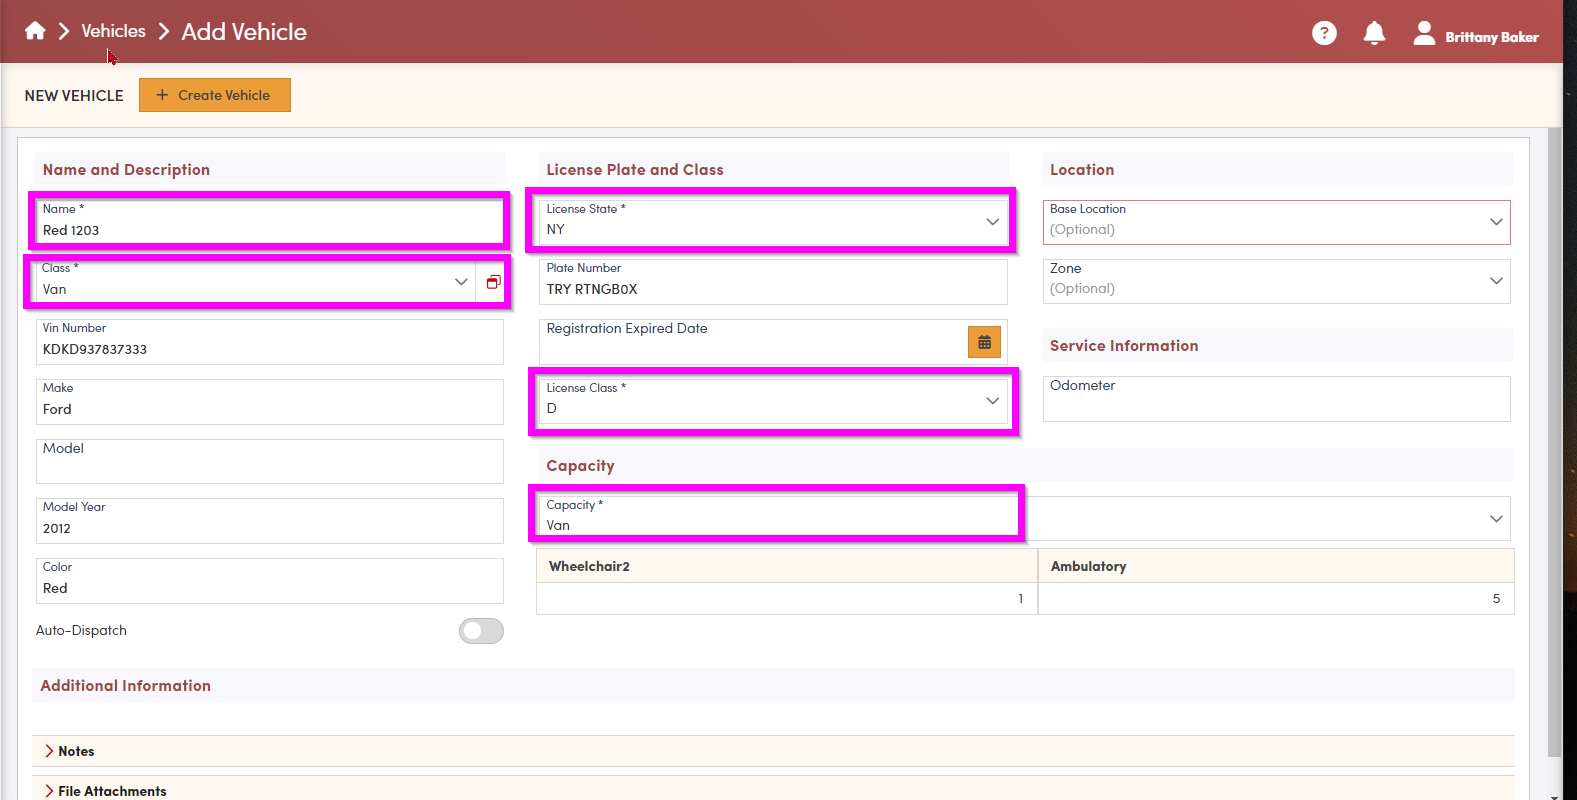
Required fields are marked with an asterisk, but you'll want to include all the information if you have it. Brokers have specific requirements, so be sure to communicate with them to familiarize yourself with what they require.
Once you've added all the necessary vehicle information, click "Create Vehicle" at the top.
Do this for each of your vehicles. Vehicles should be set-up before adding drivers.
Adding Drivers
In left panel, click Employees
Click New Employee
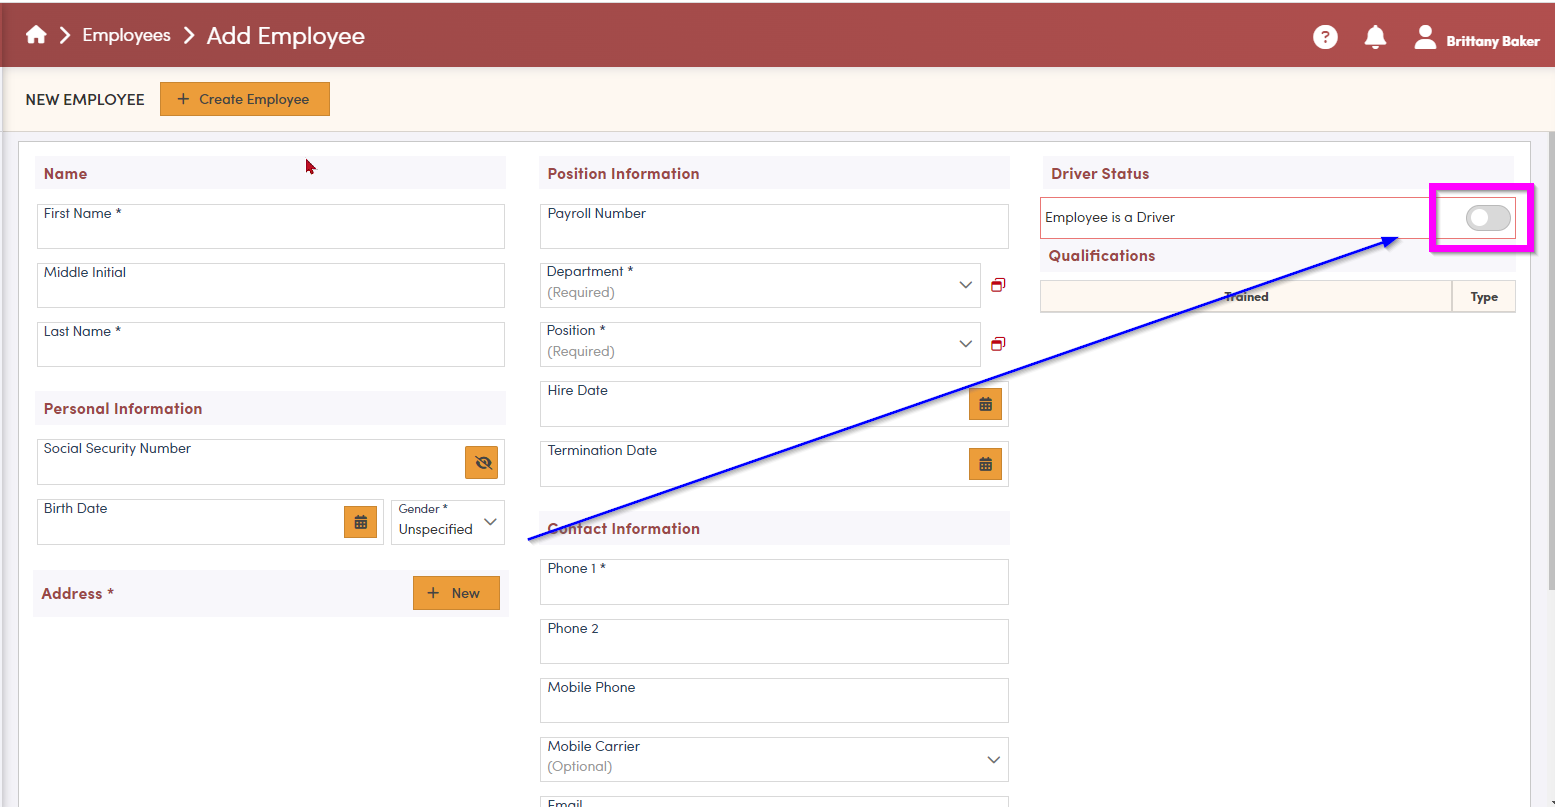
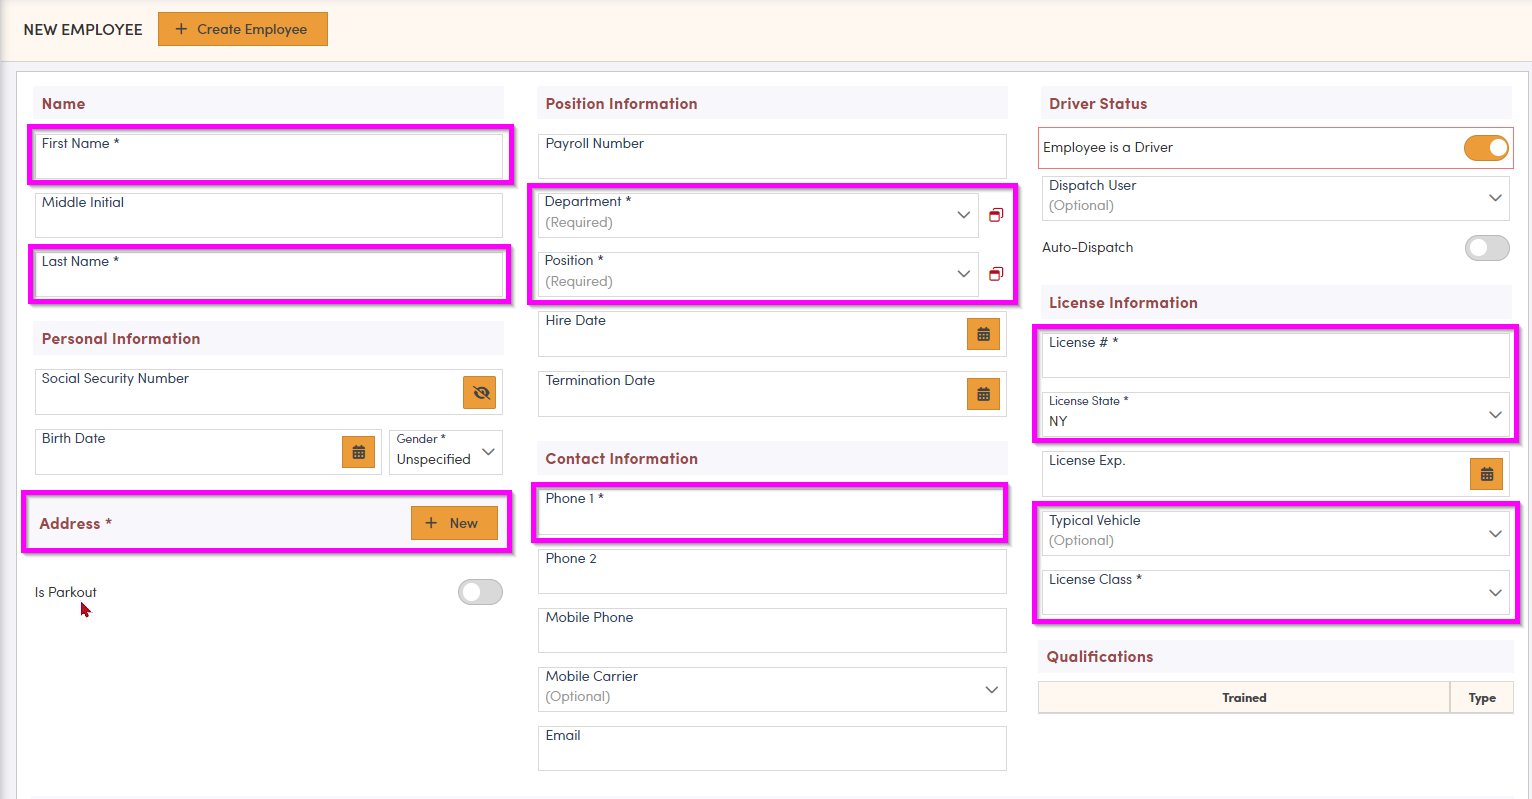
***Important! ** Mark on the right that the employee is a driver, so all the required fields for Drivers are visible.
Once you've marked that the employee is a driver, fill in their name.
On the left, next to Address, Click New
When the Map pops up, and Search to find the correct location, then click Save.
If the driver starts their day from this location, then set “is parkout” with pencil icon
Continue to fill in all the information you have for this driver. Required fields are shown below.
Once you'd added all the information you need to store for this driver, click the orange "Create Employee" button at the top.
Repeat this process to add all your drivers to RoutingBox.
Adding Payer Accounts
The final step in Set-up is adding your payer Accounts. Where do you get your trips?
Full instructions for creating Accounts in RoutingBox Web can be found here: How to Create an Account in RoutingBox Web
Congrats! You’re all set up – now, reach out to your Customer Success Manager to schedule your first session.